Page Contents
gloCOM GO 6 is the next step in the evolution of our mobile application. In combination with PBXware 6, it provides new features and offers more freedom and flexibility to users than its predecessor.
gloCOM GO 6 empowers users to communicate and work better. As part of our Unified Communications PBXware package, it is a versatile softphone that revolutionizes communications in modern workplaces.
Server-side requirements for gloCOM GO 6
-
PBXware has to be version 6.x
-
gloCOM GO 6 is using port 10009 for secure TLS connection
-
SSL/TLS certificate must support SHA2
Logging in
gloCOM GO 6 requires an email address and password for login. Additionally, a server address may be needed if it cannot be resolved through a DNS record based on the email address.
Users that have incompatible versions of mobile app and PBXware will not be able to connect to the system.
In case users have a DNS server, by adding a DNS SRV record for email domain, mobile, and desktop clients will make gloCOM login much easier for end-users as they will only have to provide their email address and User password associated with their PBXware extension and click Log In.
If users are unable to set DNS SRV or if DNS resolution fails, they will receive notification '''DNS resolution failed''' and users will have to enter PBXware hostname or IP address into the '''Host''' field when logging in with their gloCOM GO 6 client.

DNS SRV record that needs to be configured to point to PBXware is: _pwproxy._tcp.domain. 86400 IN SRV 0 5 10009 pbxserver.domain.
For more information on DNS SRV, please check the Wikipedia link: http://en.wikipedia.org/wiki/SRV_record
NOTE: For this feature to work, all email addresses must use the company domain (i.e., unitedbusiness.co.za).
Enter the email address associated with the user’s account. This is used as the username for gloCOM GO 6 login.
- Password
To authenticate gloCOM GO 6 with the PBXware server, users will also need to provide a user password generated on their account.
- Host
This field allows users to enter the address of PBXware they would like to register to. If the DNS SRV record is set up (as previously explained), this field does not have to be populated.
- SCAN QR CODE
This button opens a camera preview for QR code scanning.
- FORGOT PASSWORD
Open a confirmation dialog for password resetting by clicking this button. Email and optionally server address fields need to be filled out before attempting a password reset.
Logging in using QR code
It is possible to login in to gloCOM GO 6 using a specially created QR code. This is often used and helpful when users log in with gloCOM GO 6 for the first time.
When the administrator creates users' accounts, they will be assigned a long, automatically generated user password on email, and typing it into gloCOM GO 6 can be error-prone. With this feature, users can scan the QR code attached to the extensions credentials email by pressing the SCAN QR CODE button and pointing their phone camera at the monitor. Once the QR code image is detected gloCOM GO 6 will fill out all the fields necessary for login.
NOTE: Before users can use this feature, the PBXware Administrator must make some settings changes on PBXware; otherwise, the Address (hostname) in the field will be empty, and users will not be able to register their clients.
Login to PBXware GUI and navigate to:
Settings - Servers/Tenants and edit Server/Master tenant
Click Show Advanced Option and once users do that, they will be able to see the QR Code Server option. This field must be populated with the server’s IP address or domain name.
Once entered, save changes, and QR Code login should be ready for use.
Setting new password after logging in for the first time
When users log in to the gloCOM GO 6 for the first time, they will be asked to change the password. They will have to enter a new password and retype it to confirm it. If users make a mistake, so password entries do not match, or if the password is not strong enough, the '''NEXT''' button will stay disabled. Once the password matches our strength criteria, users will be able to log in.


Changing avatar
Users can change their avatar by opening the main drawer menu and clicking the avatar icon above the name and extension, as shown below.
Click on the avatar icon brings options for changing the avatar image. After taking a picture with a camera or choosing one from a gallery, users will have to crop the image.
-
Press and hold inside the blue rectangle to move it
-
Press and hold blue edges to resize
-
Done button finishes cropping and sets the avatar
-
Cancel button cancels cropping
![]()
![]()
![]()
Avatar rotation
Users can manage their avatar (rotate, flip, crop) in the gloCOM GO 6. Open gloCOM GO 6 and go to Profile, click the Edit icon to the right of the user avatar and choose one of the two options:
-
Take the picture using the camera
-
Choose a picture from the gallery
After taking a photo with a camera or choosing the photo from the gallery, the image will appear in the gloCOM GO 6 “Move and scale” screen.
Drag the crop tool to the desired part of the photo. The part of the photo within the boundaries of the crop tool (the square) will be used as a profile image. Resize the square by dragging the corner dots in or outward. Some advanced options are available in the hamburger (three dots) menu in the top right corner, such as: "Flip horizontally" and "Flip vertically.”
When ready, click on SAVE in the top right corner of the screen. The cropped image now replaces the previous profile photo.
![]()
![]()
![]()
Biometric Authentication
Users can use an option to unlock gloCOM GO 6 by using biometric authentication as an additional layer of security for using the app.
Users can enable it by using fingerprint and face recognition.
This feature must be enabled on the device and application options to function. This option can be found inside the Security section on the Settings screen.


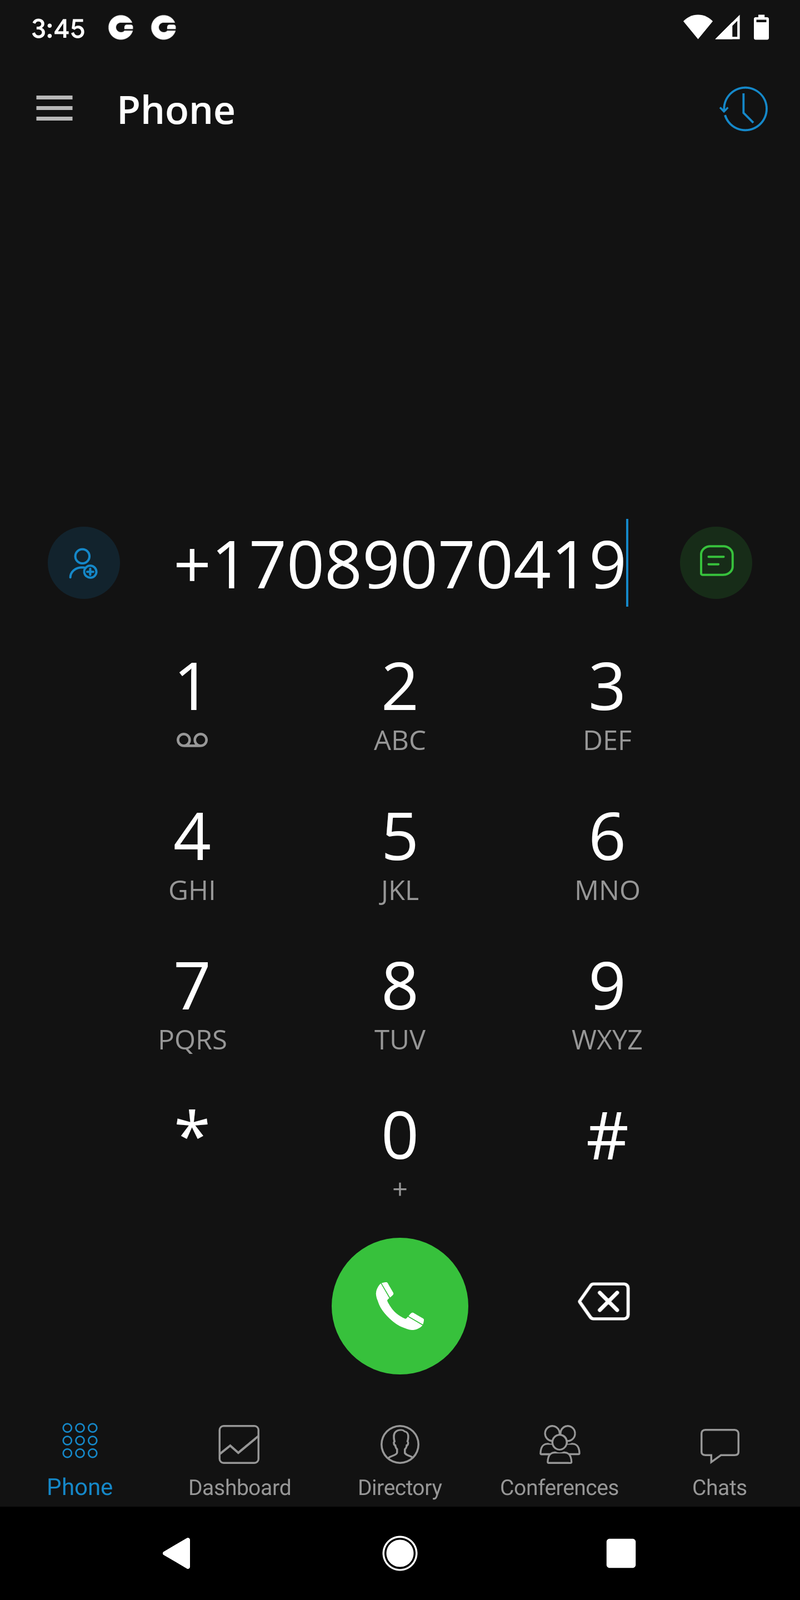
Phone
The default dialer screen is displayed once gloCOM GO 6 is started.
The call button on the dialer screen has three states depending on the softphone registration status and connectivity status.
If the softphone is not registered and the button is yellow, calls can still be made if the callback option is configured.
There are three states gloCOM GO 6 dialer can be in:
Green - Call can be made over SIP protocol (WiFi and Mobile Data Networks)
Yellow - A call can be made with the Callback module (Mobile Data Networks)
Gray - Call can not be made (No Network Connections)


Editable dial number
The entered number inside the dialer of the gloCOM GO 6 Android can be modified before placing a call.
Long pressing on a dialer call button will start a callback call to the entered number. The long press gesture also works with any call button in the app.
If number to dial is empty, pressing on the call button will result in populating the number to dial with last called number.
Predictive Dialer
Predictive Dial (alphabet and numerical mode) is used to quickly find a contact or a number and place a call.
When on the phone screen, users are now able to search by phonewords (mnemonic phrases represented as alphanumeric equivalents of a telephone number). For example, if users type “34”, they will be presented with contacts that have 34 in their number, as well as contacts whose name contains a combination of letters [DEF][GHI].


Contacts search will include contacts from Extension Directory, Device/System Phonebook, and Central Phonebook in that order.
Once users have entered the phonewords on the dialpad, and all of the contacts that match the criteria are listed, users can hide the dialpad by swiping down. Once the dialpad is hidden, users can see the contact list on the entire screen and can scroll the contact list.
.png?width=284&height=568&name=android-predictive-dialer-3%20(1).png)
.png?width=285&height=570&name=android-predictive-dialer-4%20(1).png)
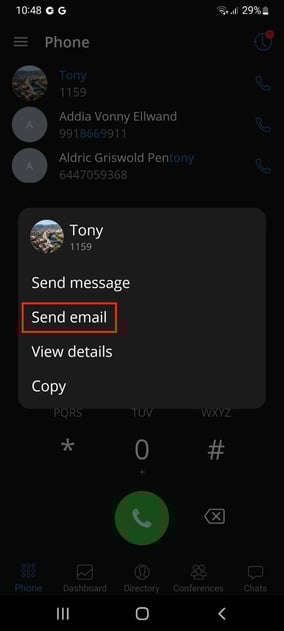
Predictive dialer popup menu
By long pressing on the contact in the predictive dialer contact list, a popup menu appears with 4 provided options:
- Send message - Start a chat conversation with the selected contact.
- Send email - Redirects the user to the default mail client with the e-mail address prefilled (if the e-mail address is provided for the selected contact).
- View details - View details about selected contact.
- Copy - Copy the contact's number.
.png?width=284&height=568&name=android-predictive-dialer-4%20(1).png)
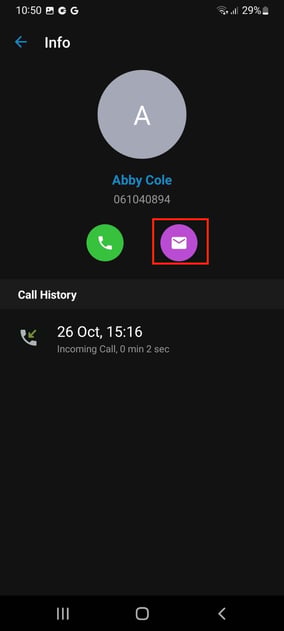
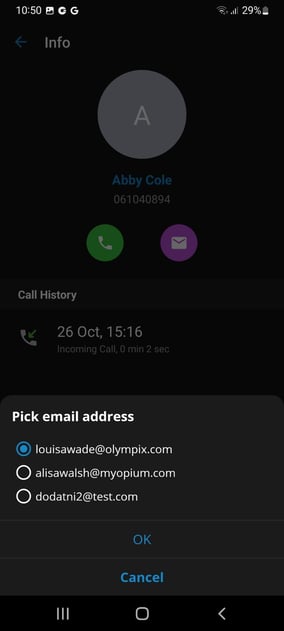
Send email from the predictive dialer, recent list & recent info screens
gloCOM GO now offers several new ways to send emails from the predictive dialer, recent list, and recent info screen:
- Long press on contact in the predictive dialer
- Long press on contact in the recent calls list
- Pressing on the email button in the recent info screen
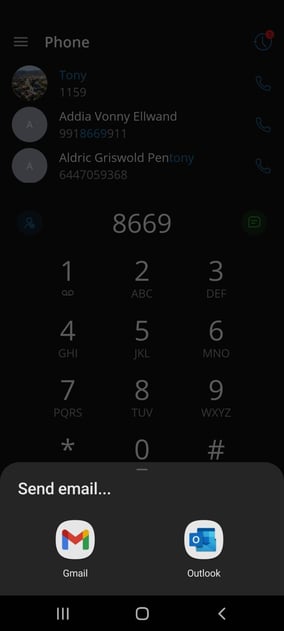

For contacts that have no email address provided these options won’t be displayed, and for the contacts that have multiple email addresses, the user will be presented with a list of emails available for this contact.
Opus
Opus is an excellent codec for lossy audio compression, and that’s why Opus codec has the highest priority when making calls by default. Users can customize the order of codecs priority in gloCOM GO 6 Settings.
Opus is an audio coding format designed to efficiently code speech and general audio in a single format and handle a wide range of interactive audio applications while remaining low-latency enough for real-time interactive communication. It is distinguished from most high-quality formats by having a low delay and supporting high audio quality.
To ensure that Opus is used for all calls, users will need to add Opus as a first codec in Extension settings on PBXware.
Calls
In gloCOM GO 6, calls can be made over SIP protocol, which is a primary option, or using the Callback calls.
Call scenarios may vary and will depend on the network connection (WiFi, Mobile Data, No Connection), service availability and value for option SIP over mobile internet.

The table above displays the order in which gloCOM GO 6 will try to establish calls in different scenarios.
If we, for example, take the first scenario for WiFi where the order is:
-
SIP Call
-
Callback Call
-
No Success
This means that in a scenario where the device is connected through the WiFi, the app is connected to the SIP Server, and the Callback Module is available on PBXWare, gloCOM GO 6 will first try to make a SIP Call; if unsuccessful, it will then try to make a call using Callback, and if this fails, it will display the message that the call could not be established.
SIP Calls
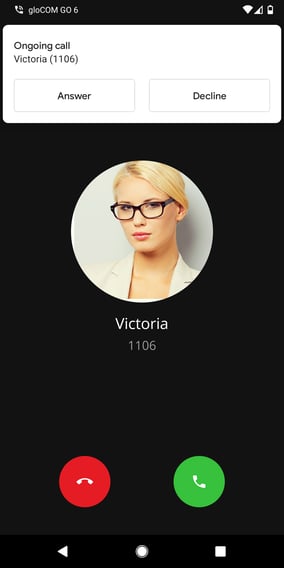
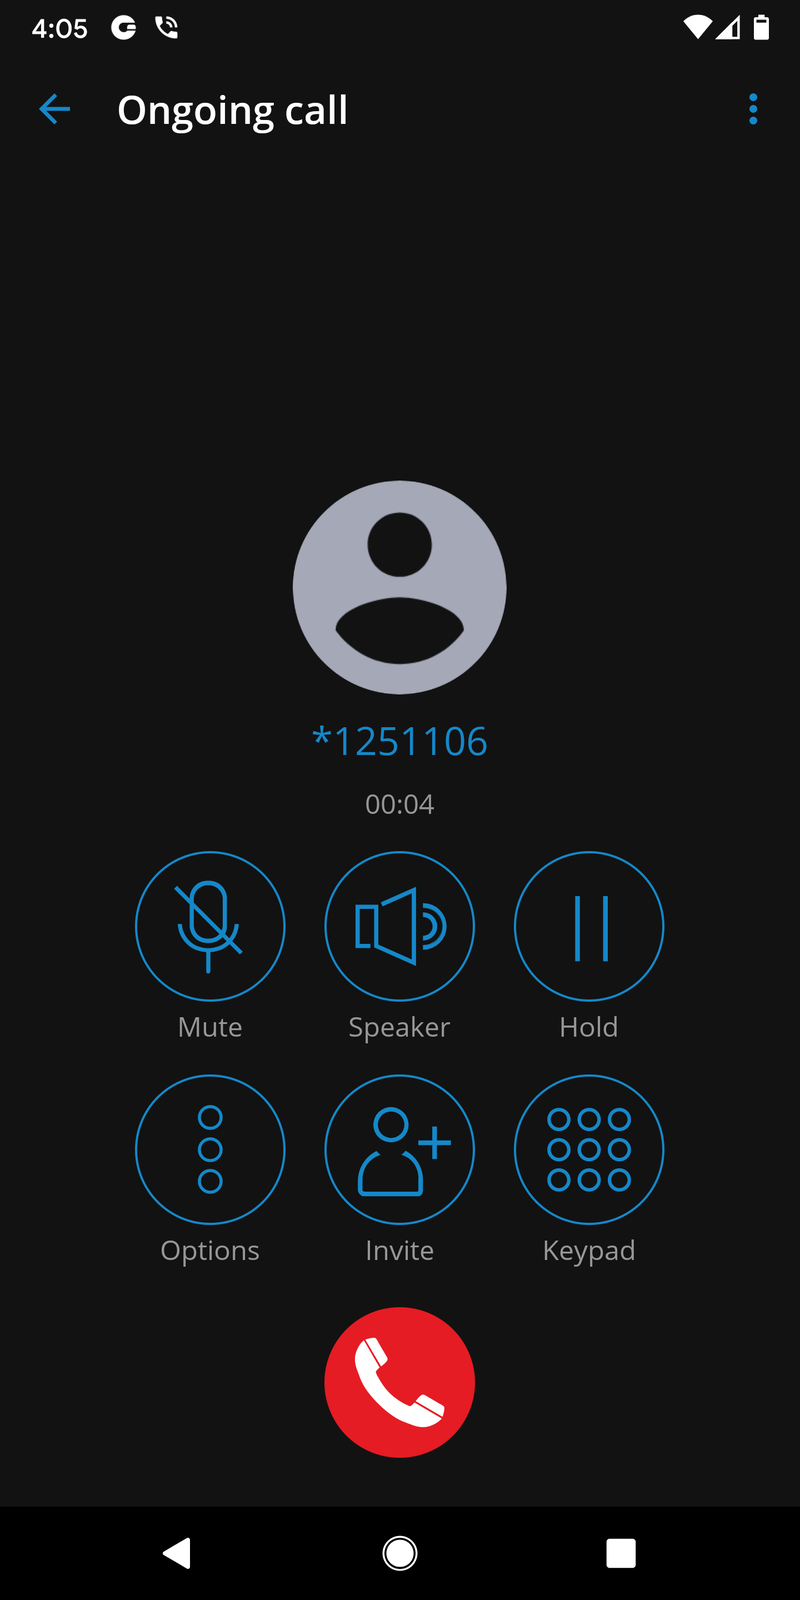
SIP Call Screen appears when the user initiates or receives a call through PBXware.
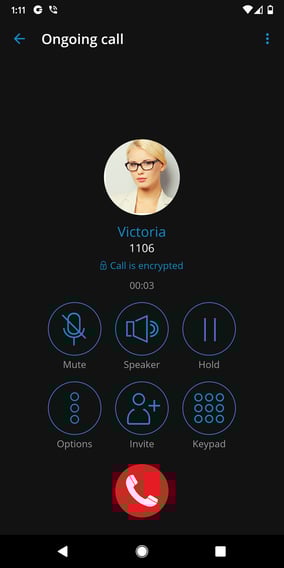
Once the call is connected gloCOM GO 6 allows users to perform several actions:
- Mute
Mute allows users to disable the microphone on the device, preventing any unwanted communication on the user’s side from being transmitted to the other side of the call.

- Speaker
Press the Speaker button to put the device in speakerphone mode, allowing users to continue without holding the device in the ear or to allow other persons in the room to join the conversation through a single device.
- Hold
Hold option will put a caller on hold and play Music on Hold until Hold is pressed again or the call is transferred to another destination.

- Options
By pressing the Options button, users can perform multiple actions.

Transfer Call
The transfer button allows users to initiate a direct or supervised transfer to a PBXware extension or outbound number.
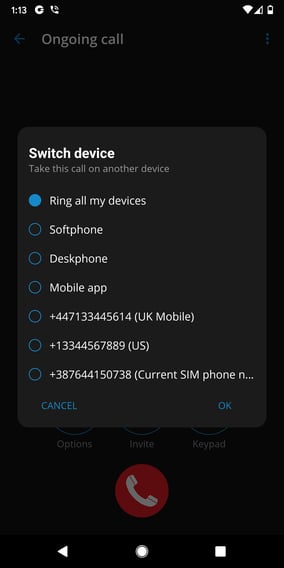
Switch Device
Switch Device allows users to resume the call on other devices, such as deskphone, softphone, mobile app, or via callback using predefined phone numbers from the My Phone numbers feature.
Start Call Recording
Start Call Recording is only available if enabled in Enhanced Services for the user’s Extension in PBXware.
Once the call recording is started for a call, the indicator on the ongoing call screen is visible, showing that the recording is active.
Users are also able to pause/unpause and stop the recording.
Invite
The invite option allows users to create an Instant conference by adding one or more people to an ongoing call. With this option, users can add PBXware extensions or any number available from their contact list.

Keypad
Use the Dialpad to generate DTMF signals to provide information to IVRs, voicemail management, etc.

Multiple SIP Calls
gloCOM GO 6 offers an option to handle two calls at the same time.


If there is one SIP call in progress and users receive another call, it will be presented to the user on the SIP Call Screen. If answered, gloCOM will set one call on hold. gloCOM will exit from the Multiple SIP Calls state if one of the calls is finished.
Indicator for disabled microphone
The app shows an indicator on the call screen if the microphone is disabled, so users know if other parties can not hear them.
The microphone button on the call screen would be disabled if the user did not give permission previously.
By pressing on the message banner or the disabled microphone button, users will be prompted to allow the microphone permissions.
Call Recording Indicator
Once the call recording is started for a call, the indicator on the ongoing call screen is visible, showing that the recording is active.
Users are also able to pause/unpause and stop the recording.


Call Encryption Indicator
An indicator shows a call encryption message during an ongoing call if a call is encrypted.
The indicator should only be present when the TLS encryption is enabled. Pressing it will bring a pop-up message explaining the encryption.

Xiaomi devices permissions
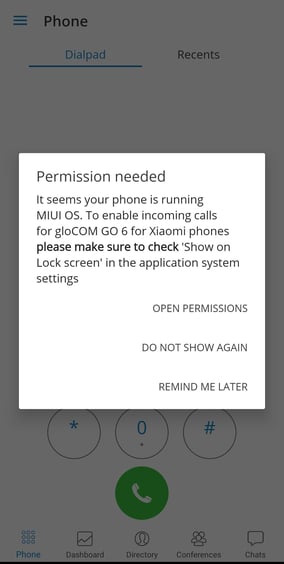
Users of the Xiaomi devices could have a problem with incoming calls on the full screen.
After login, the app should show the dialog “It seems your phone is running MIUI OS. To enable incoming calls for Xiaomi phones, please check 'Show on Lock screen' in the application system settings.
The dialog should have three buttons:
-
Open permissions - will open the phone settings window with the 'Show on Lock Screen' option
-
Remind me later - will just close the dialog
-
Do not show again - will store shared preference that warning has been displayed
Also, users can enable permission that has to be enabled to work properly from the device system settings.
Settings → Manage Apps → APP → Other permissions → Show on Lock screen
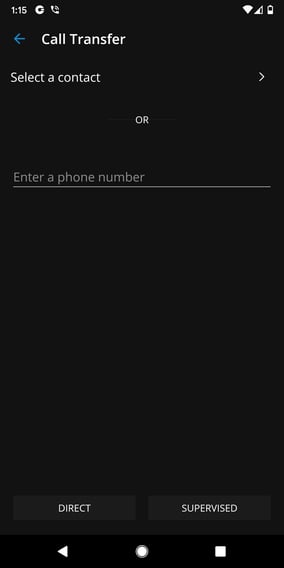
Call transfer
Users can transfer a call by pressing the transfer icon from the call options menu.
The user will be able to transfer the call to two destinations:
- Select a contact
Pressing Select a contact brings up a screen with favorites, users, and phone book contacts to choose someone to transfer the call to.
- Enter a number
Users can enter the number directly without selecting from the contact list.
After selecting the contact or entering a number, users have to select to make a Direct or Supervised transfer to initiate it.
.png?width=284&height=568&name=android-call-transfer%20(1).png)
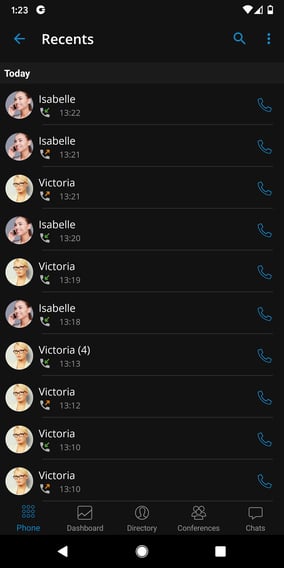
Recent Calls
The recent calls screen will be entered when the user presses Recents Tab button from Header Bar on the Phone Screen and a list of the recent calls will be displayed.
In the recent calls screen, there is a search icon in the top bar, which can be used to filter recent calls by number and name.
Pressing on the avatar of some contact from recent calls opens an info screen containing additional information about that contact.

Pressing on the avatar of some contact from recent calls opens an info screen containing additional information about that contact.
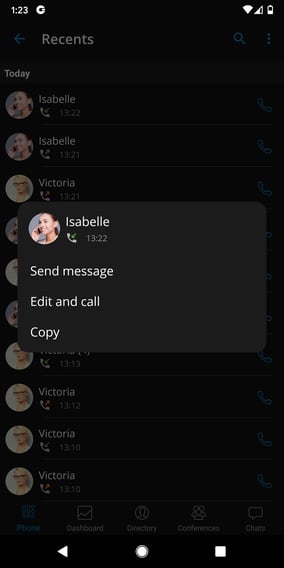
By long pressing on the contact in the recent calls list, a popup menu appears with 3 provided options:
-
Send message - Start a chat conversation with the selected contact.
-
Send email - Redirects the user to the default mail client with the e-mail address prefilled (if the e-mail address is provided for the selected contact).
-
Edit and call - View details about selected contact.
-
Copy - Copy the contact’s number.
With the call history sync feature, users will be able to access their recent calls history from all gloCOM apps (Desktop, Mobile, and Web).
Each call users make on the desktop will be reflected on the mobile devices. If users mark a missed call as seen on their mobile device, it will now be marked as seen on their desktop and other mobile devices. If users delete call history on one device, it will be synced and deleted on all of the devices.
When logging into the device, gloCOM GO 6 will sync up to hundreds of previous calls no older than a month.
Technical information about an ongoing call
While in a call, users can show technical information about it by pressing the info icon. This can be useful for diagnosing problems with call quality.
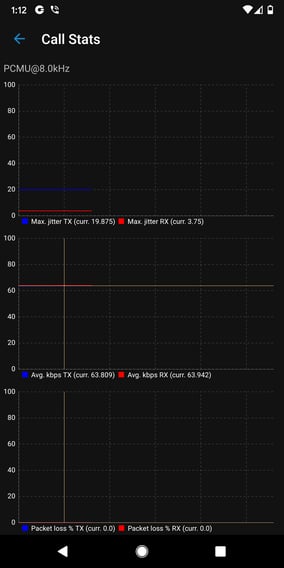
High packet loss and high jitter, both RX and TX indicate that call quality suffers due to network quality and usage.
RX stands for reception (incoming traffic) and TX for transmission (outgoing traffic).
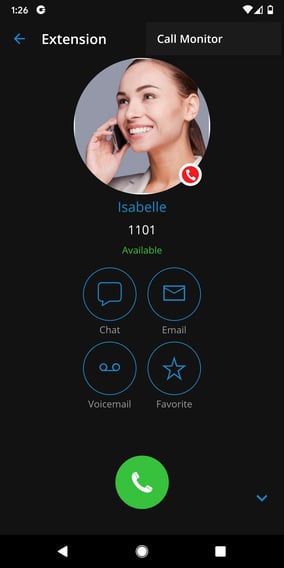
Call monitor
The call monitor feature enables the users to listen or participate in calls for extensions configured in the call monitor enhanced service settings on PBXware.
When call monitoring is enabled in the Enhanced Services on the user’s account, users will see a three dots menu inside the extension profile. When pressed, the call monitoring feature will be available. If users do not have call monitoring enabled on the extension, they will not be able to see that option.

Conference calls
Conference calls enable the users to make calls with more than one participant (external or internal).
There are two types of conference calls:
-
Instant (dynamic) conferences: Users can create a conference call by adding one or more people to an ongoing call or through the conference section. With this option, the user can add contacts or any number available from their contact list. If the user missed the conference call, they could still join it from the Call History tab, provided that a conference call still exists, by clicking on the Dial button.
-
Static conferences: Users can join predefined conference rooms and add other participants. A conference number is next to the conference name within the conference list for the static conference call. Static conferences can be added to PBXware by the PBXware administrator.
Selecting an ongoing conference on the conferences list screen will display a list of participants and the “Join this conference” button at the bottom, allowing users to join the selected conference. The list of participants is updated in real-time as users join or leave the conference room.


Start Dynamic conference from Recent calls
If there is a missed call from a conference in recent calls, users can press the call button for that call and join the instant conference only if that conference is still active.
Conference list screen
gloCOM GO 6 has a conference screen list, which offers more information and a better user experience for ongoing conferences that have participants. Active conferences that have participants are visible on top of the Conference list screen. Also, in an active conference with participants, names and avatars (if available) of 3 participants (or 2 if only 2 are left) will be visible on top of the Conference list screen. Besides the Active conference name, the number of conference participants is also visible on the screen, as well as the conference number and the button to join the conference.
.png?width=284&height=568&name=android-conference-1%20(1).png)
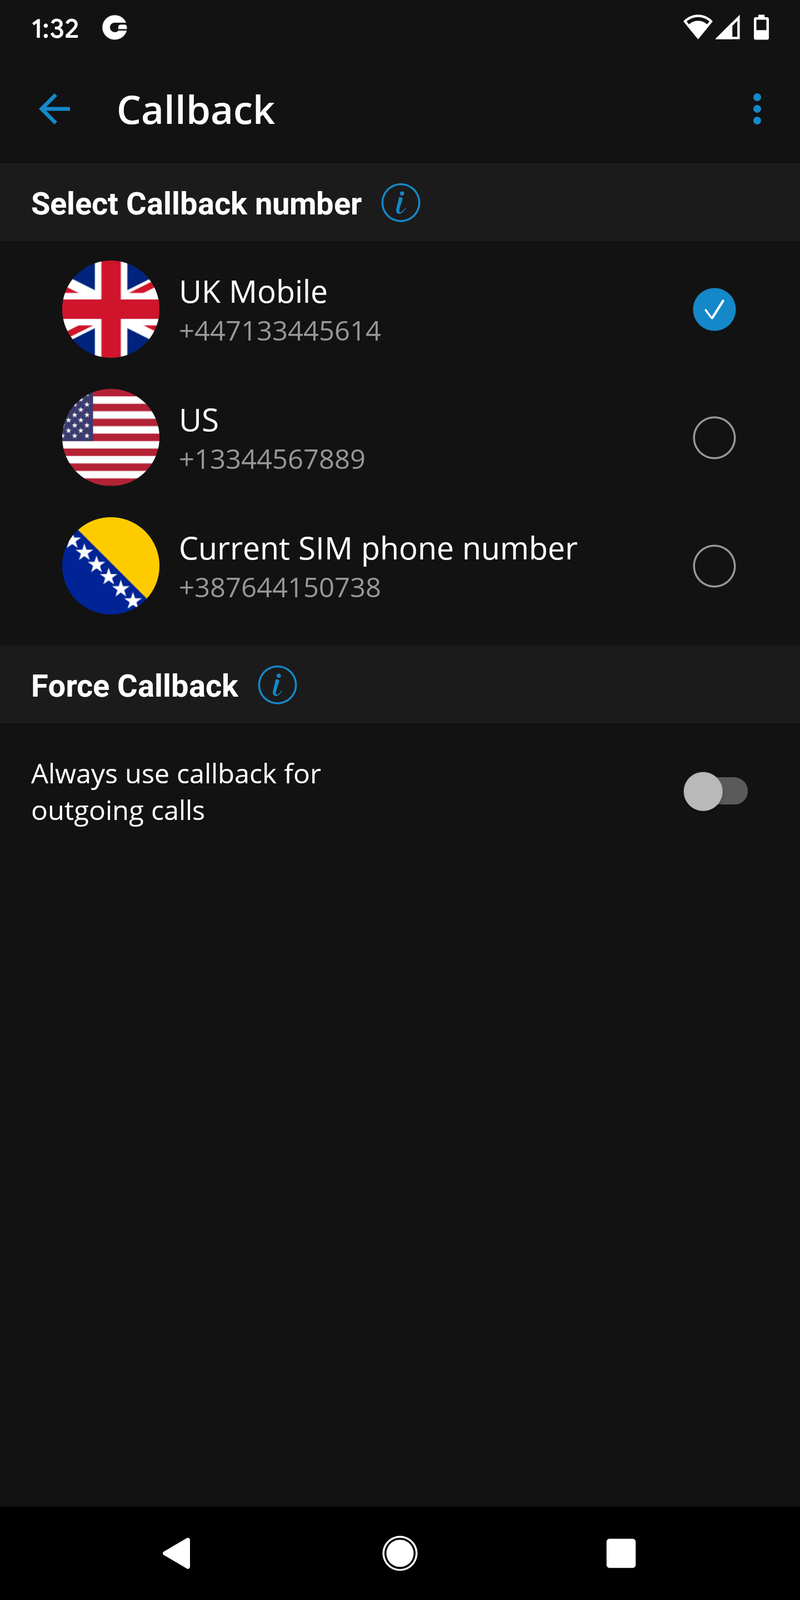
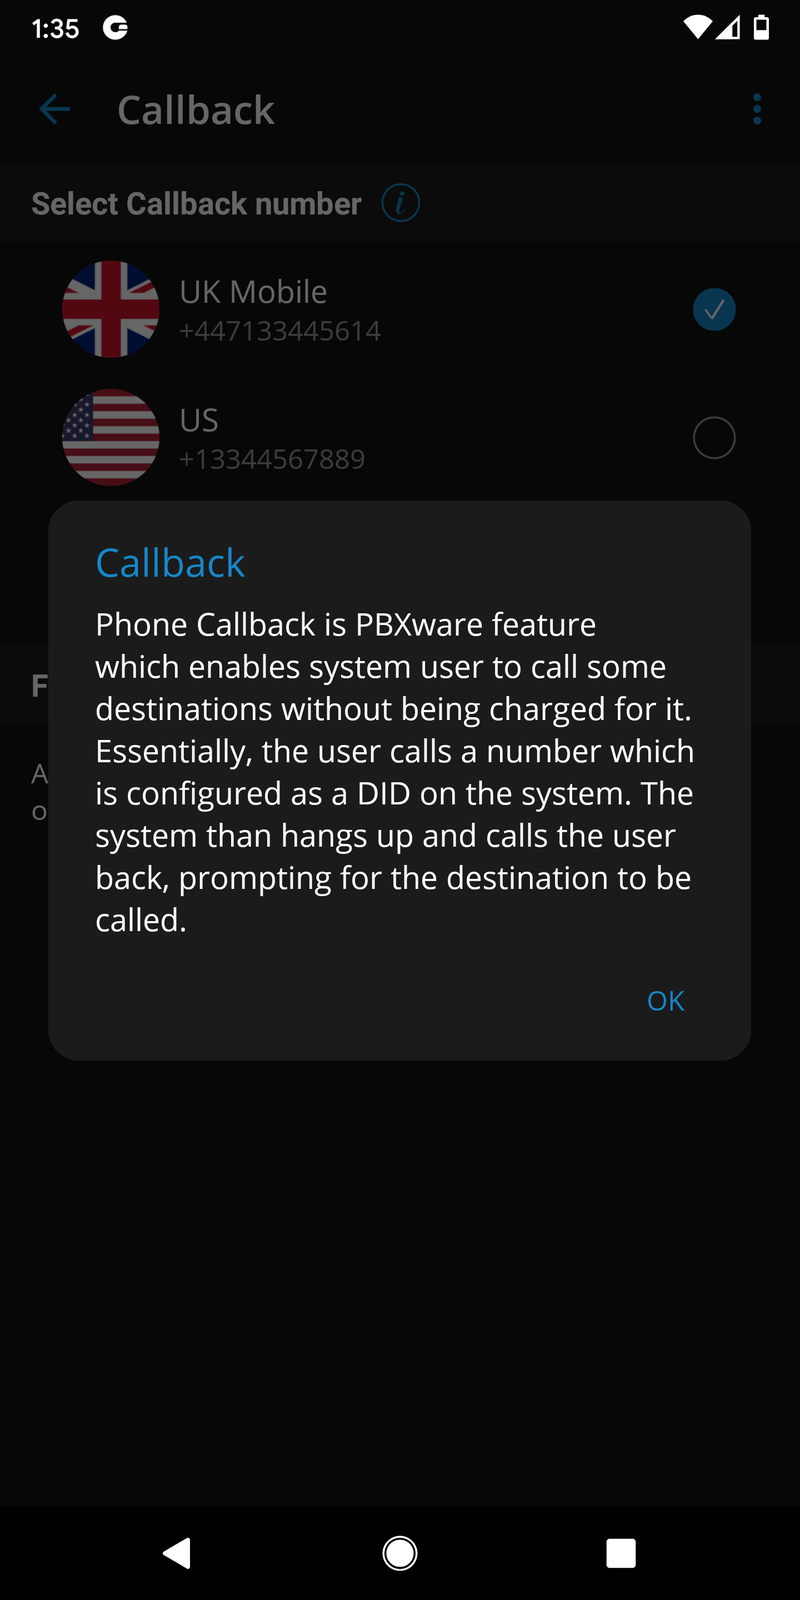
Callback calls
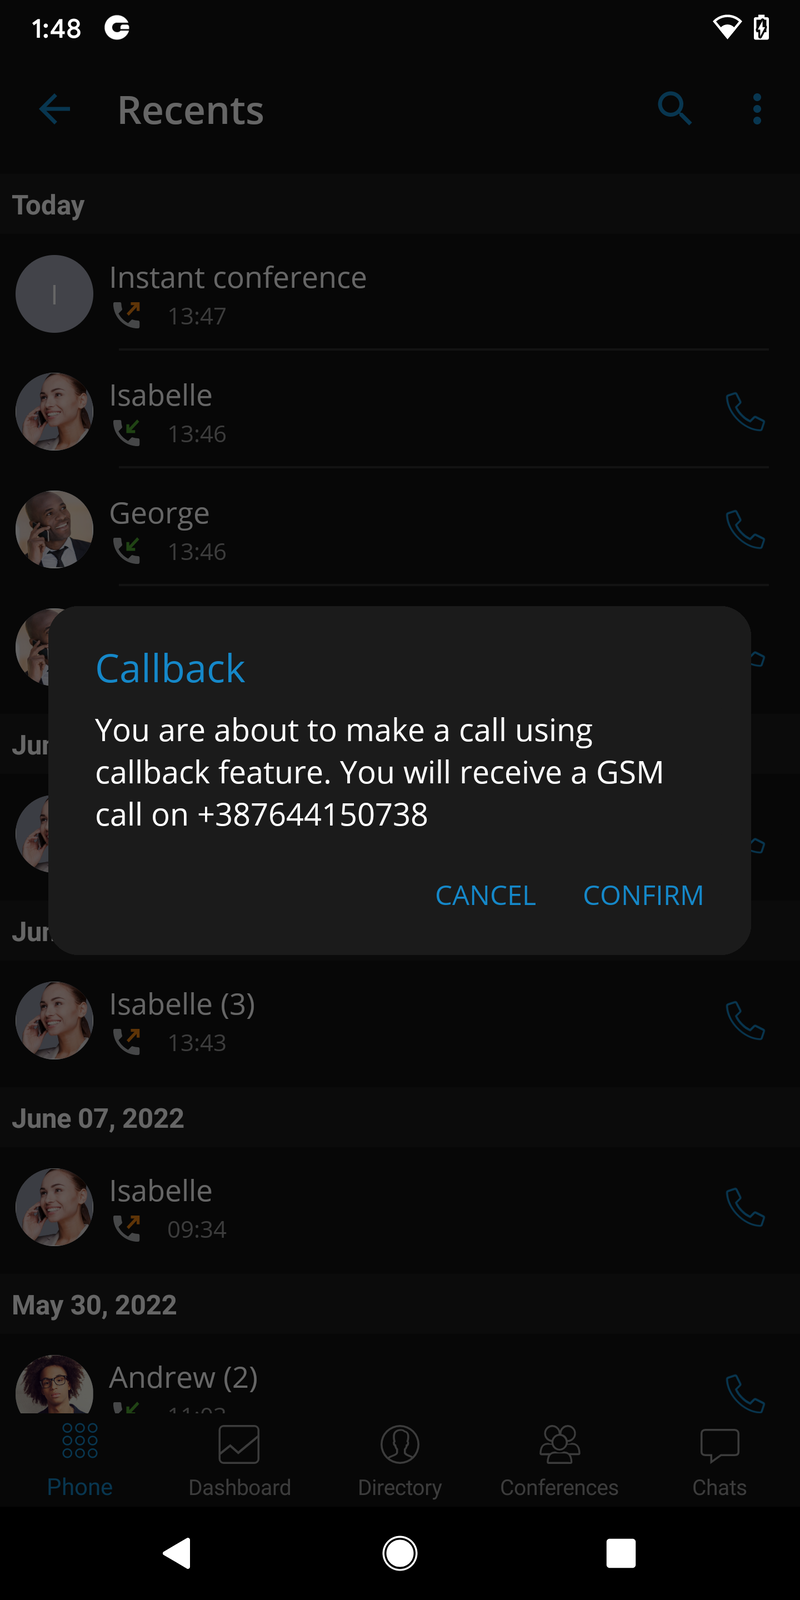
Callback calls are helpful when a softphone cannot be registered due to some error or when poor network quality impacts call quality.
When using a callback, gloCOM GO 6 tells the server to call the users callback mobile number via a GSM network. VoIP will connect the other call party, if possible, or GSM. For the callback feature to work, users need to select a number in the app Callback settings where they will receive GSM calls.
When starting gloCOM GO 6 for the first time, users will see a tip about callback as below.

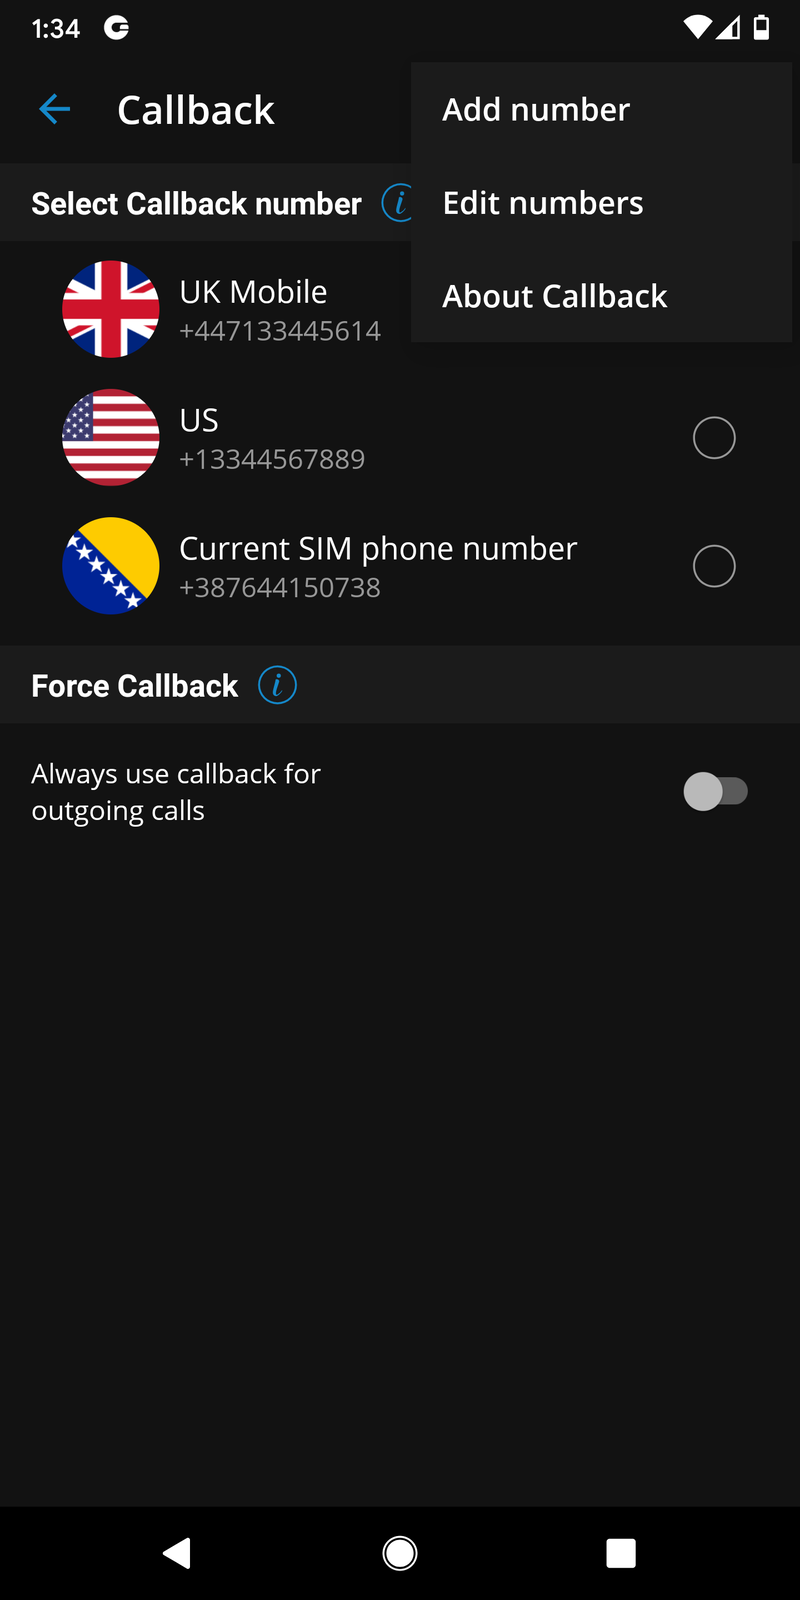
- MORE
By pressing this button, additional information about callback functionality will be displayed.
- LATER
Press this button to dismiss the Callback Tip dialog.
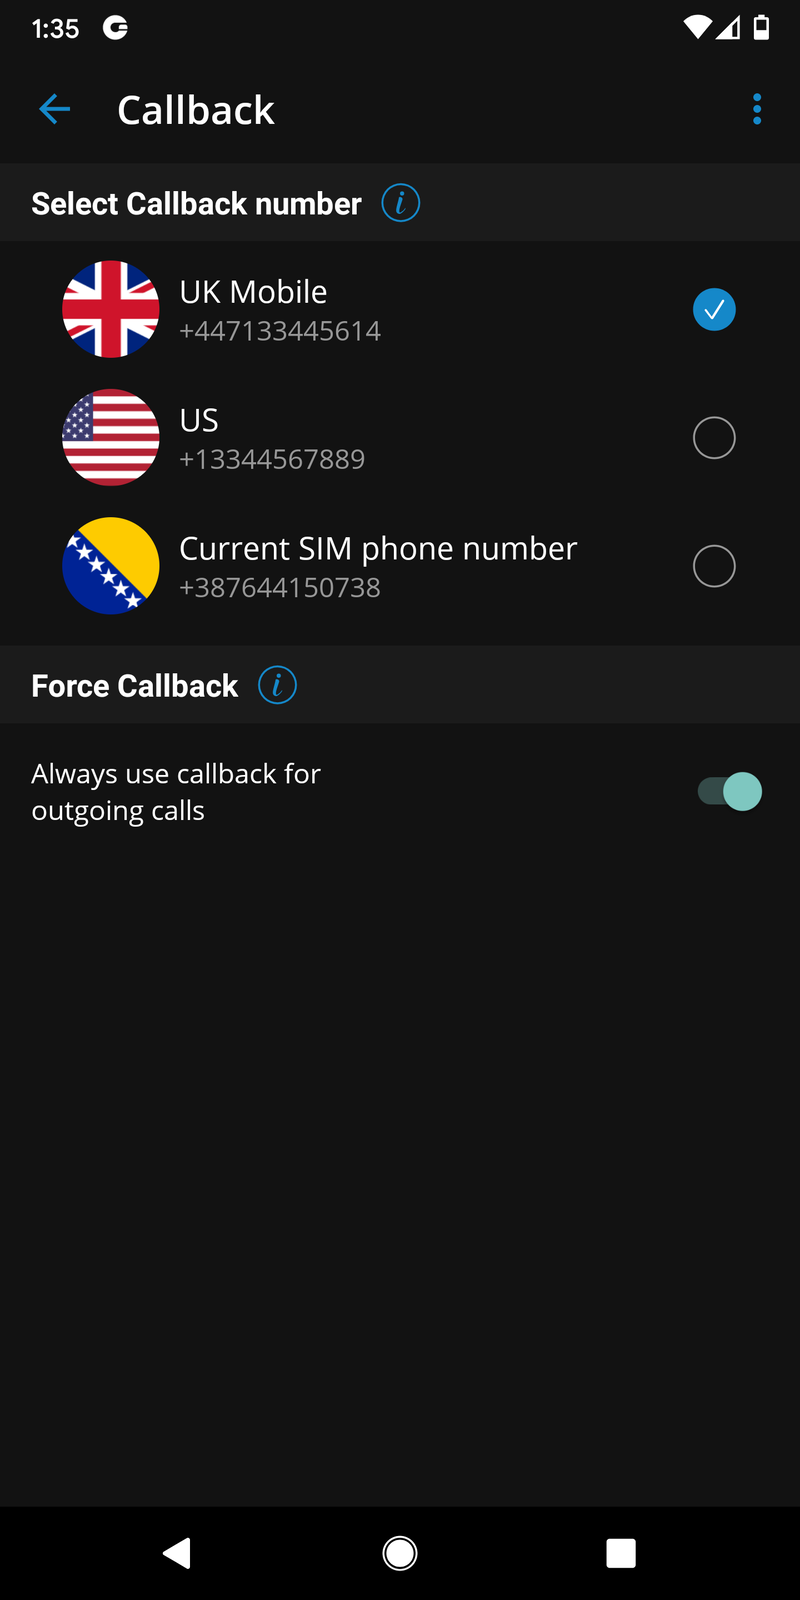
- OPEN SETTINGS
OPEN SETTINGS button opens the Callback settings screen.
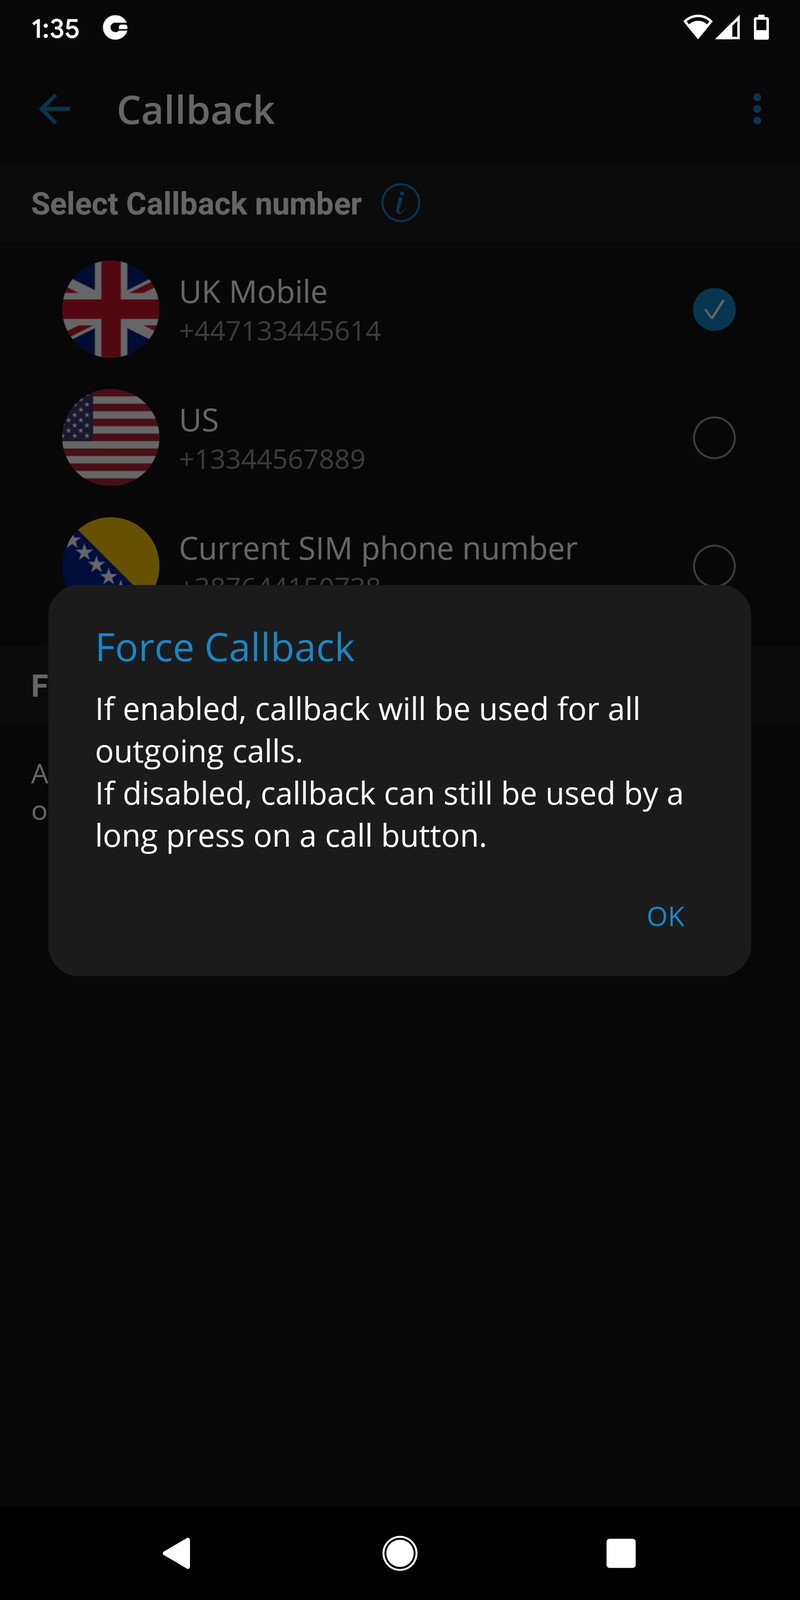
Users can use the callback feature for all outgoing calls by enabling Force callback in the Callback settings screen.
Users can use the callback feature for all outgoing calls by enabling Force callback in the Callback settings screen.

Long-press icon for one time Callback activation
A long-press can start the callback on a call icon from wherever a call icon is in the interface.
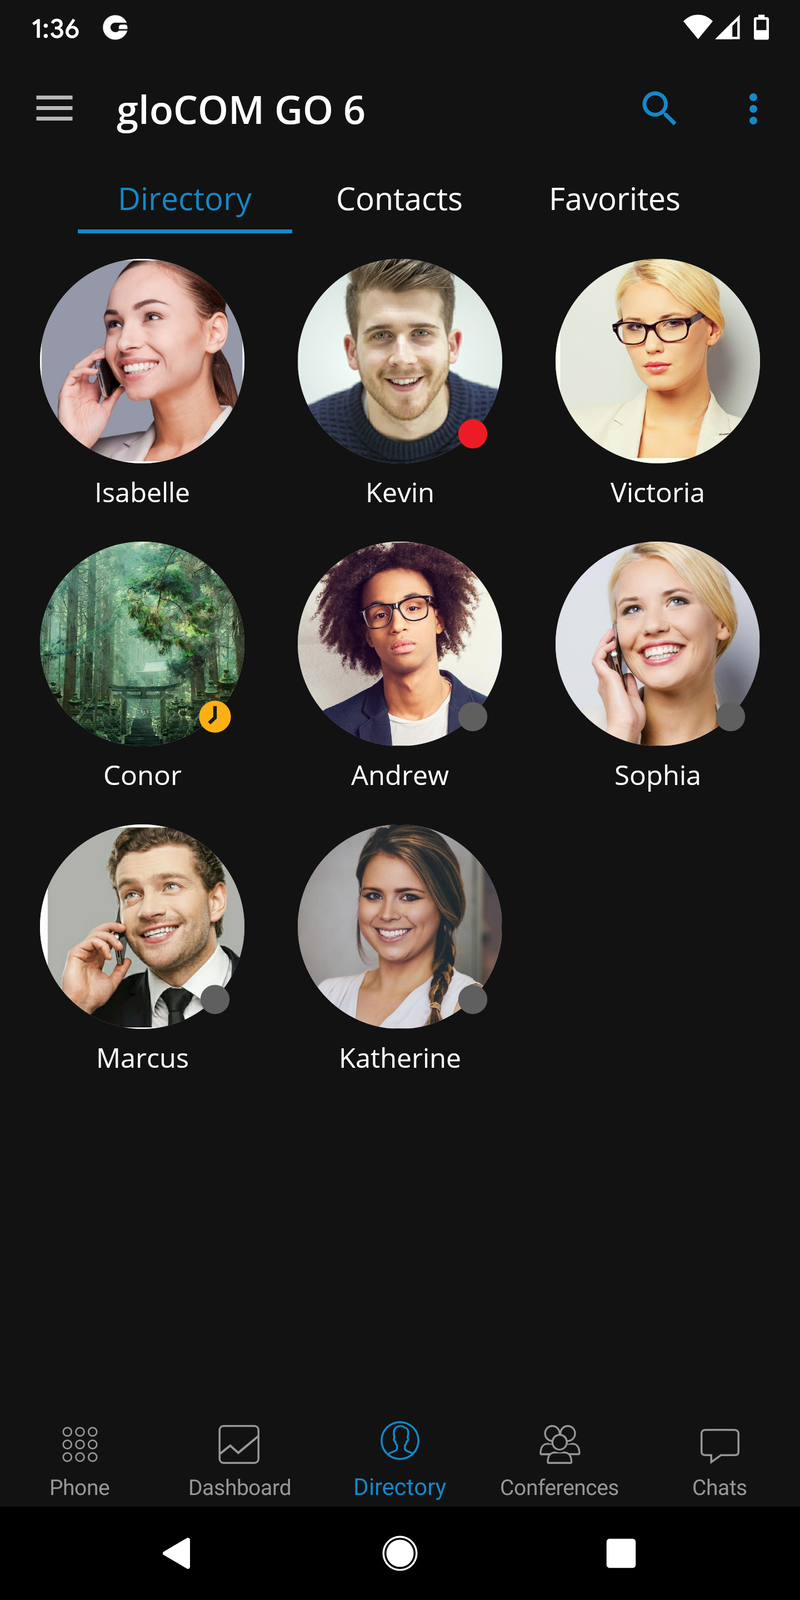
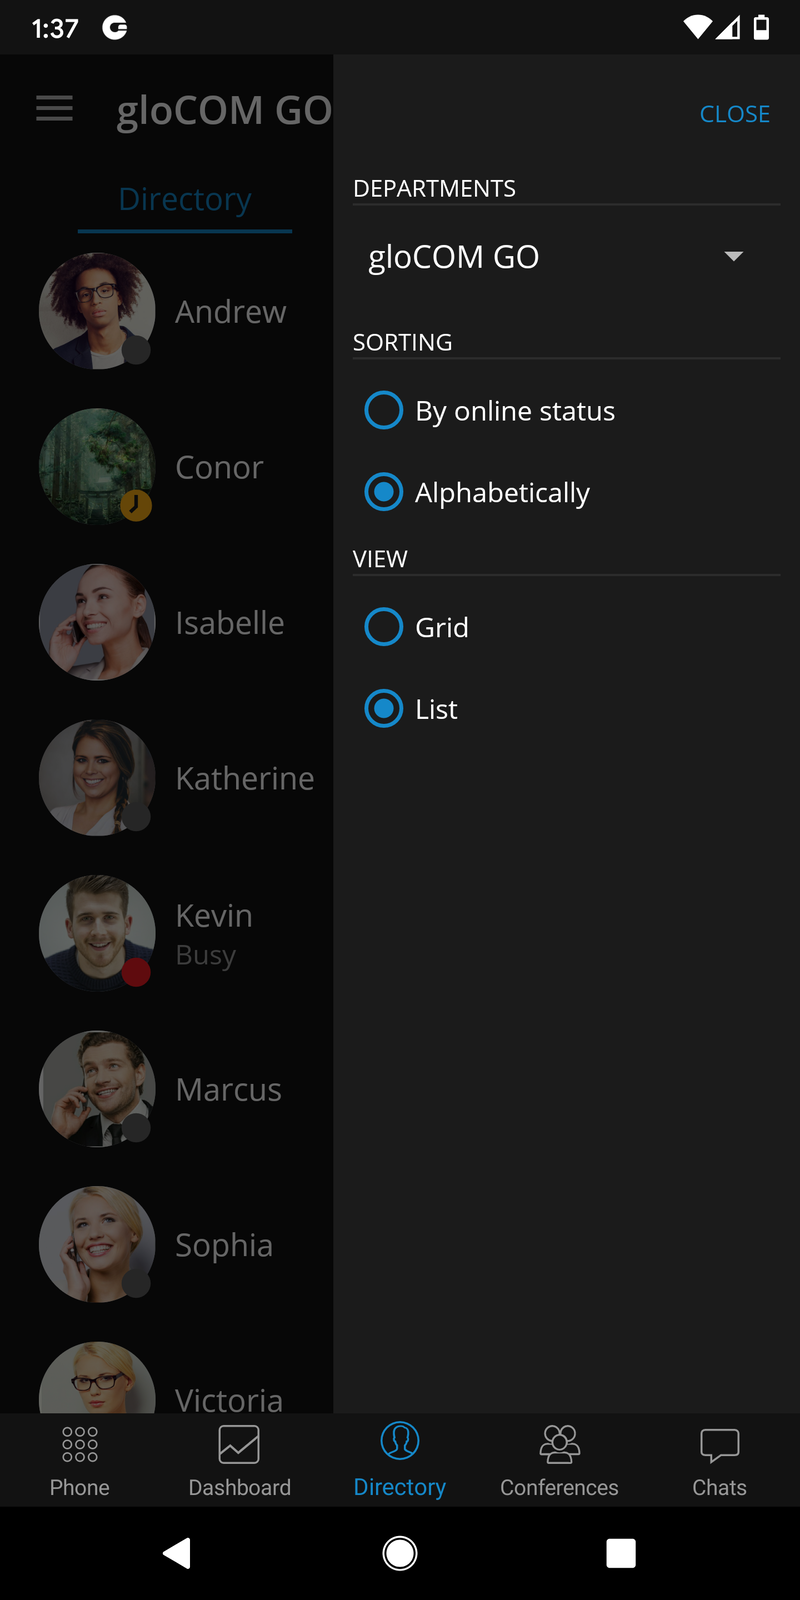
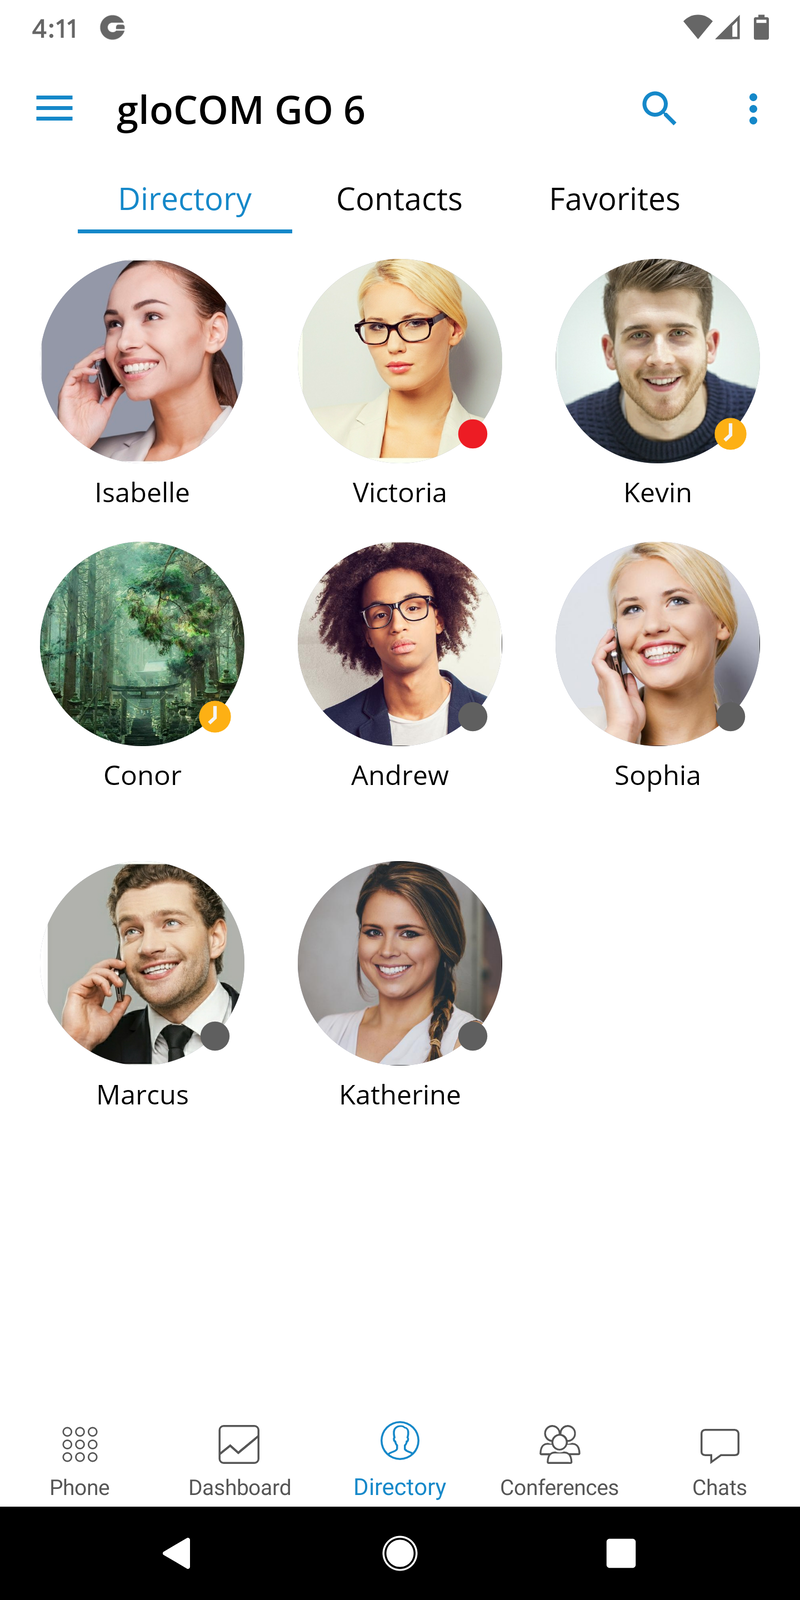
Directory
The directory tab contains users, device contacts, central phonebook contacts, and favorites from the system. Users can be displayed in the grid (default) or list order.
Users can be sorted according to their presence and department.
The default order for users is ordering them by their presence. Online users will be sorted alphabetically at the top of the list, followed by away (recently online) users and then offline users.
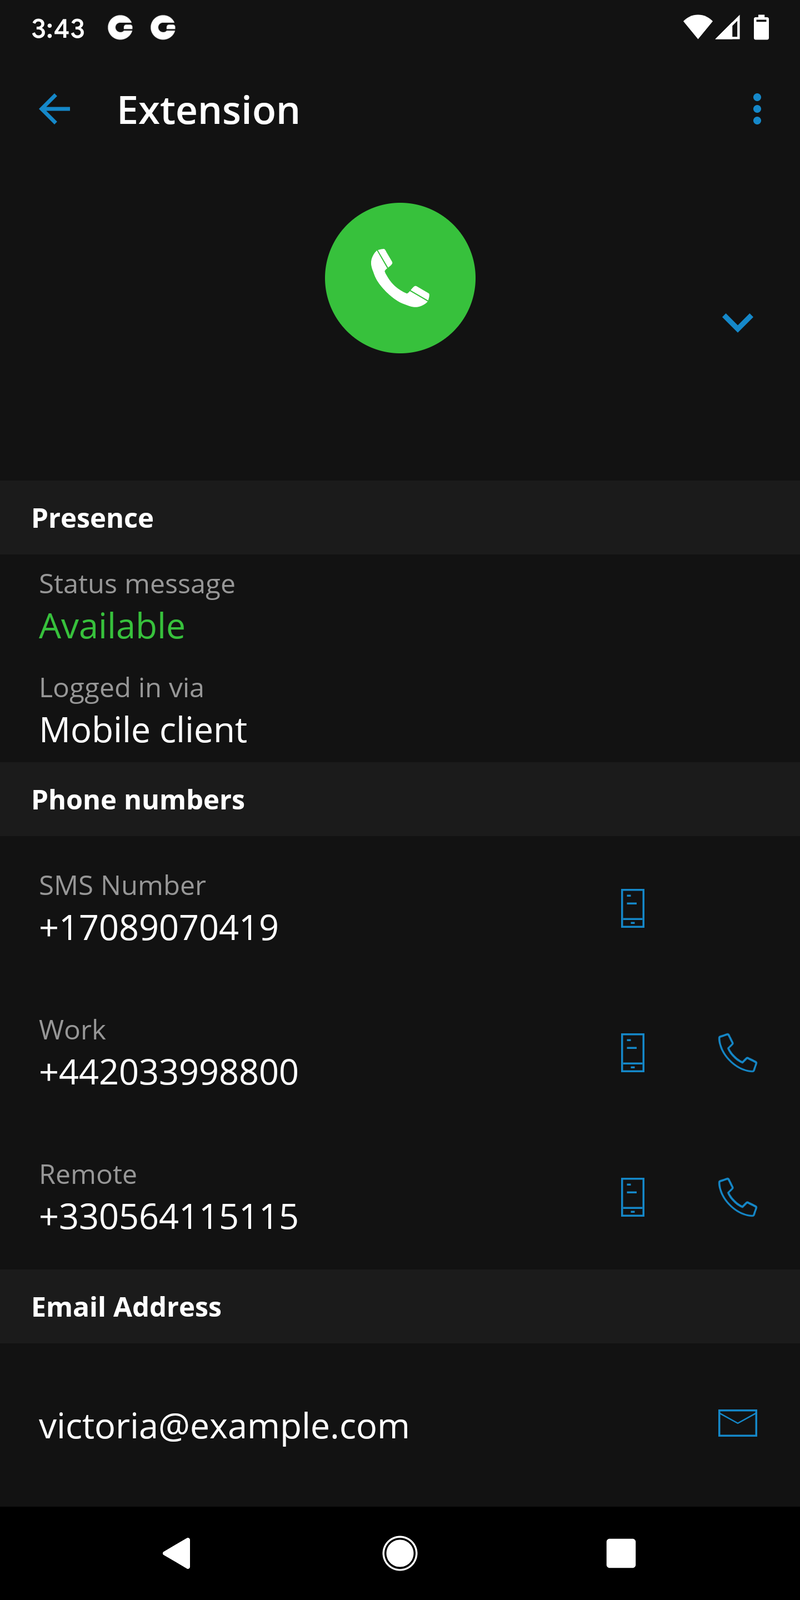
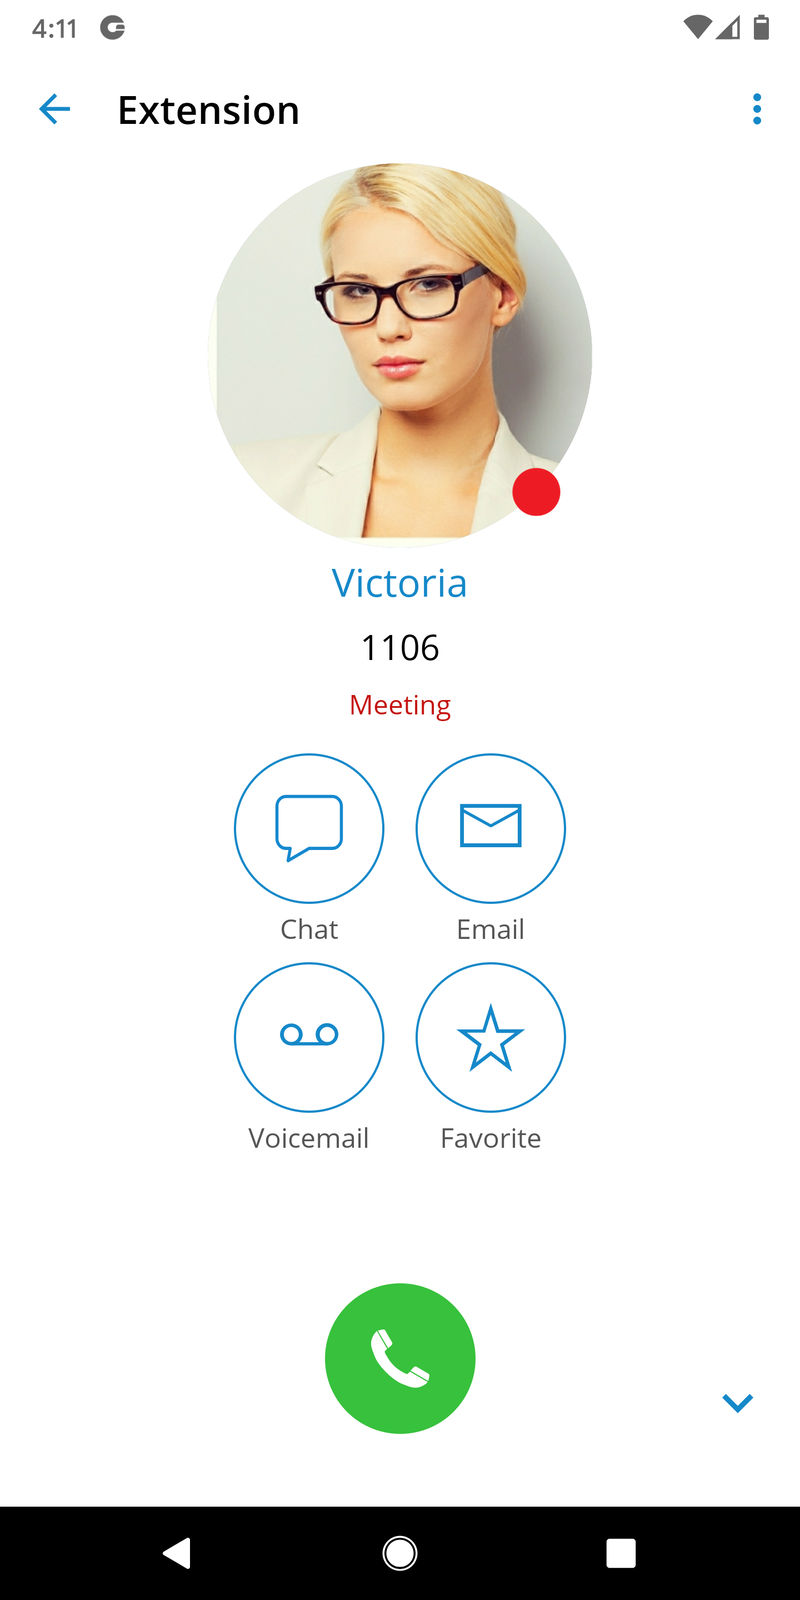
Pressing on a user’s name or avatar will open up the user’s details screen that contains information such as email, presence status, and message, user’s numbers. Users can also call the selected user from this screen, start a chat, send a voicemail, or add to favorites.
If the user associated additional phone numbers with their account, these numbers will be listed as well, and they will be able to dial them by simply pressing the number.
Contacts Search
To search gloCOM GO 6 contacts, users can press the search icon in the upper right corner. After pressing the search icon search field will be displayed. Search is performed by contact name or number.
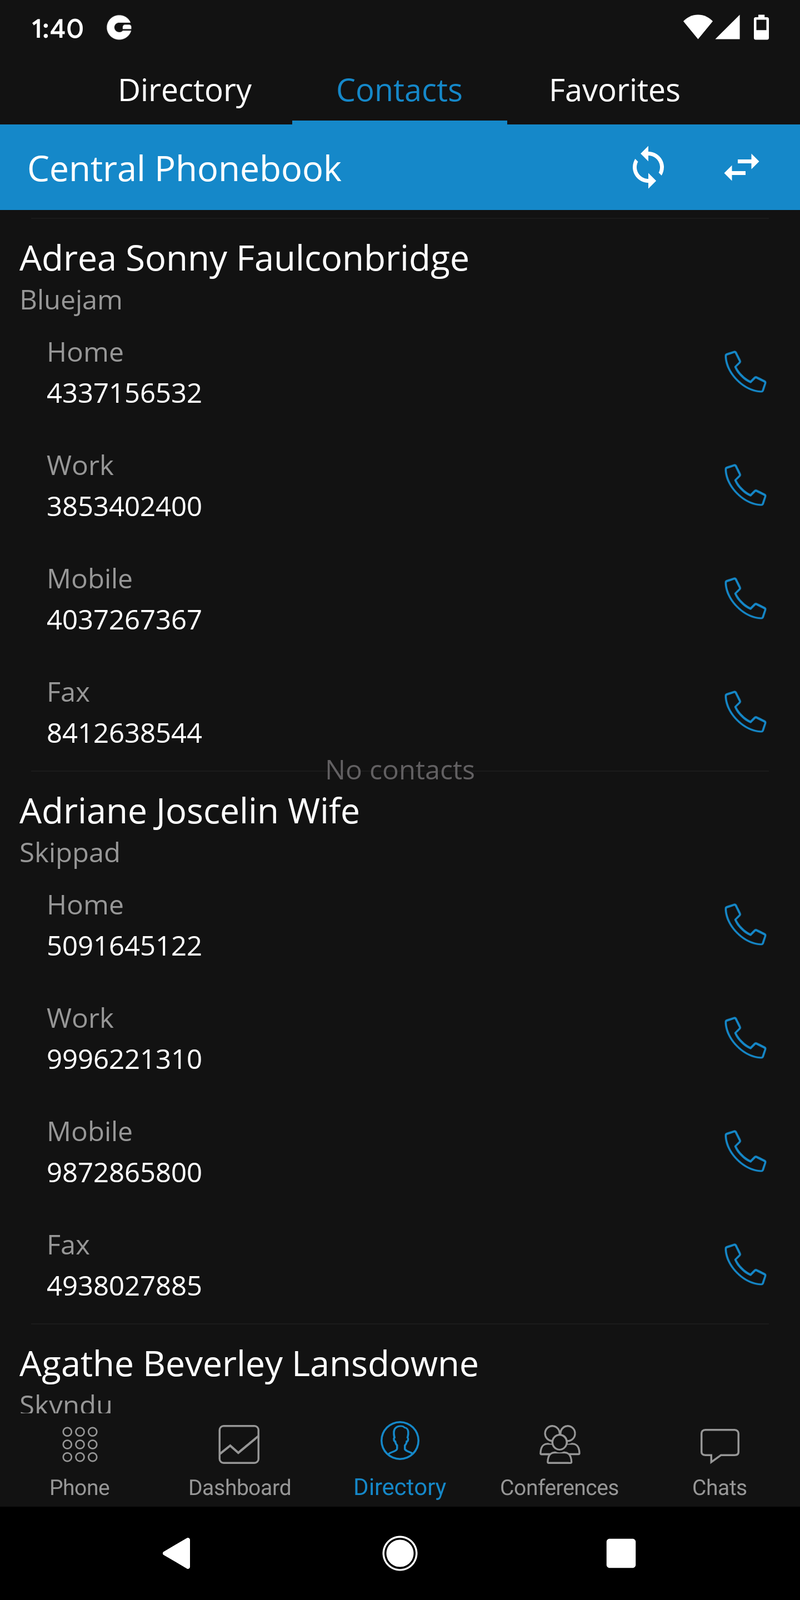
Synchronize Central Phonebook contacts from the PBX
Central Phonebook is a collection of contacts that all users of one system share.
When users navigate to the directory from the bottom bar and then to the contacts screen from the three tabs in the top part of the screen, they will see the Contacts screen.
The Local Phonebook looks mostly like it did before except for the top part, which has a banner with the name of the Phonebook and a button to change the Phonebook type.
In addition to having the button that changes the Phonebook type, the Central Phonebook blue banner has a button to refresh the contacts.
Each contact item in this Phonebook has a name, company name, and a list of number labels and numbers.
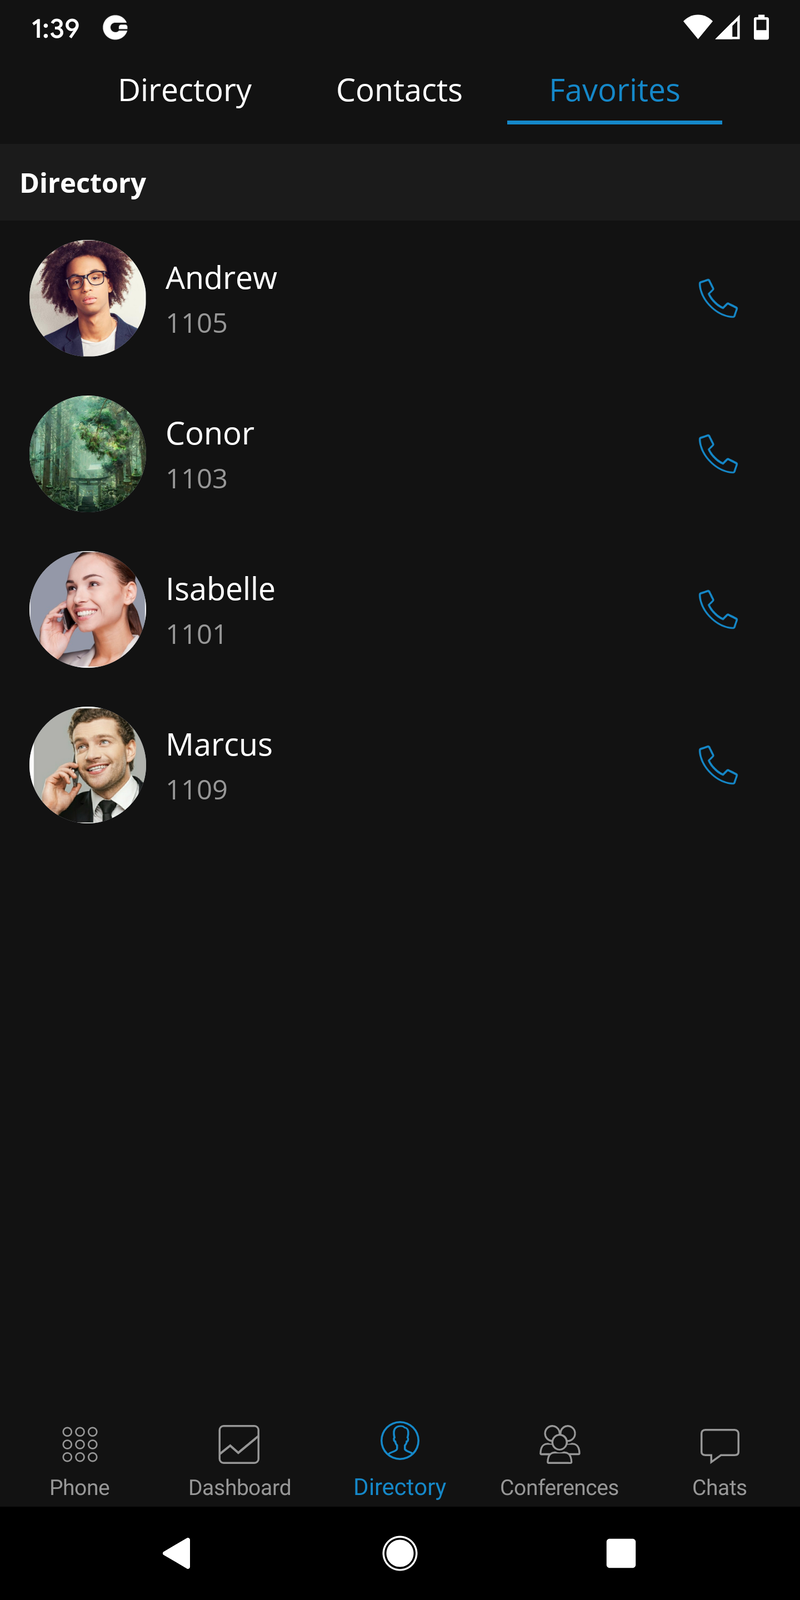
Favorites
Users can add other users and contacts from the phonebook to favorites to have them in one place and show up first while performing an action, e.g., transferring a call.
Users can be added/removed from favorites by pressing Add to Favorites or Remove from Favorites on the user’s details screen as shown in the pictures below.
Contacts from the phonebook can also be added or removed from Favorites by pressing on their numbers and choosing Add to Favorites or Remove from Favorites.
The favorites list can be accessed from the Directory tab by choosing the '''Favorites''' section in the top bar.
Meeting
gloCOM GO meeting provides an option to meet with multiple users simultaneously while offering:
- Video Conferencing (in a grid and speaker view)
- Audio Conferencing
- Screen Sharing (specific application or whole screen sharing)
- Remote Control when screen sharing
- Group chat
The meeting management within the gloCOM GO app gives a user the ability to create an instant meeting, schedule a meeting, or join an existing meeting. To access the meeting screen, a user should press the Meetings icon within the navigation bar. When a meeting is started, the gloCOM GO app redirects the user to the Meeting GO app.
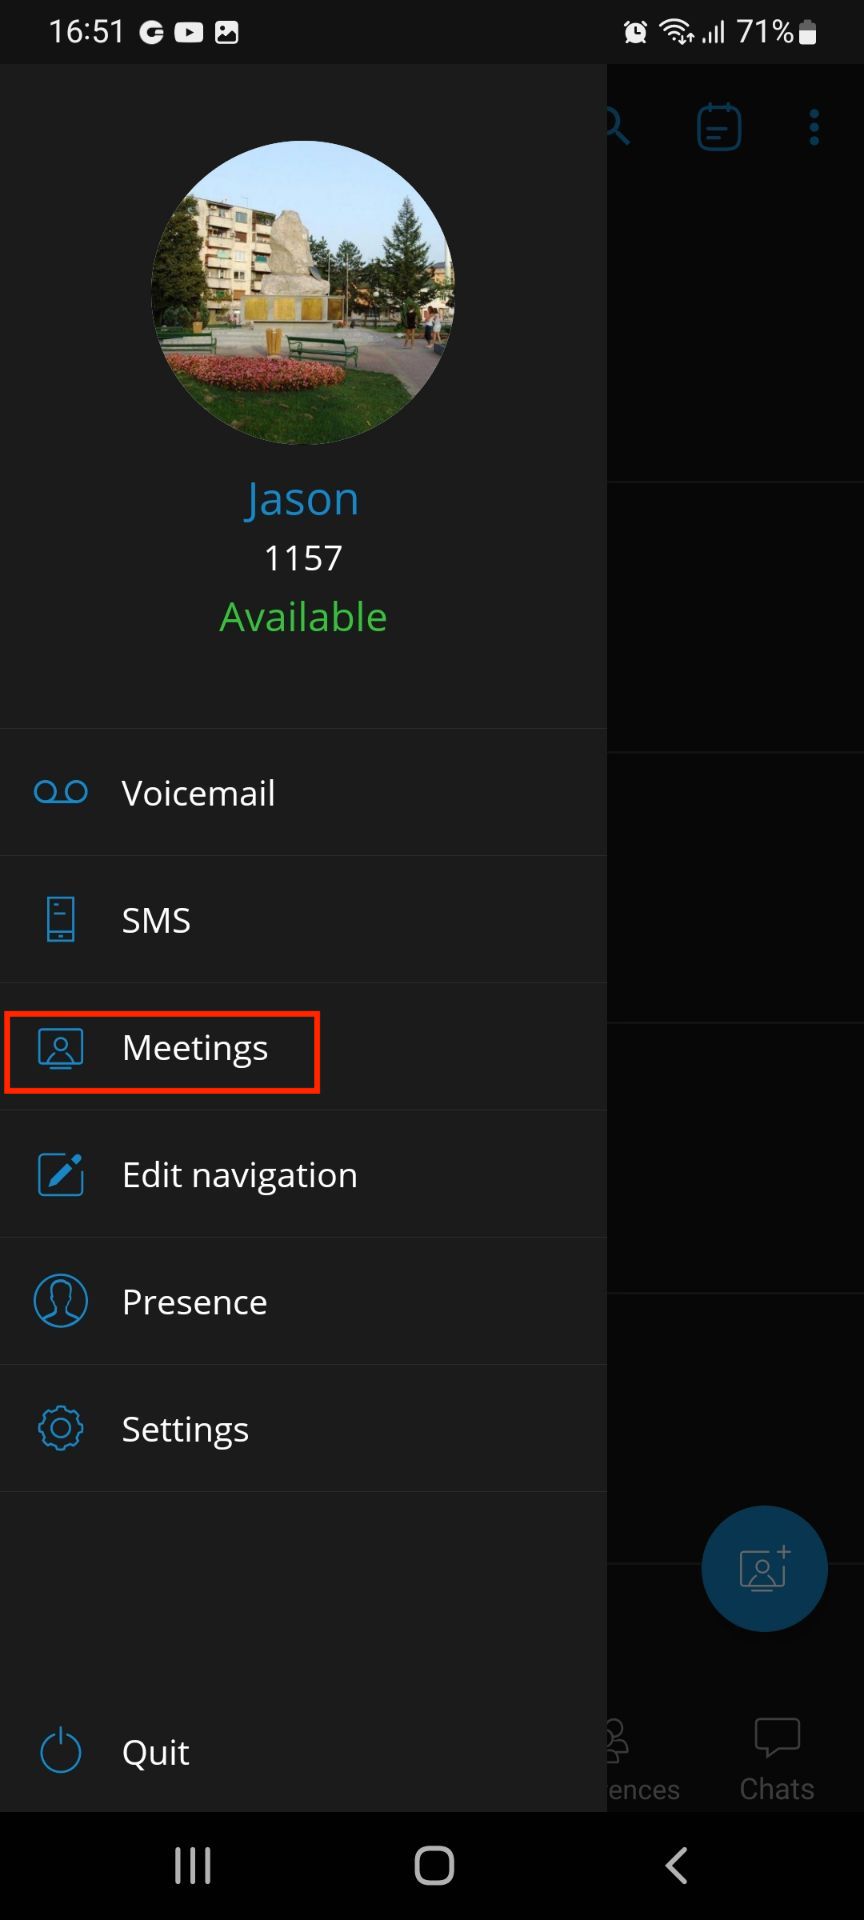
If the meeting is disabled on the license, all meeting-related screens will be disabled.
Main meeting screen
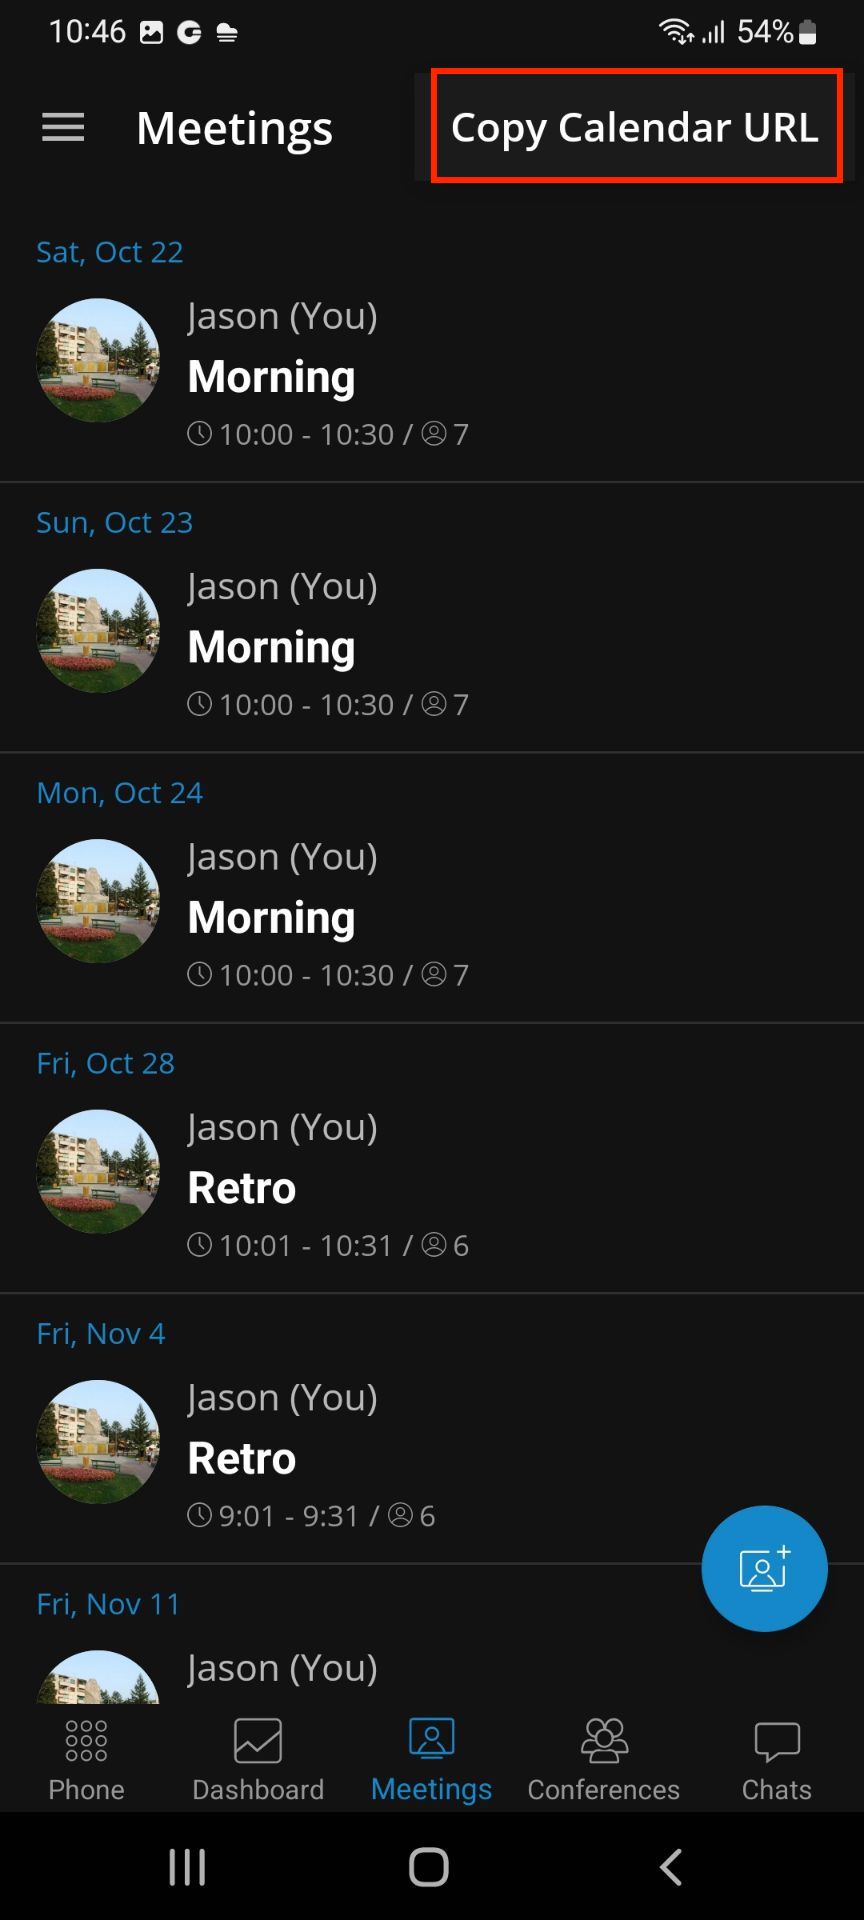
On the main meeting screen, the user has an overview of scheduled meetings sorted by date.
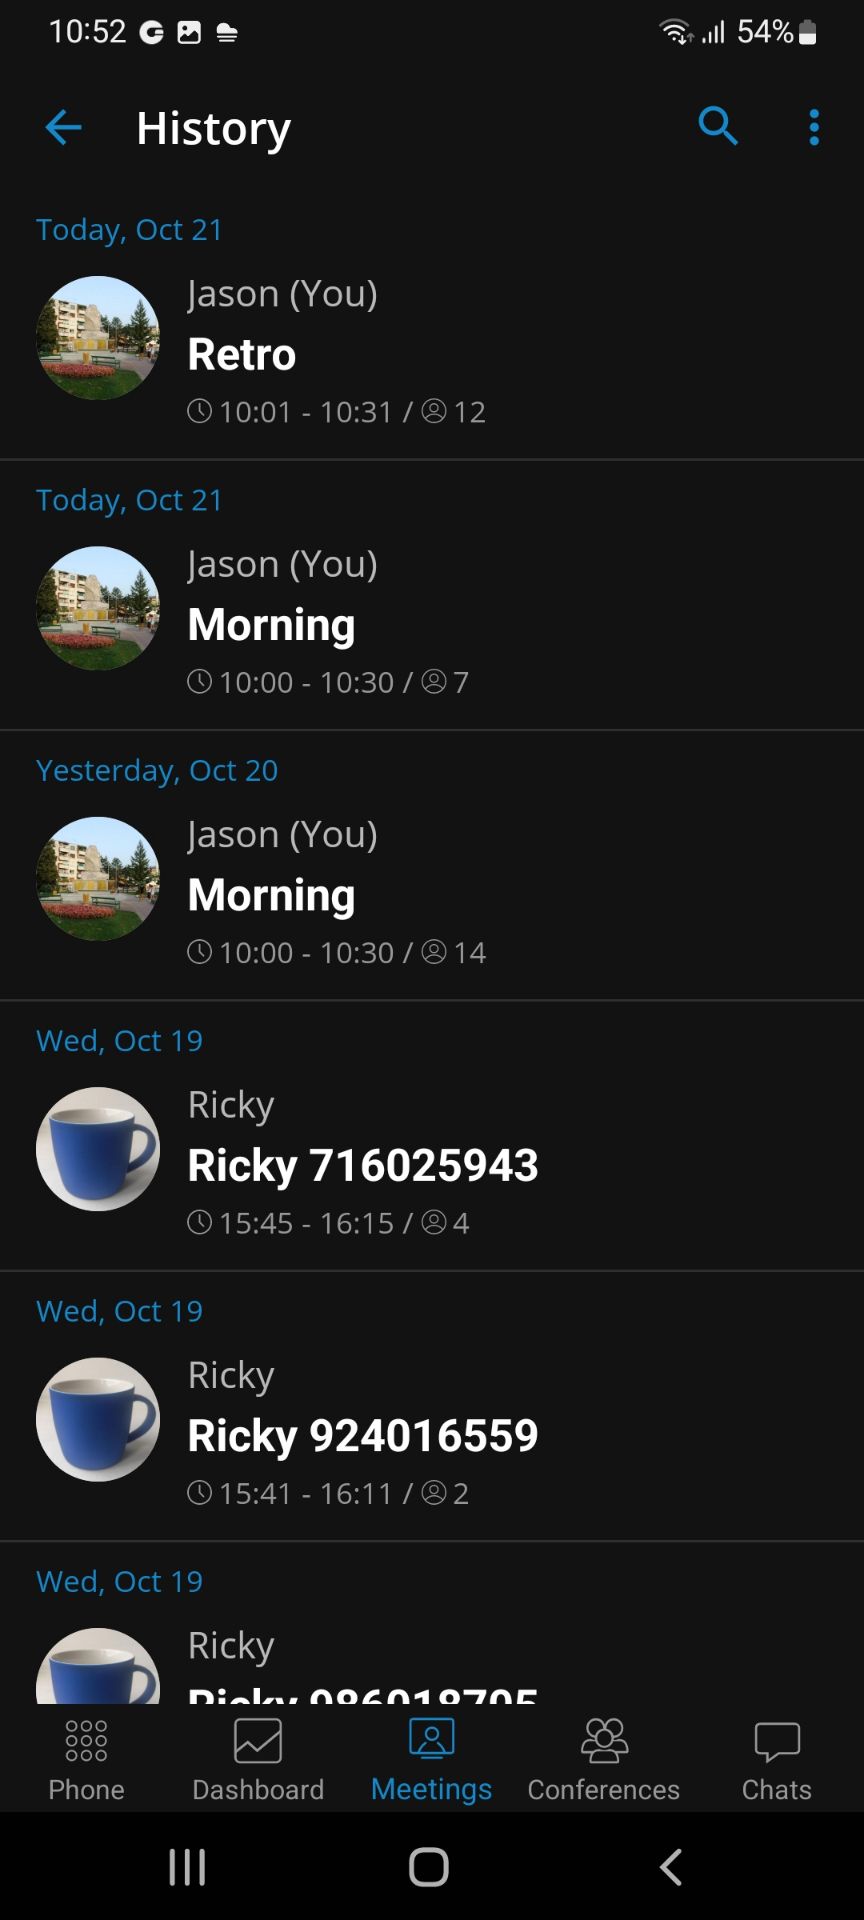
There is an "In progress" indicator in the upper right corner for the meeting currently running. Pressing on a meeting inside the list opens the meeting info screen. Meetings in the list can be filtered by name or by meeting number with the search option that can be found at the top of the screen. Next to the search button is a history button that opens the list with the previous meetings. In the additional options, there is an option to Copy Calendar URL, which allows the user to copy the Meeting calendar into their calendar software.
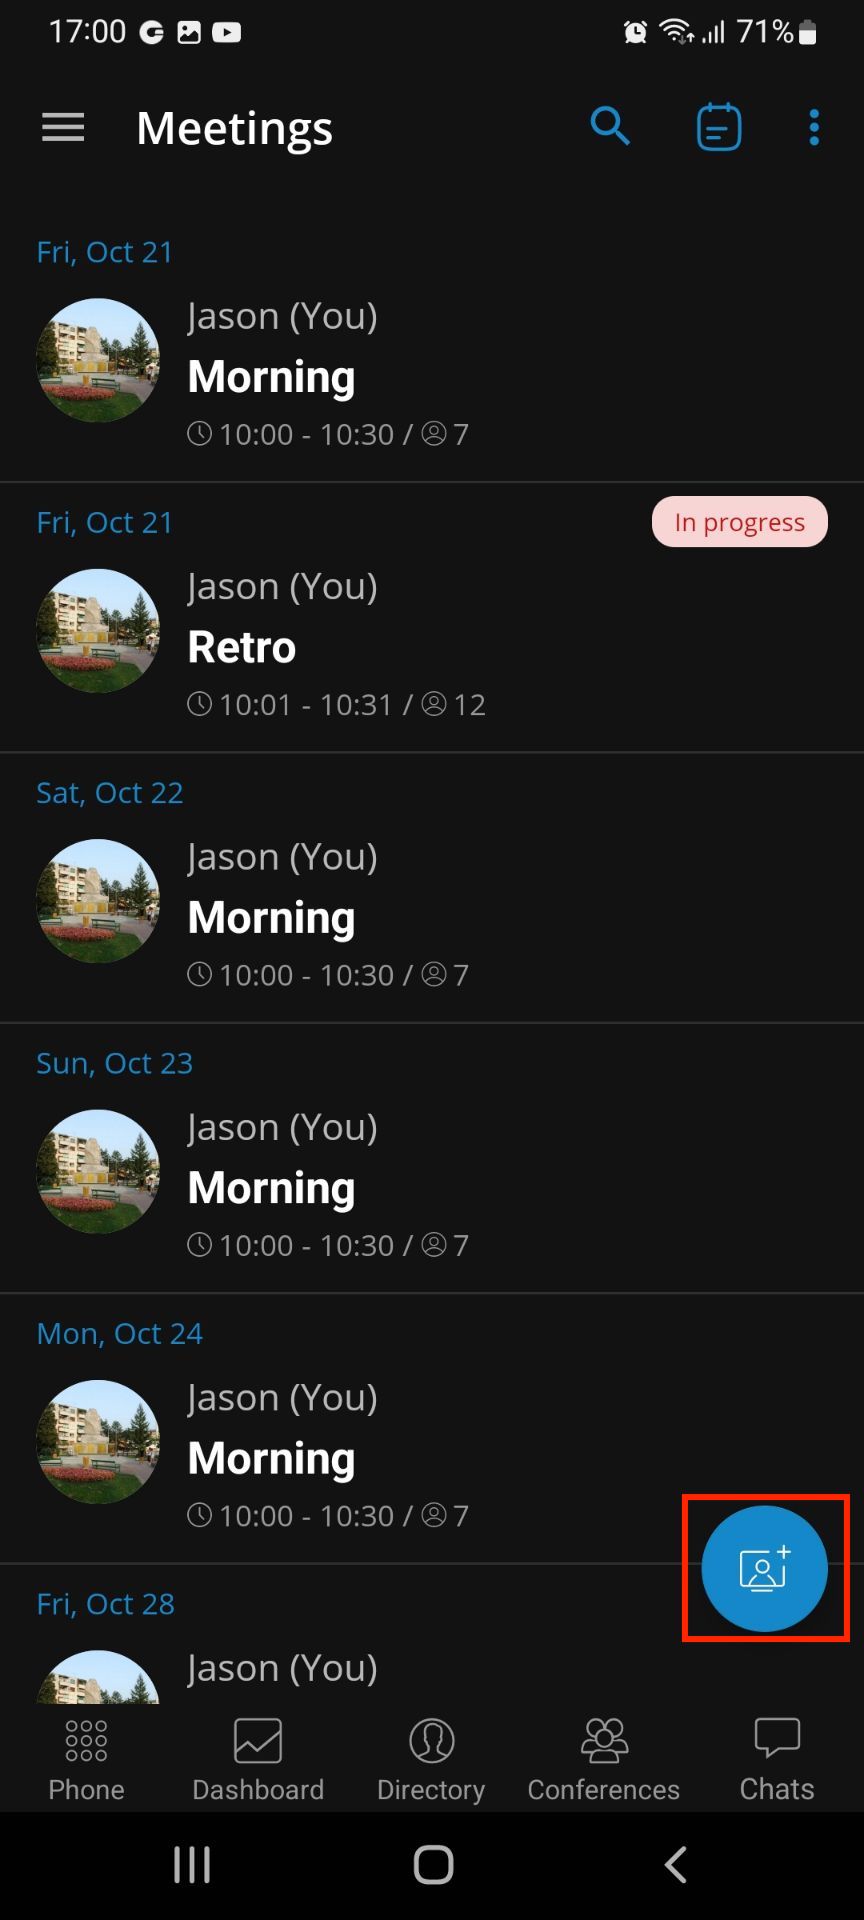
At the bottom of the screen there is a floating button that, when pressed, offers three options:
• Join an active meeting - gives the user the ability to join the existing meeting by entering the meeting number. After entering the meeting number and clicking the Join button, the user will be redirected to the gloCOM Meeting GO app.
• Create an instant meeting - opens the instant meeting screen where the user can set a meeting to be public or private, add participants from the directory or add external participants by entering their email address.
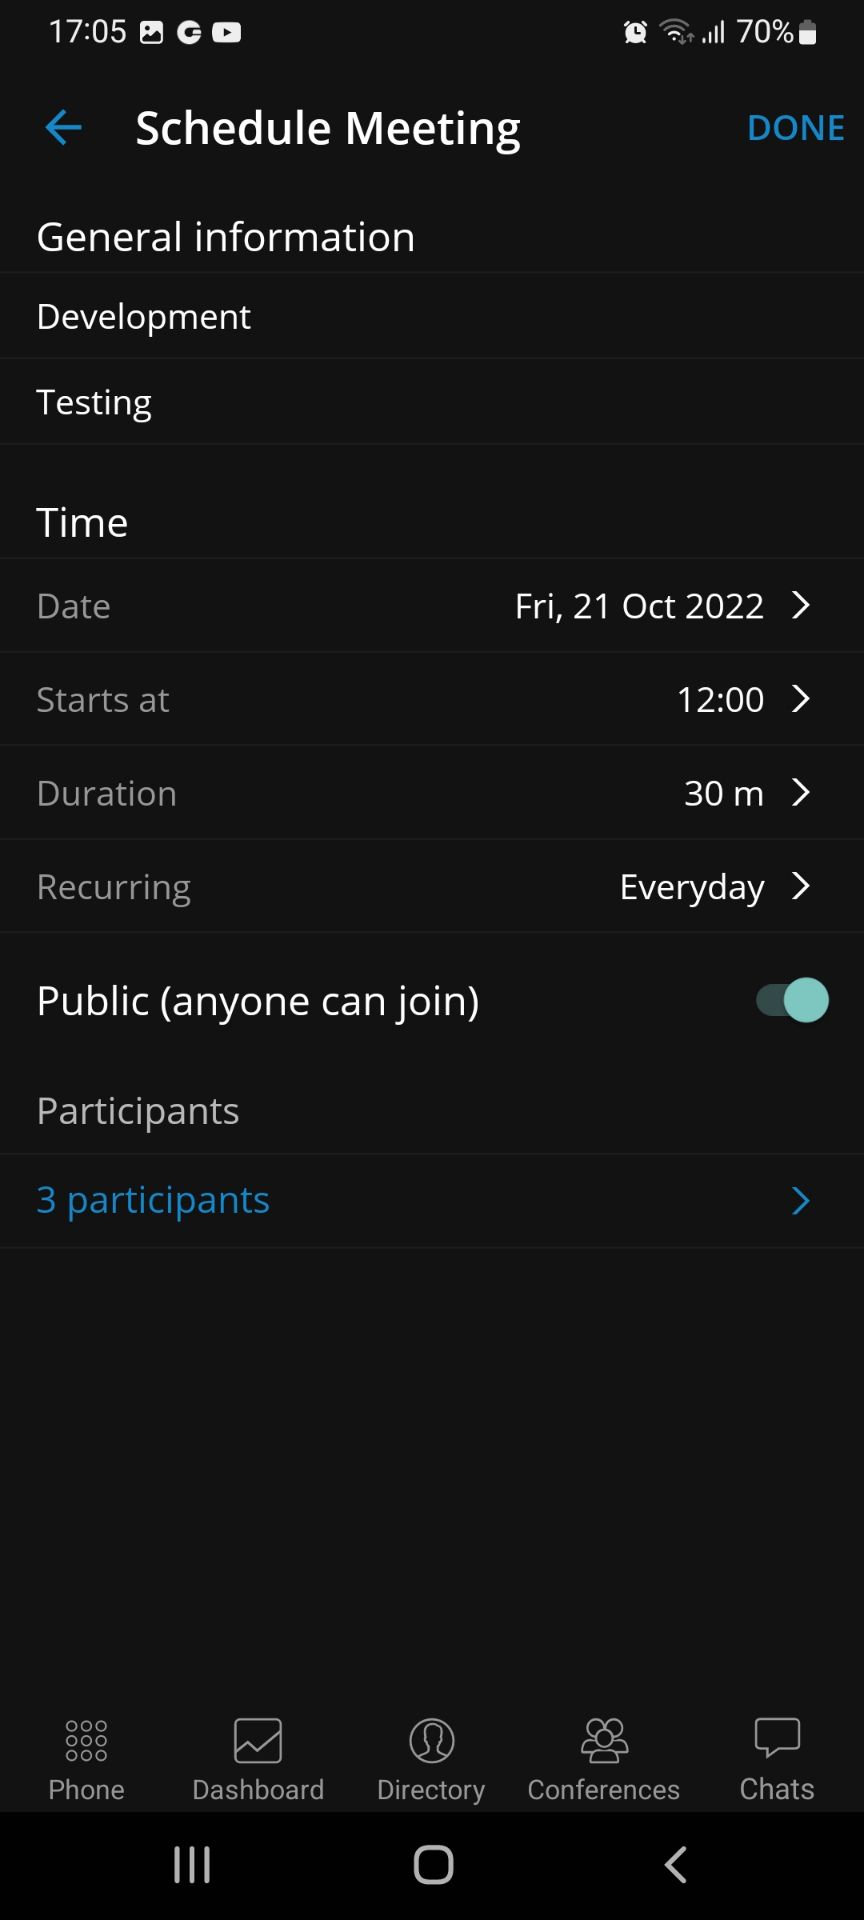
• Schedule a meeting - opens the schedule meeting screen where the user can schedule a meeting beforehand. in order to schedule a meeting, the user has to enter certain data in the provided fields:
◦ Title (meeting title)
◦ Description (meeting description)
◦ Date (date of the meeting)
◦ Starts at (meeting start time)
◦ Duration (duration of the meeting)
◦ Recurring - in case a user clicks on a Recurring option a dialog with the following options will appear:
▪ Never (meeting occurs only once (set by default for the new meetings))
▪ Every Day (meeting recurring every day at the selected time)
▪ Custom (opens the screen with custom recurring options)
◦ Participants
◦ External participants
◦ Public/Private switch
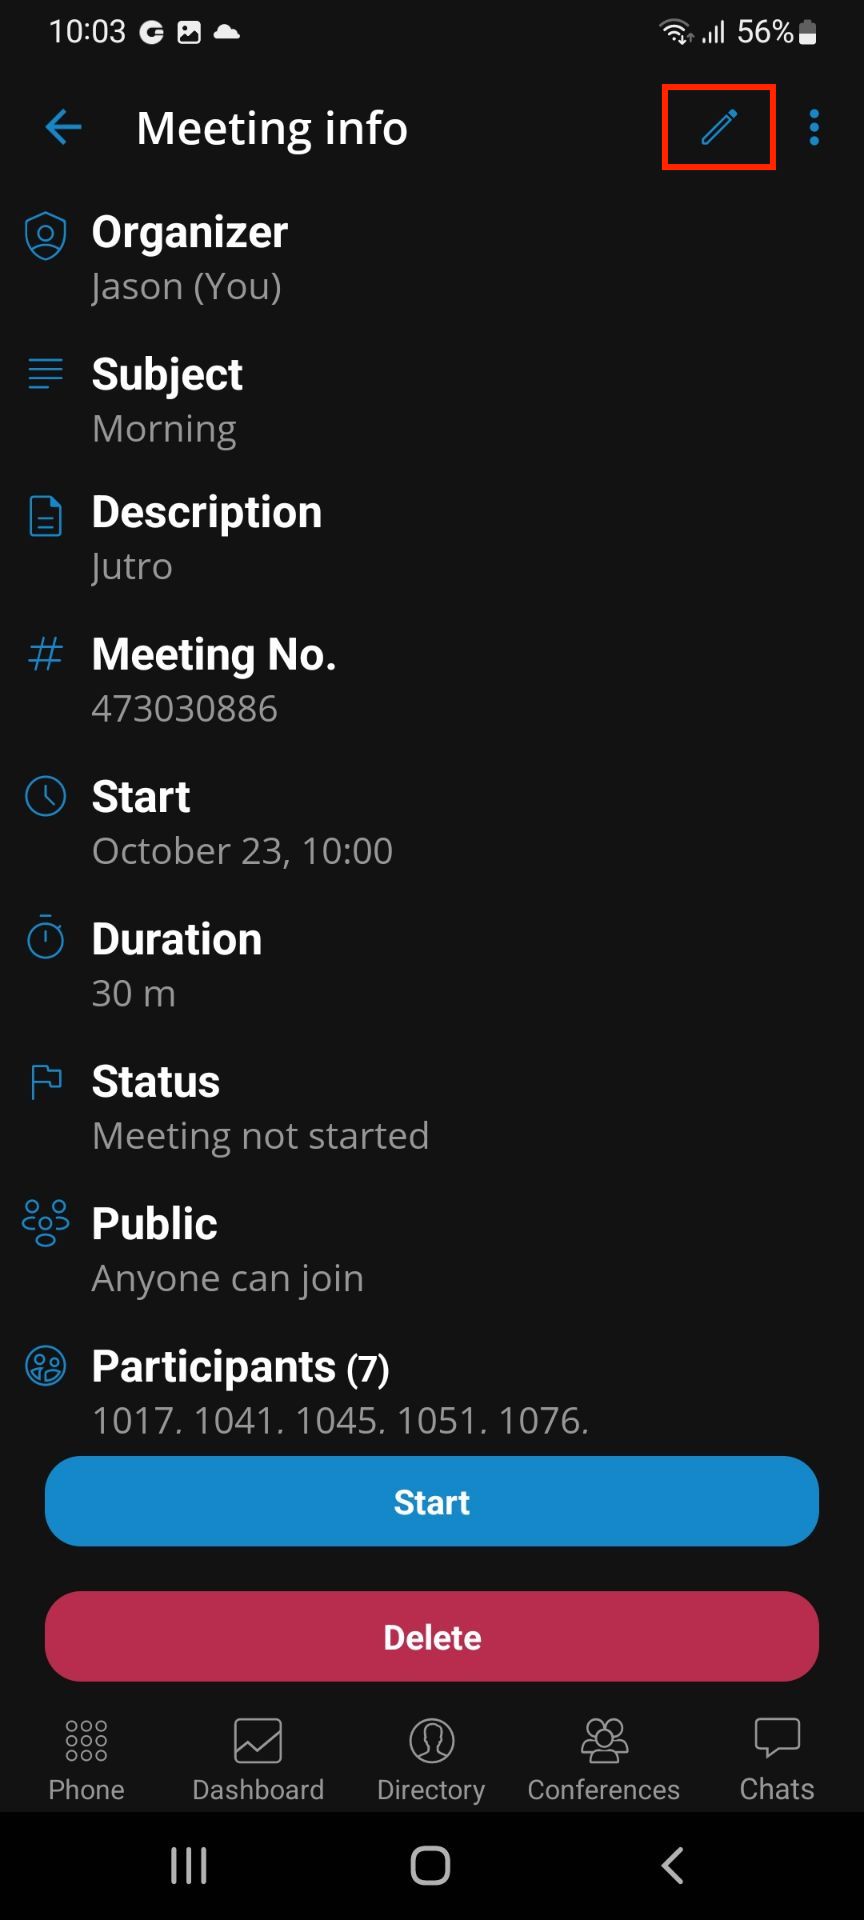
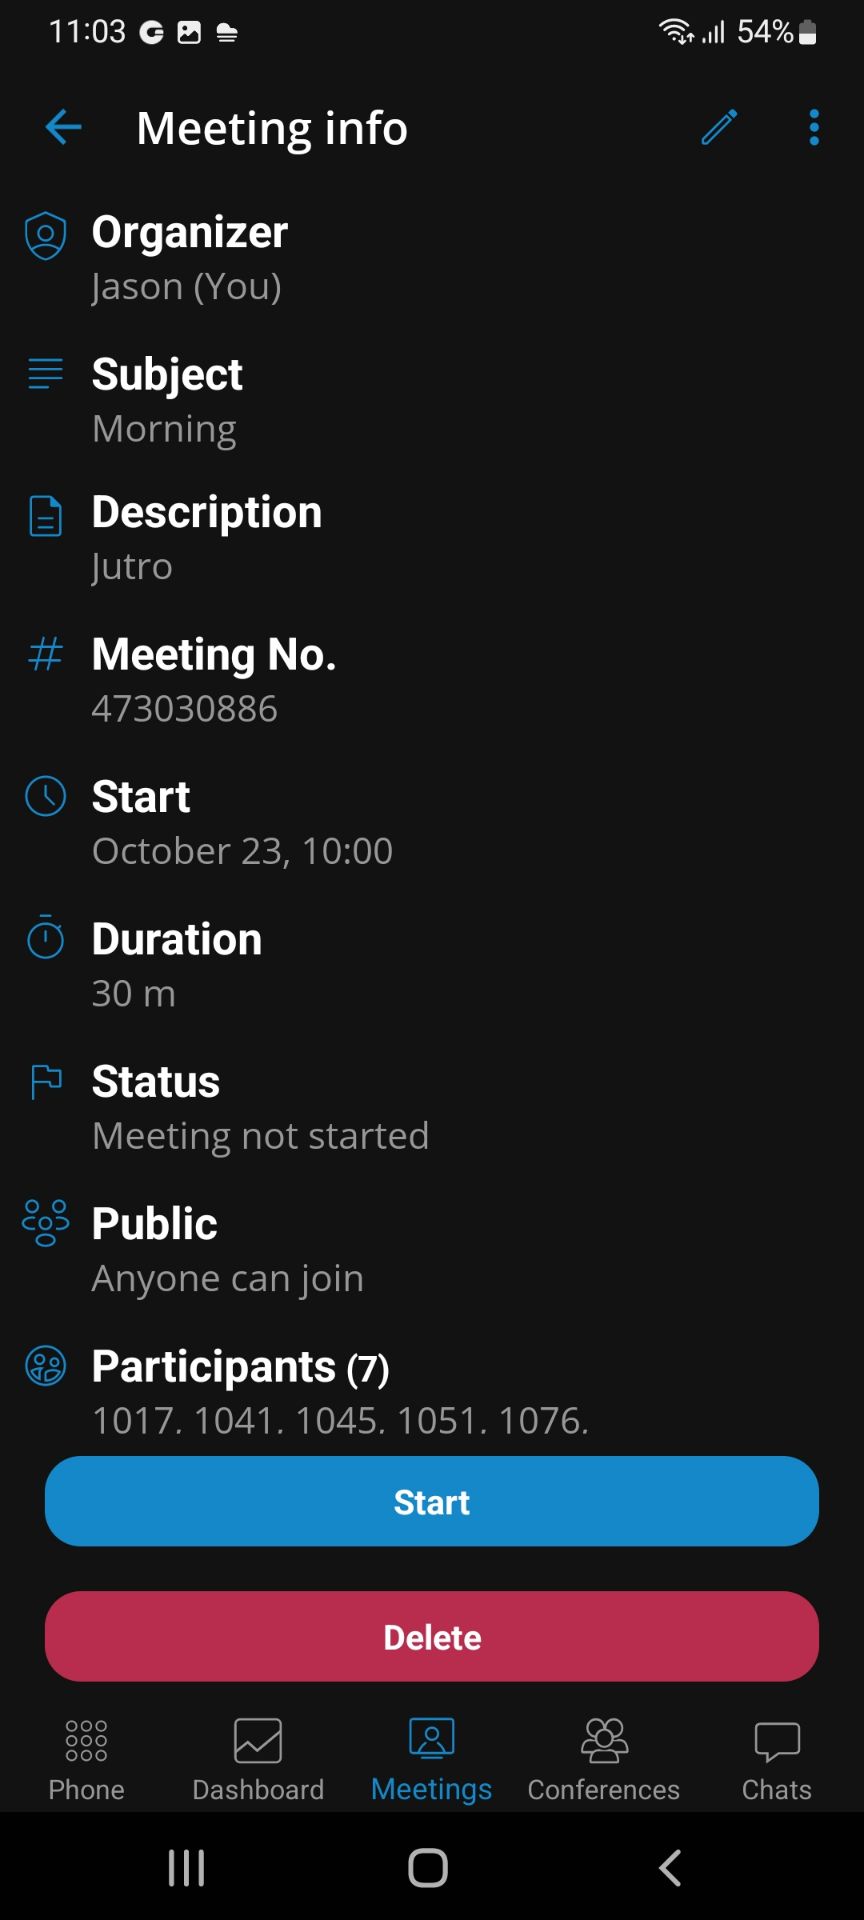
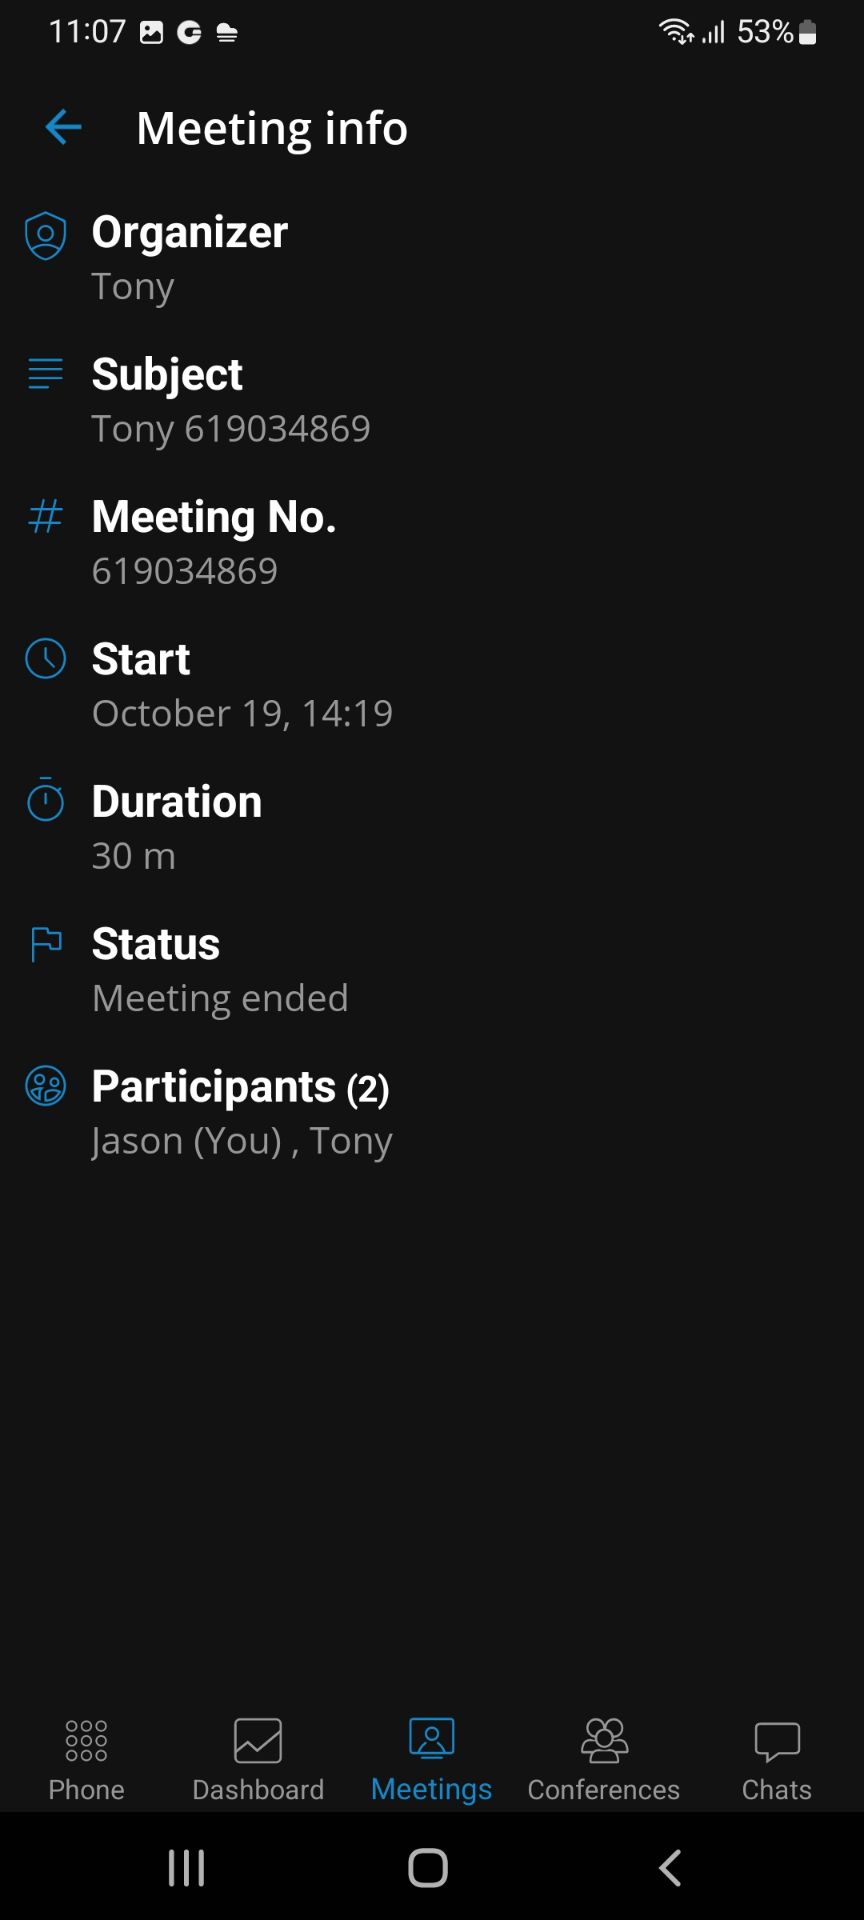
Meeting info screen
By selecting one of the meetings from the scheduled meeting list or history, the meeting info screen opens and shows the details of the selected meeting:
- Organizer
- Subject
- Description
- Meeting number
- Start time
- Duration
- Status
- Public
- Participants list

For a meeting that is scheduled but not started yet an organizer has the option to update the meeting details by clicking on the edit button in the upper right corner.
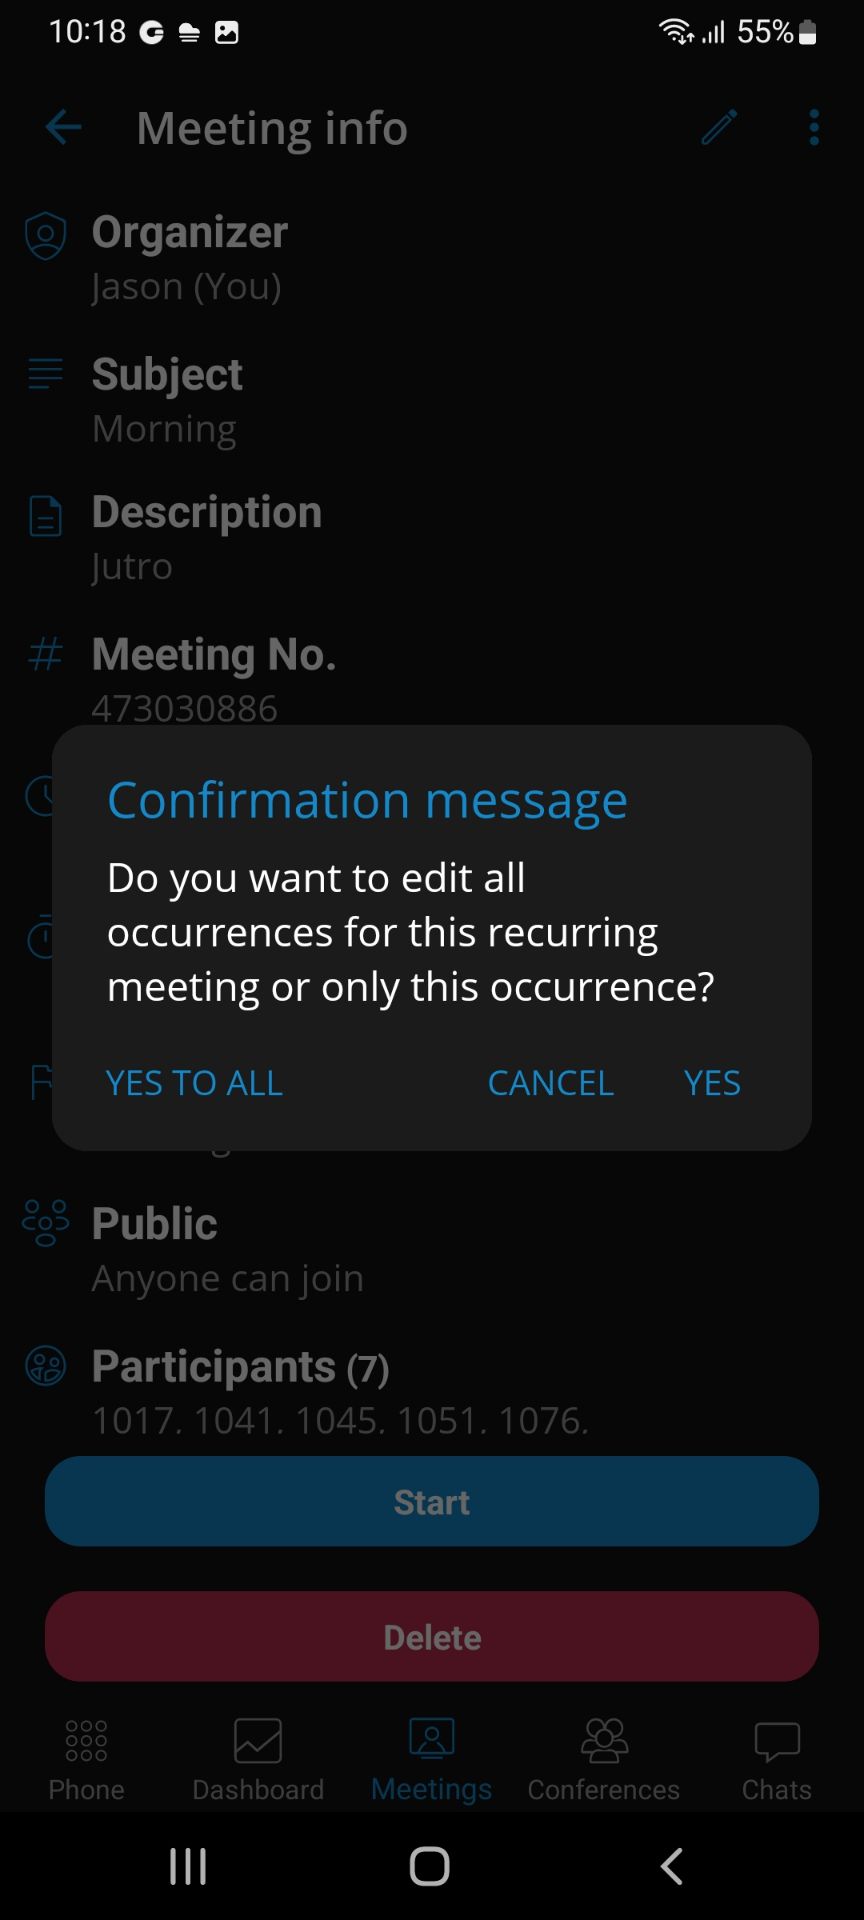
In case the selected meeting is recurring, the user will be presented with a confirmation message: “Do you want to edit all occurrences for this recurring meeting or only this occurrence?” with three options provided:
- Cancel (to cancel editing)
- Yes (to edit only a selected instance of a meeting)
- Yes to all (to edit all of the occurrences of the selected meeting)
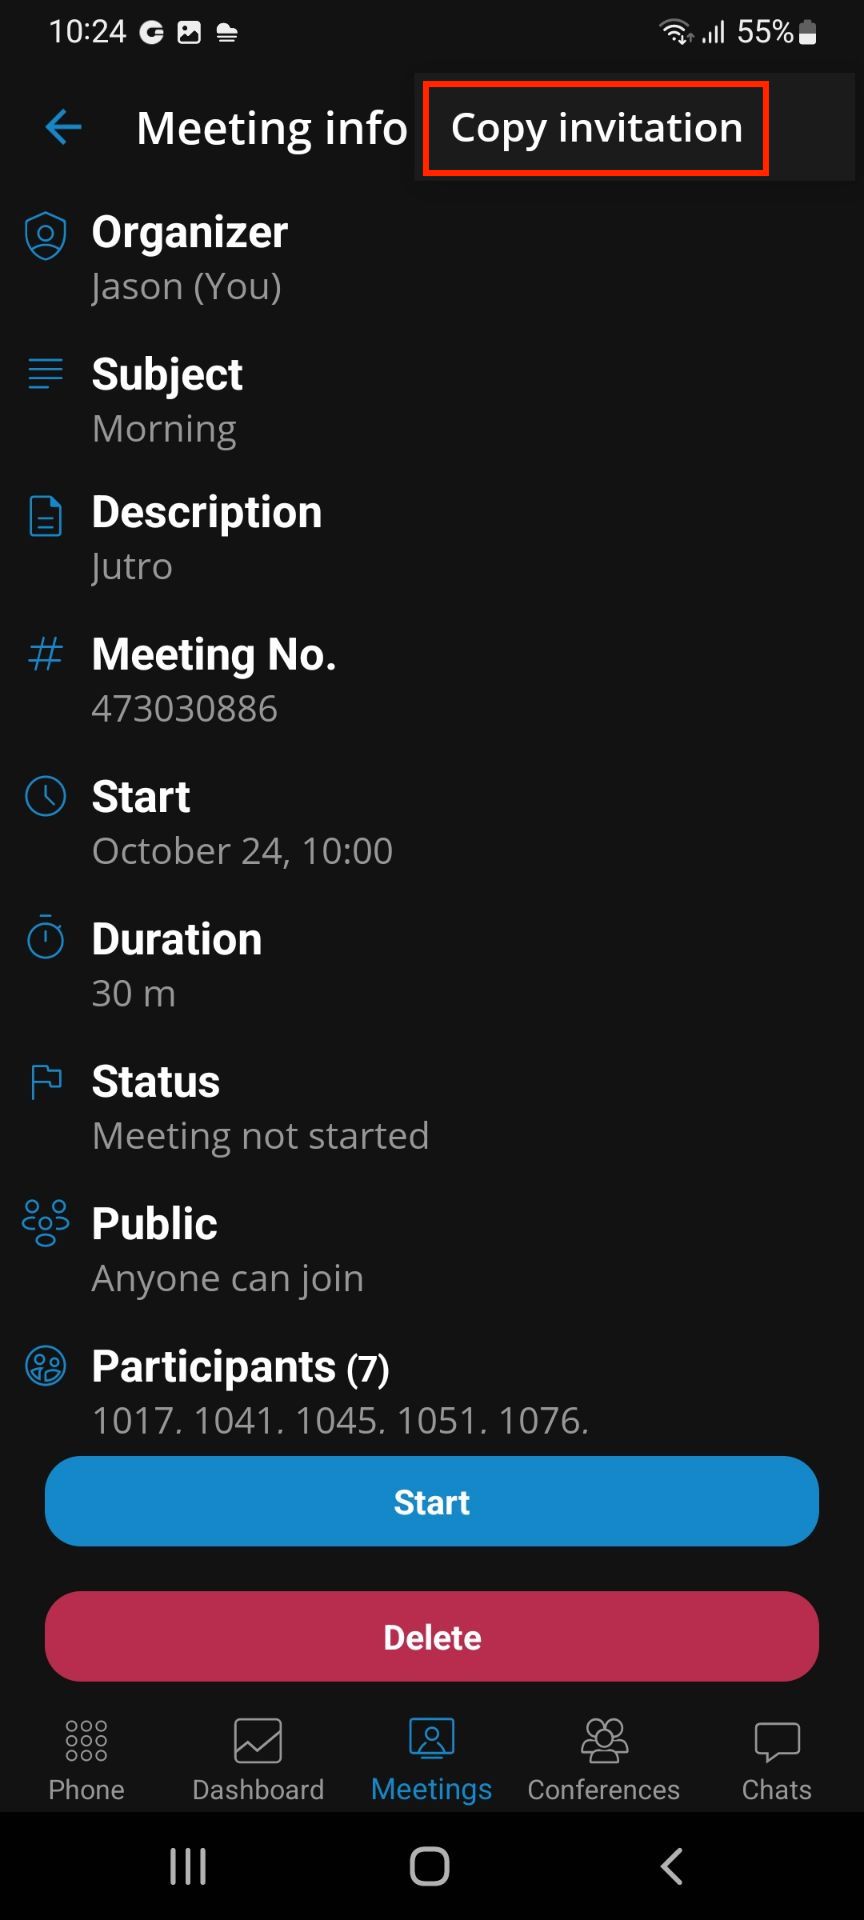
For meetings that are scheduled, or in progress, there is an option to copy the meeting invitation in the clipboard by clicking on additional options at the top bar.
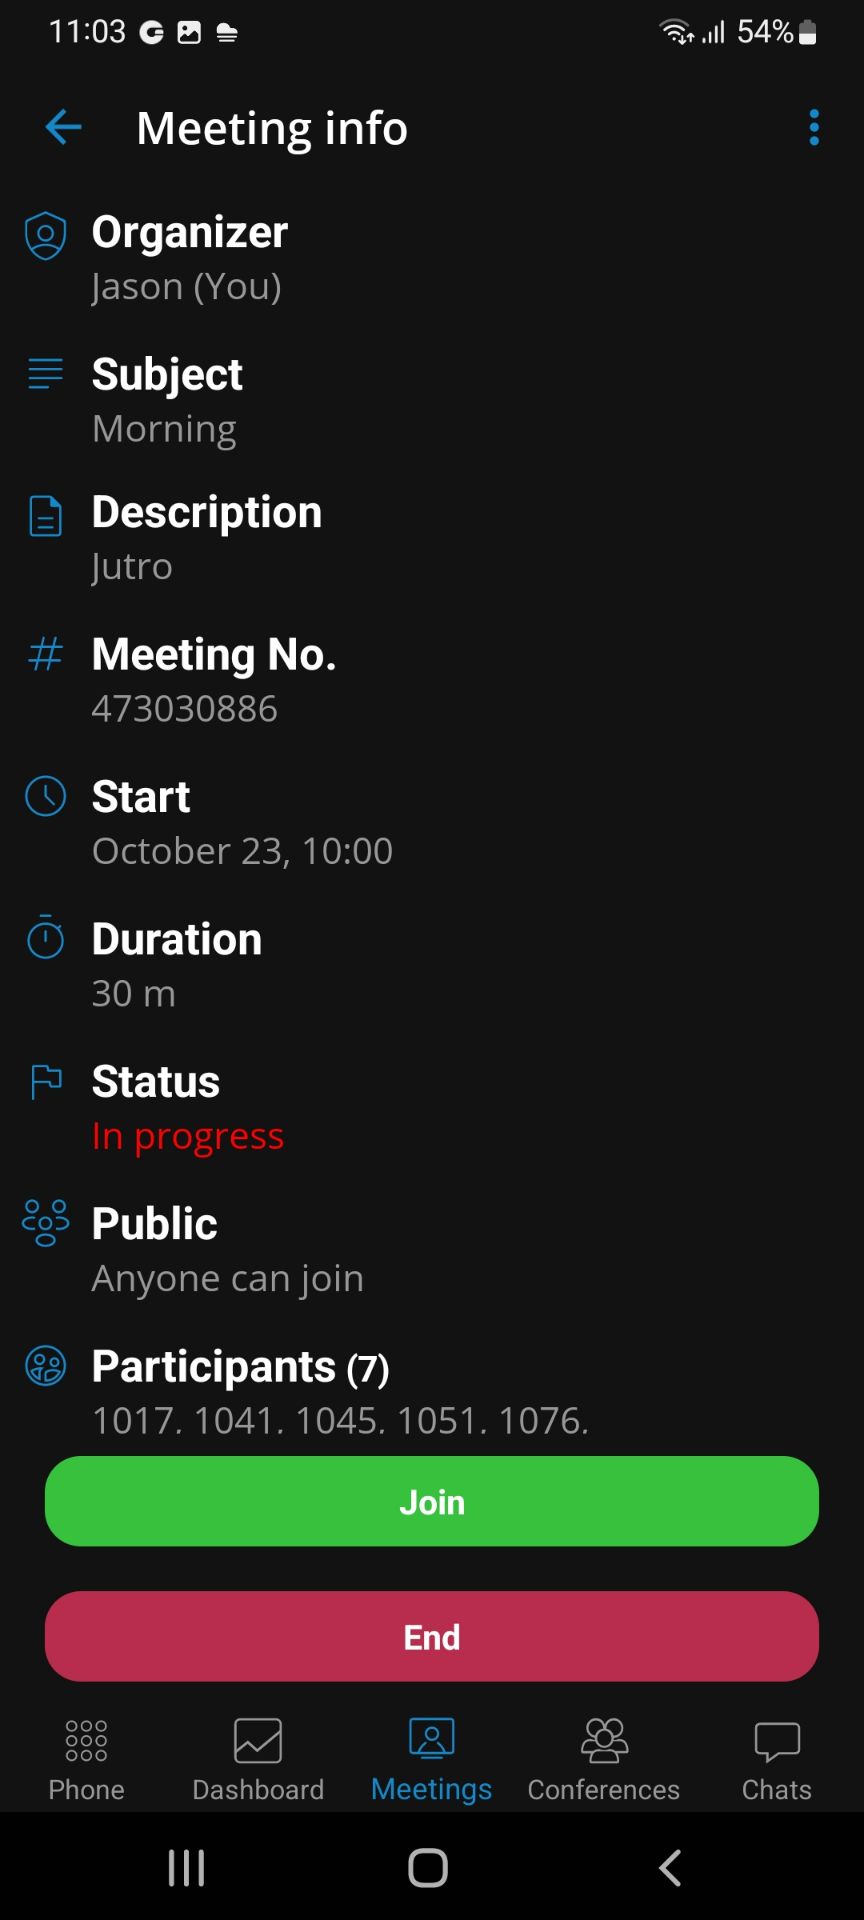
Based on the different scenarios, the user will have different buttons at the bottom of the screen:
• If a meeting is scheduled and the user is the organizer:
◦ Start (starts a scheduled meeting)
◦ Delete (deletes a scheduled meeting)
• If a meeting is in progress and the user is the organizer:
◦ Join (joins the ongoing meeting)
◦ End (ends the ongoing meeting)
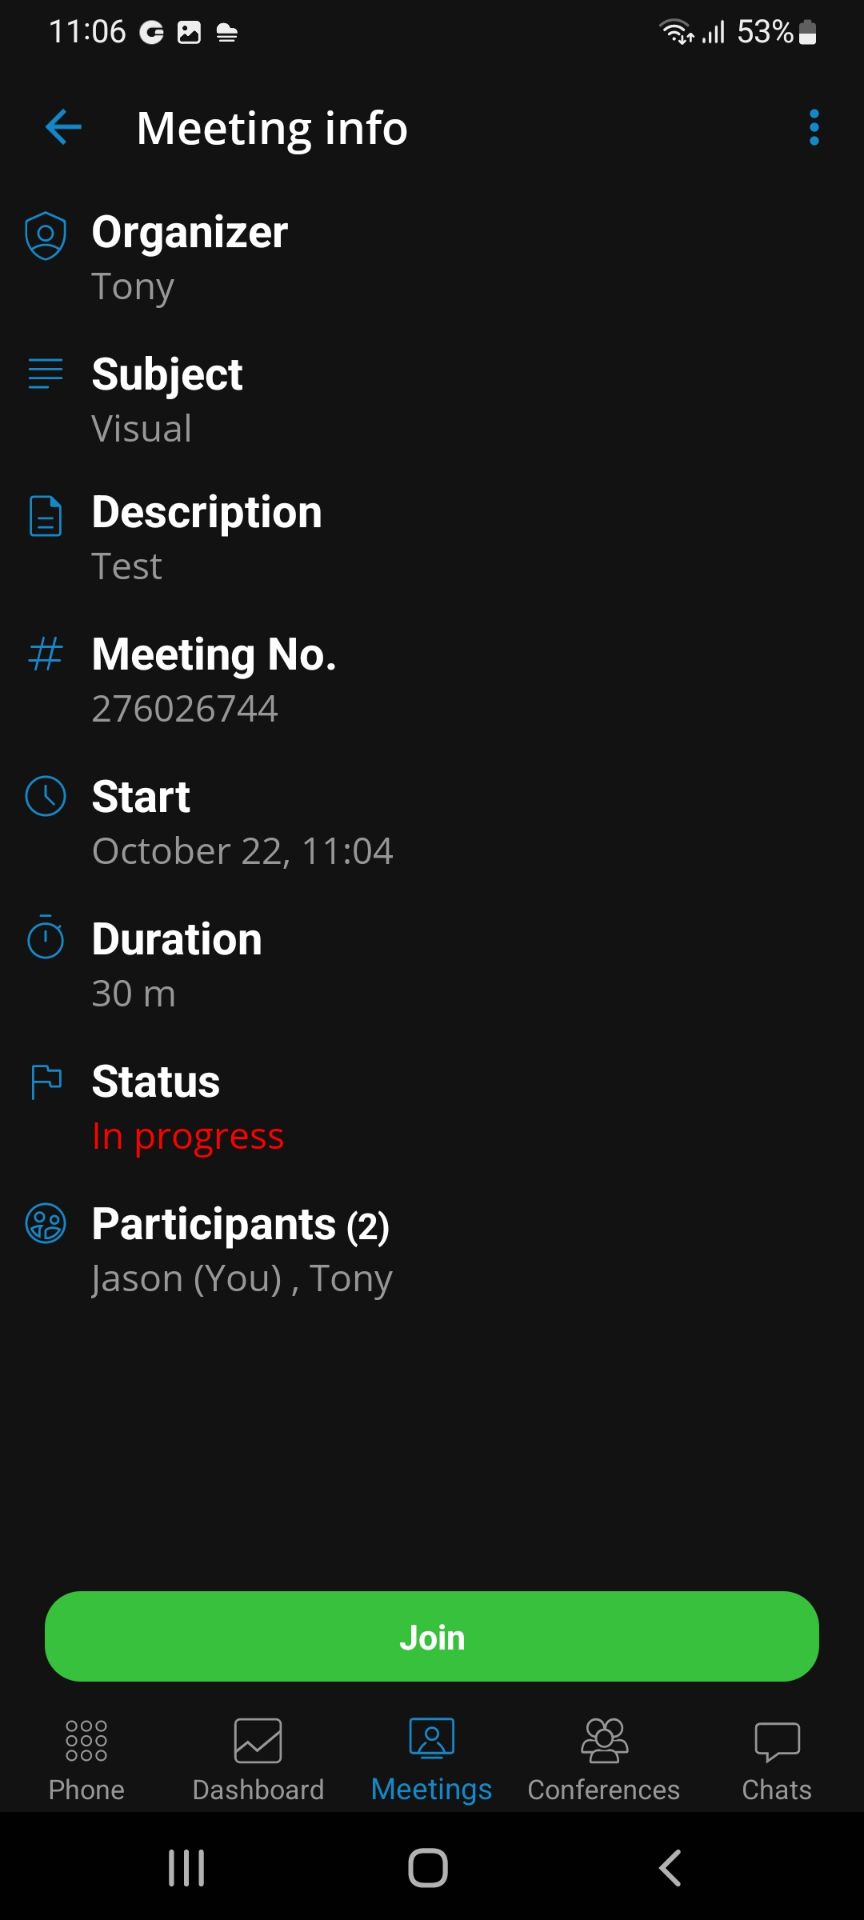
• If a meeting is in progress and the user is not the organizer:
◦ Join (joins the ongoing meeting)
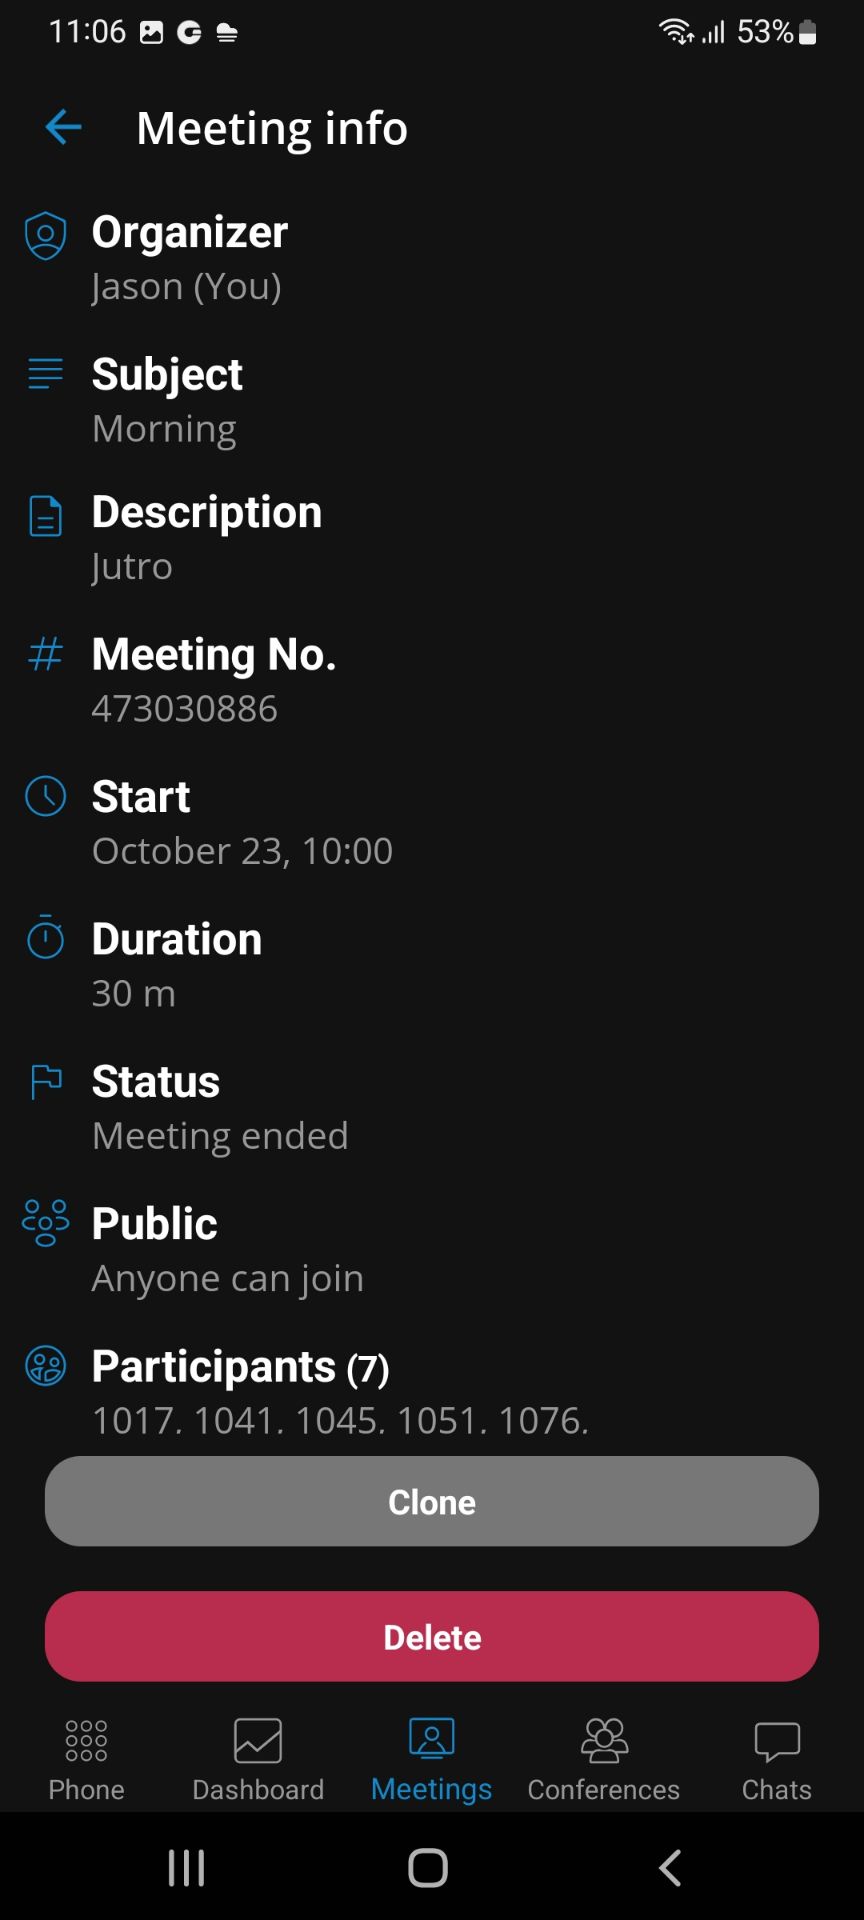
• If a meeting is finished and the user is the organizer:
◦ Clone (opens a “schedule meeting” window with name, description, and participants pre- filled)
◦ Delete (deletes the ended meeting)
• If a meeting is finished and the user is not the organizer, no options will be available.
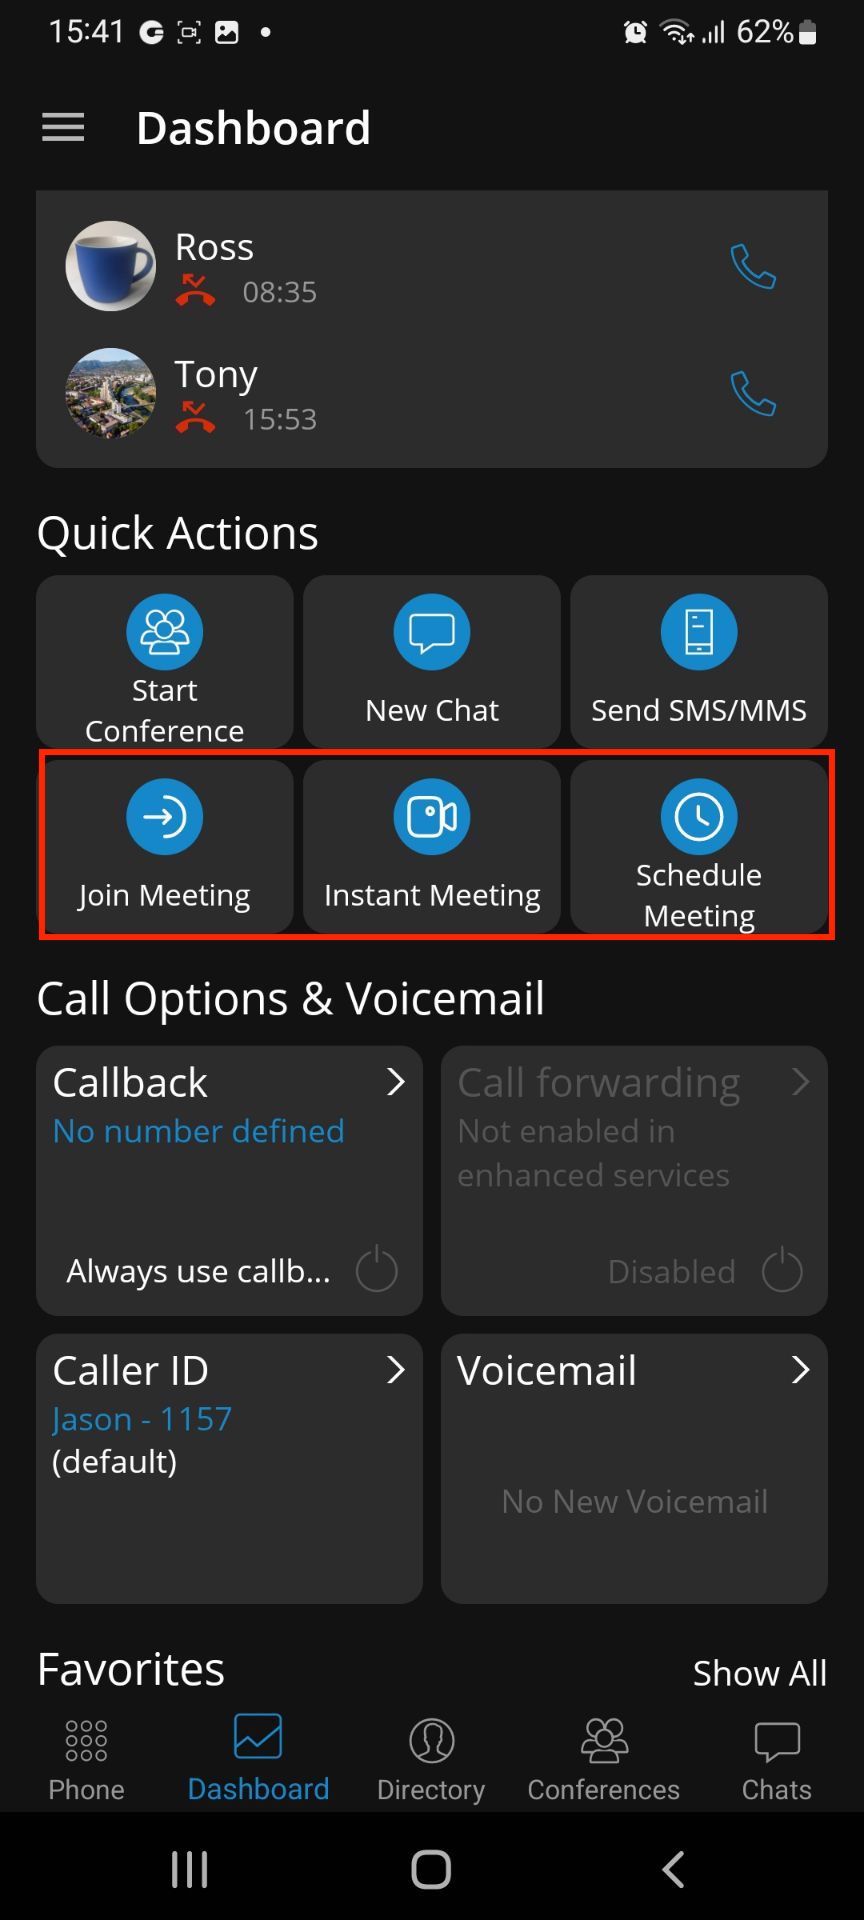
Meeting dashboard panel
The user has the ability to start/join/schedule a meeting from the dashboard. In the quick actions panel, there are 3 options available:
- Join Meeting
- Instant Meeting
- Schedule Meeting
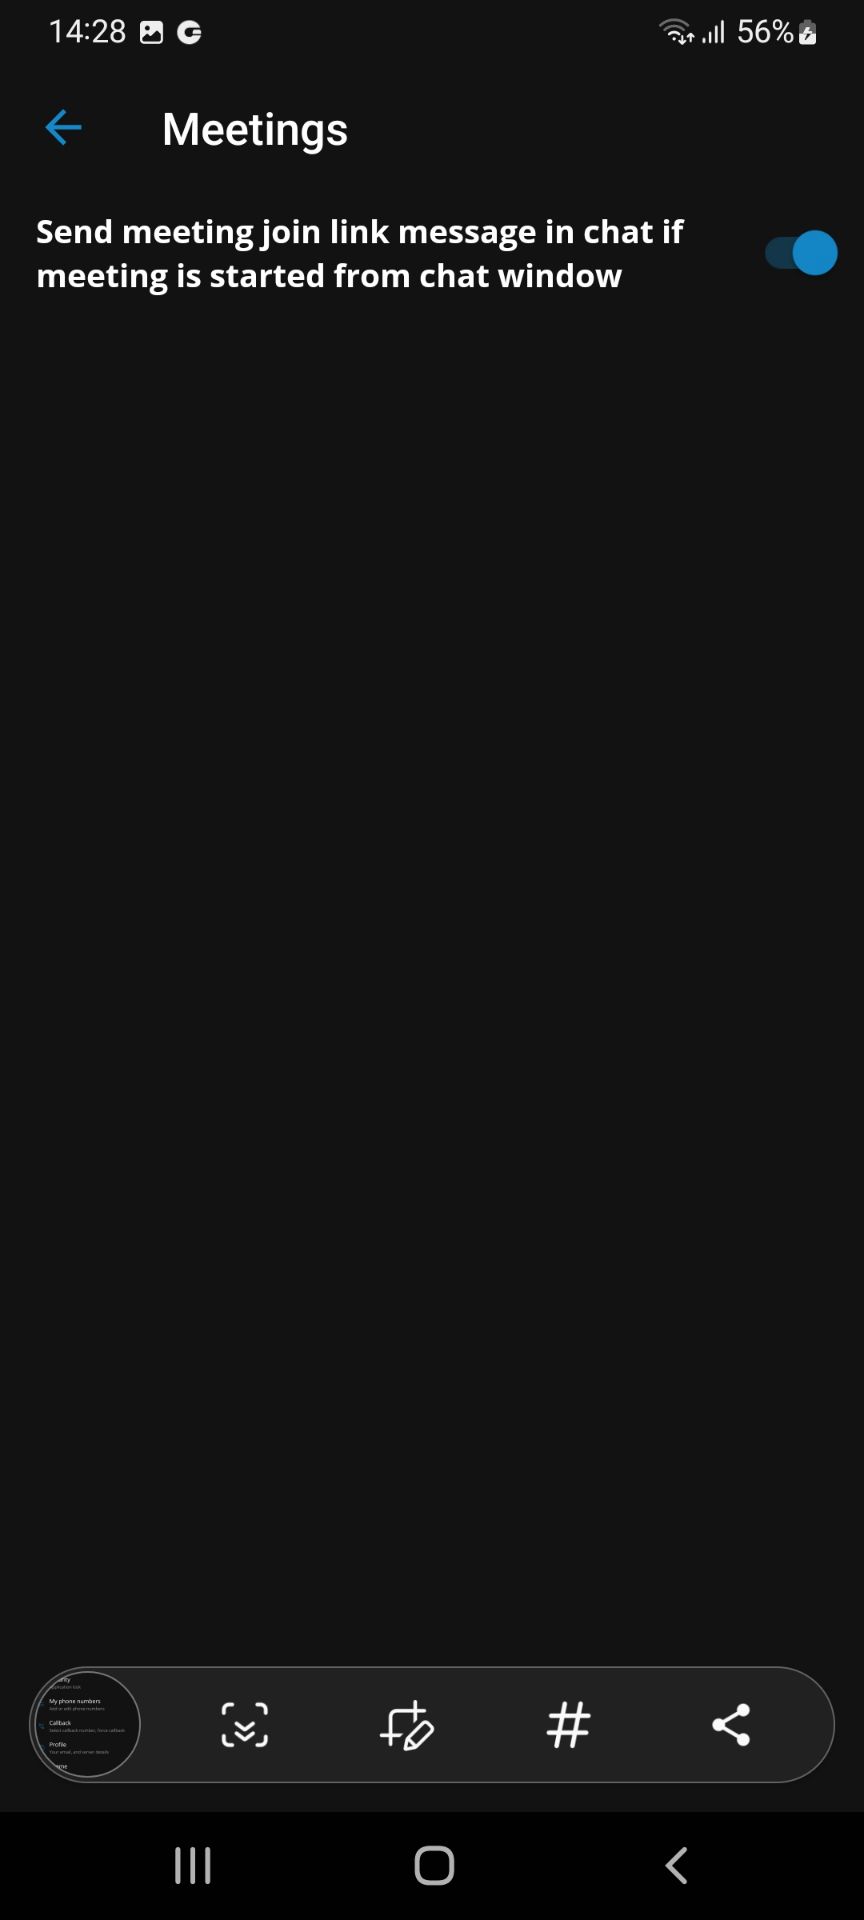
Meeting settings
The user can change meeting integration options by pressing on the meeting screen in the settings.
It's possible to enable/disable sending of the meeting link as a chat message if a meeting is started from the chat window.
Chat
Chat is one of the main features of gloCOM GO 6.
Chat conversations are synced between all of gloCOM.
Users can start a chat in two ways:
-
Via chats item in the bottom menu and pressing on a + icon (one-to-one or group chat)
-
Via user information display screen (one-to-one chat with the user you are previewing)


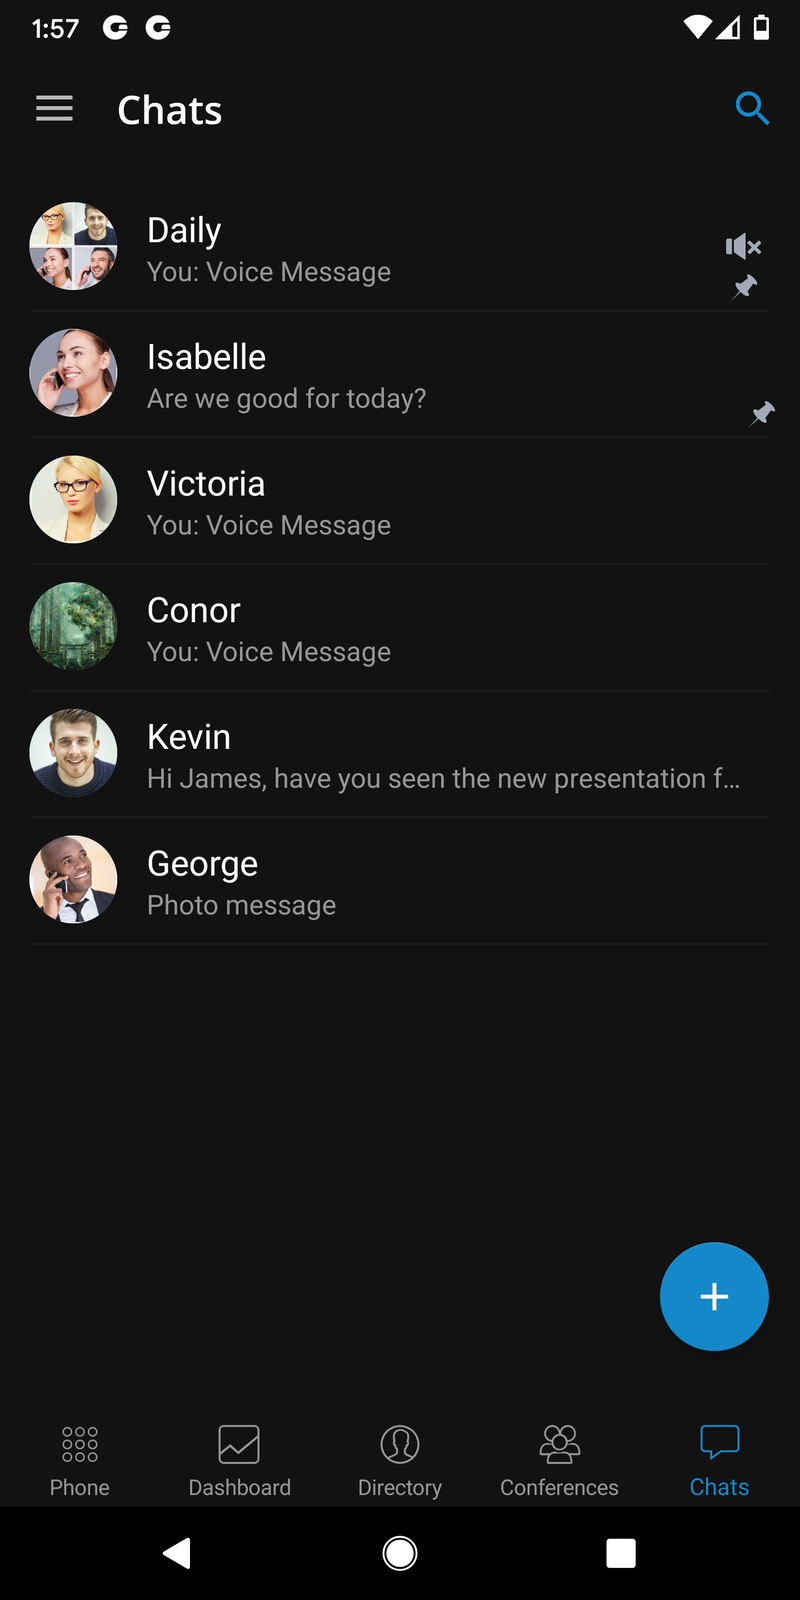
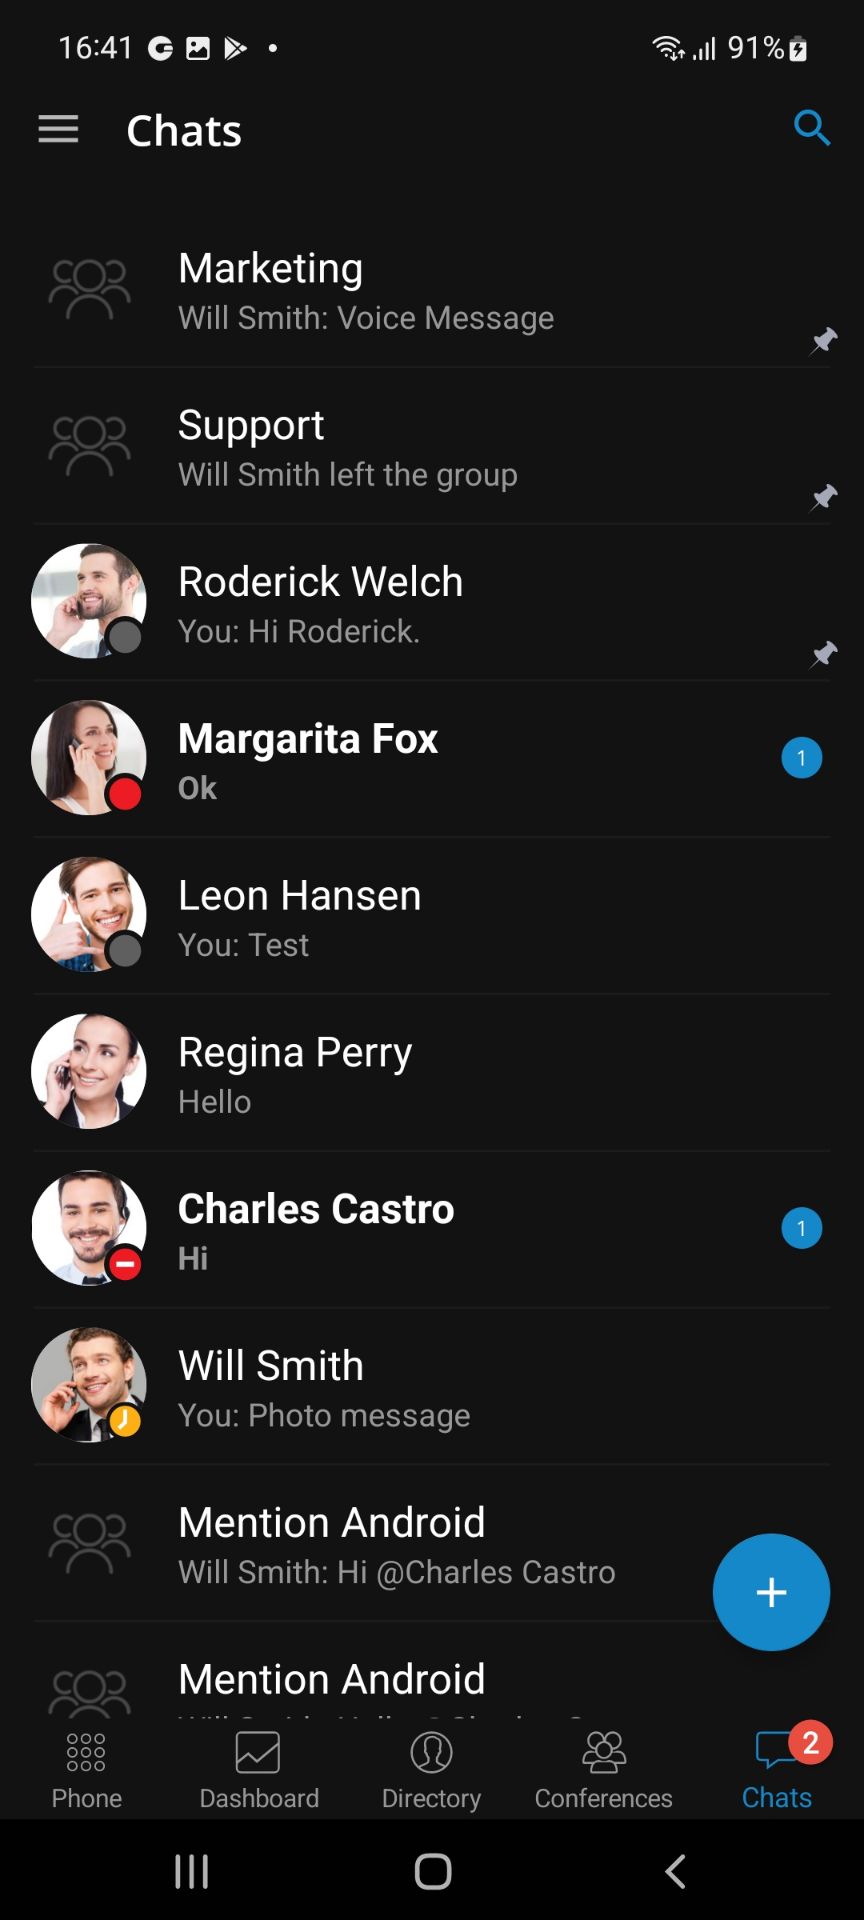
All chat sessions can be found in the Chats icon in the bottom menu with a number of unread messages for that chat session and the last message for that chat session.
Users can also search chats by pressing a search bar in the Chats feature. Chats can be searched by group or user name.
If a user does not have a chat session with another user, that other user will be displayed when the user searches for it in the Chats tab of the app. When the user presses on a user that he does not have the chat session, the chat session will be created, and the user can start chatting.
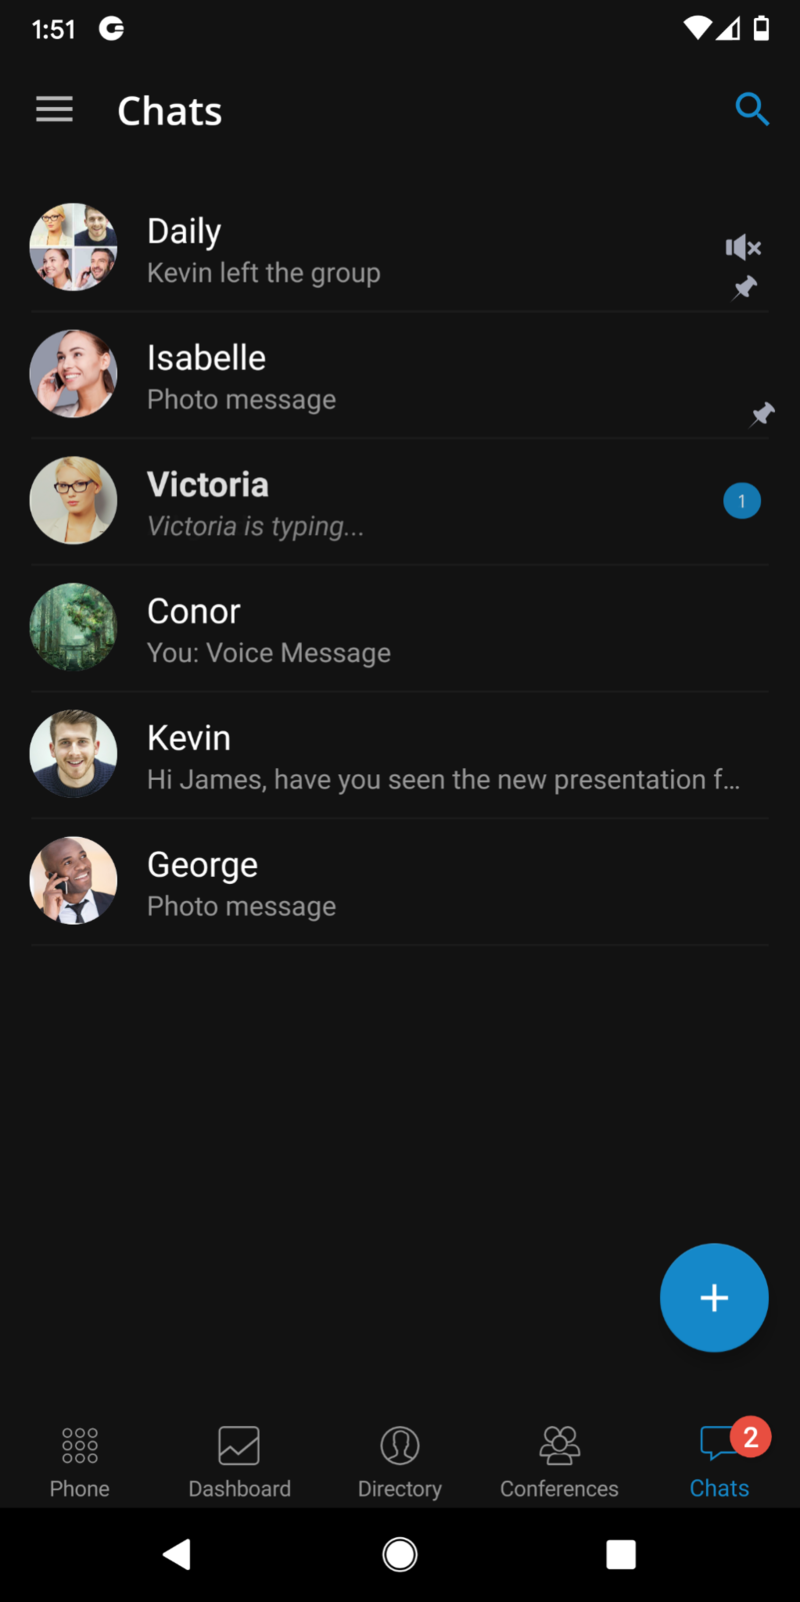
The total number of unread messages is always displayed on the bottom icon of the Chats section. This number reduces as the user reads the unseen messages.
When chat messages or sessions are syncing from the server, the app will display a yellow indicator below the navigation bar. The app is fully synced with the server when the loading indicator disappears. If the user logs in with a mobile app for the first time, it could take seconds to sync the recent chat sessions.
If chat is not enabled for a user on the PBXware, then the app will not display the Chats module for that user.
Banner message to indicate that the chat server is down
A yellow banner will be shown on the chat list and chat screens to indicate that the server is unavailable.
One-to-one chats
One-to-one chats are chat sessions between two participants that are users of one PBXware.
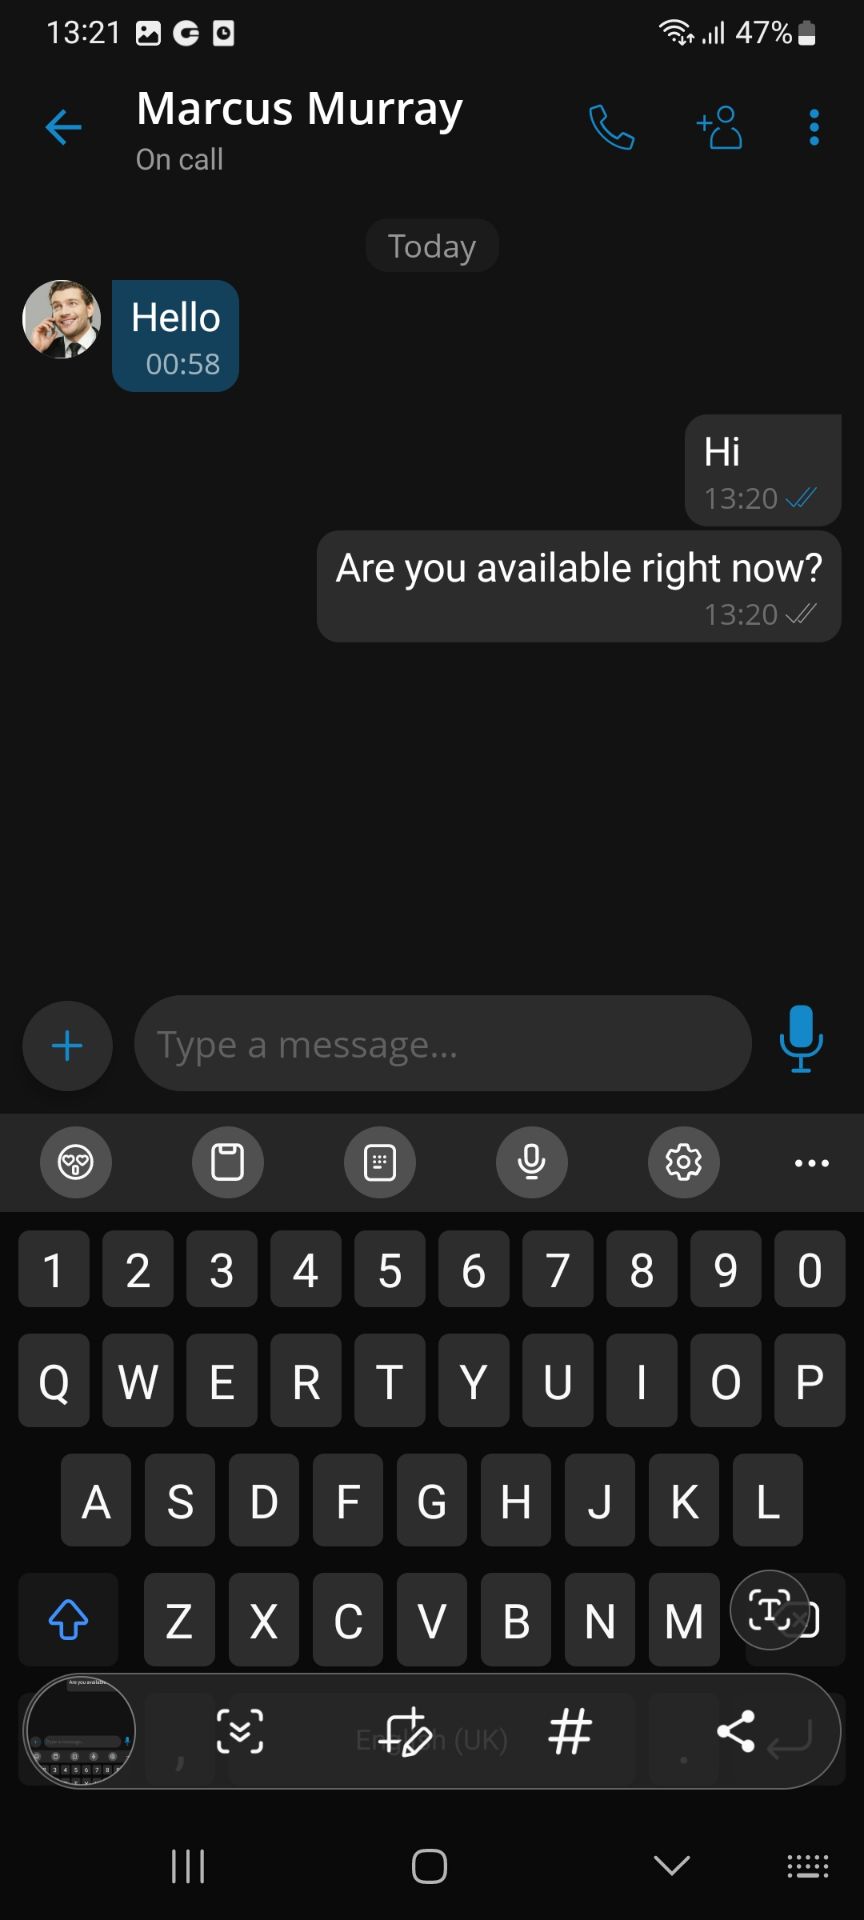
When users enter a chat on the bottom bar can type a message just like on any messaging app. It is also possible to send files with gloCOM GO 6. The default file size limit is 50 MB, which can be changed in PBXware.
On the navigation bar, users can see the user’s name they are chatting with and their Presence status. On the right, users can find the Call button that will start a call with the extension and the Info button that will open the screen containing chat information and options.
In the chat info screen, there is an option to create a group chat from one-to-one chat. This will create a new group chat with a clean history.
Chat can also be deleted from the chat info screen. The deletion of the chat will only be visible to the user that deleted it.
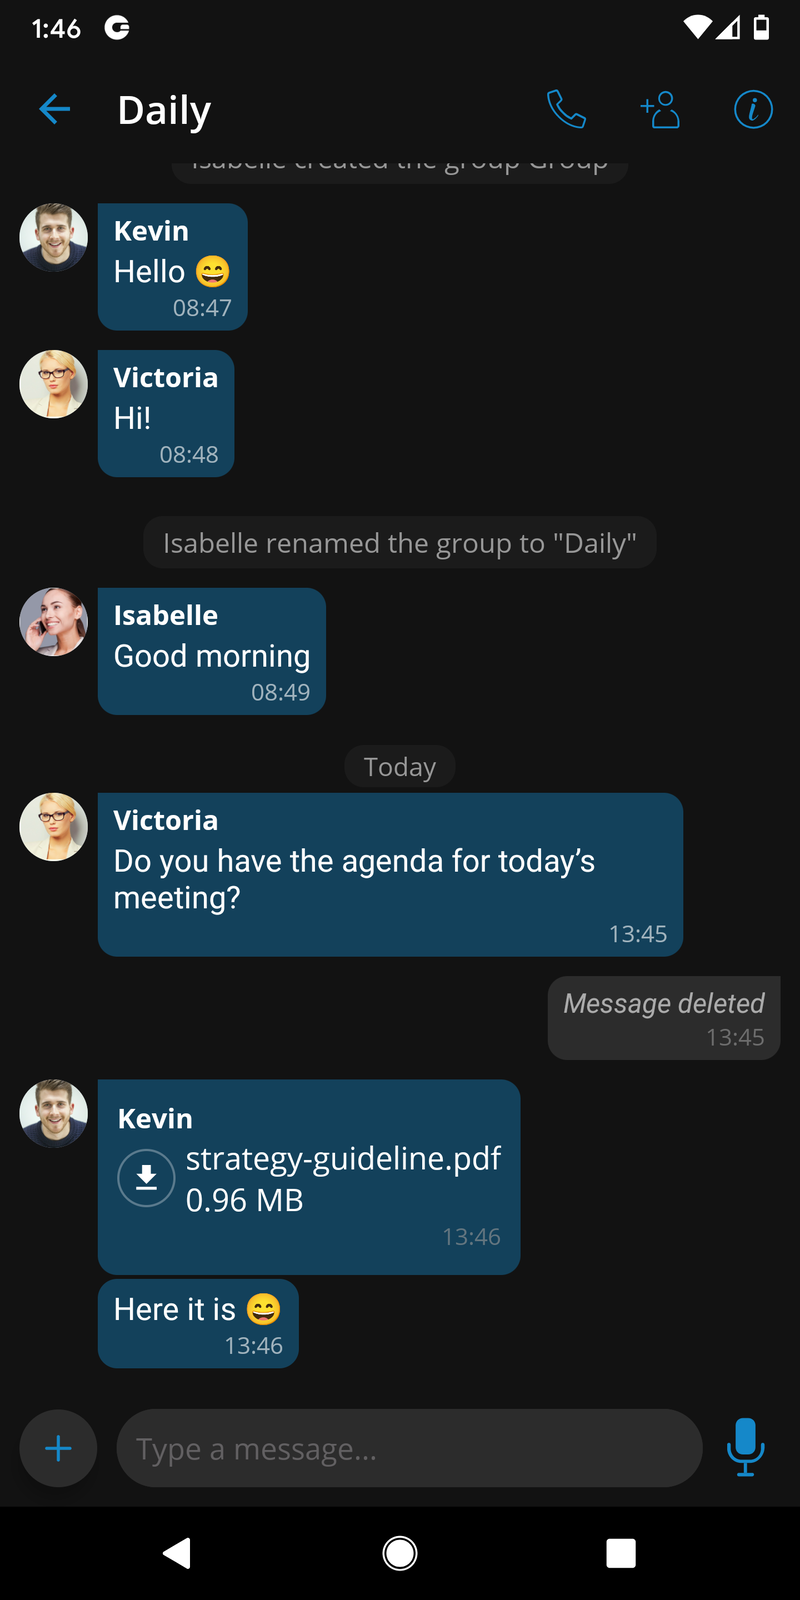
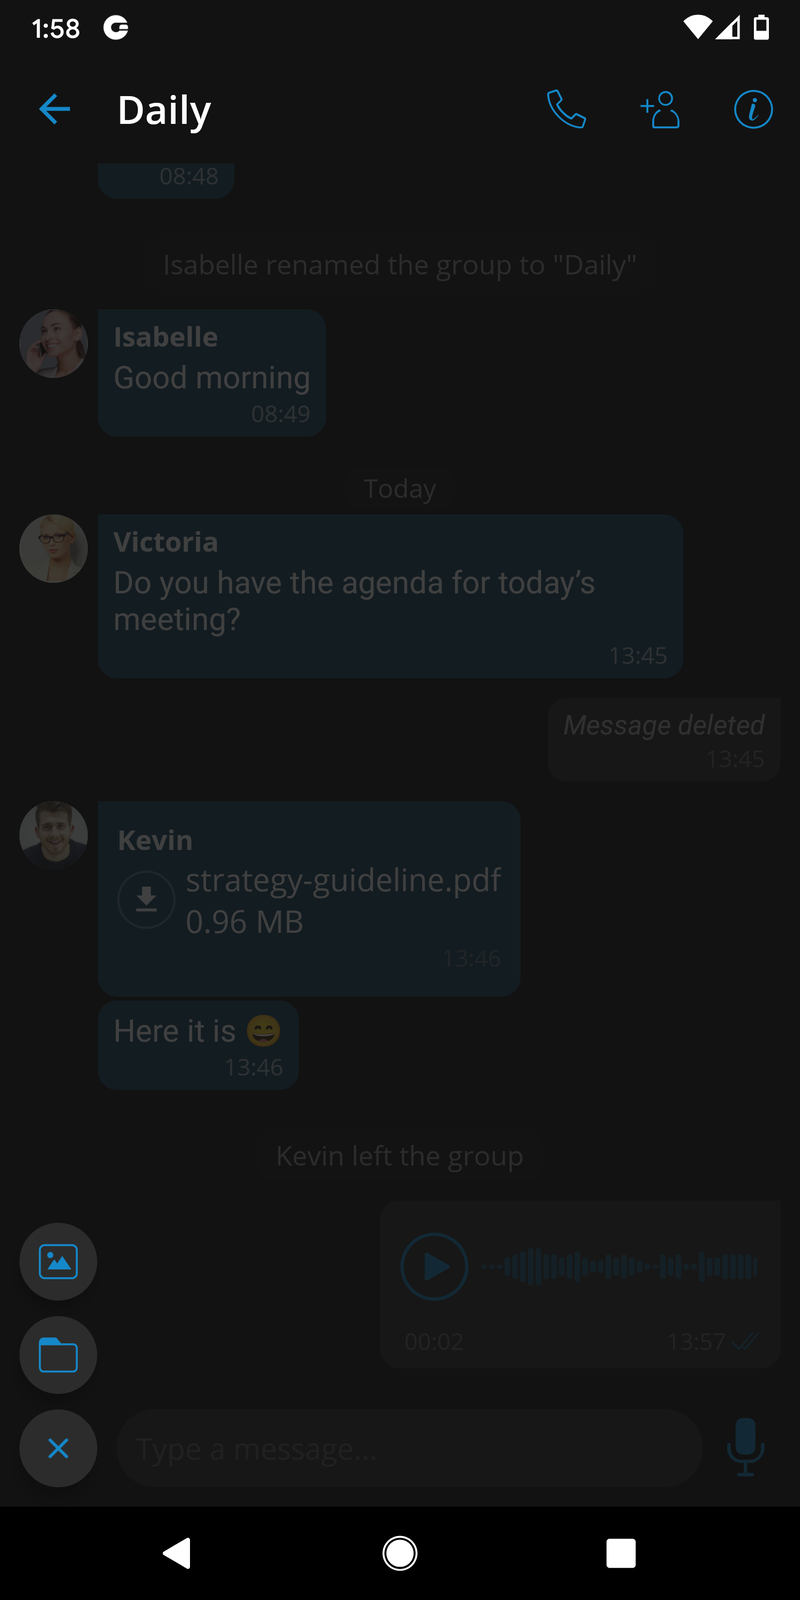
Group chats
Users can start a group chat by pressing a + icon on a Chats item in the bottom menu or by creating a new group chat from one-to-one chat on the chat info screen.
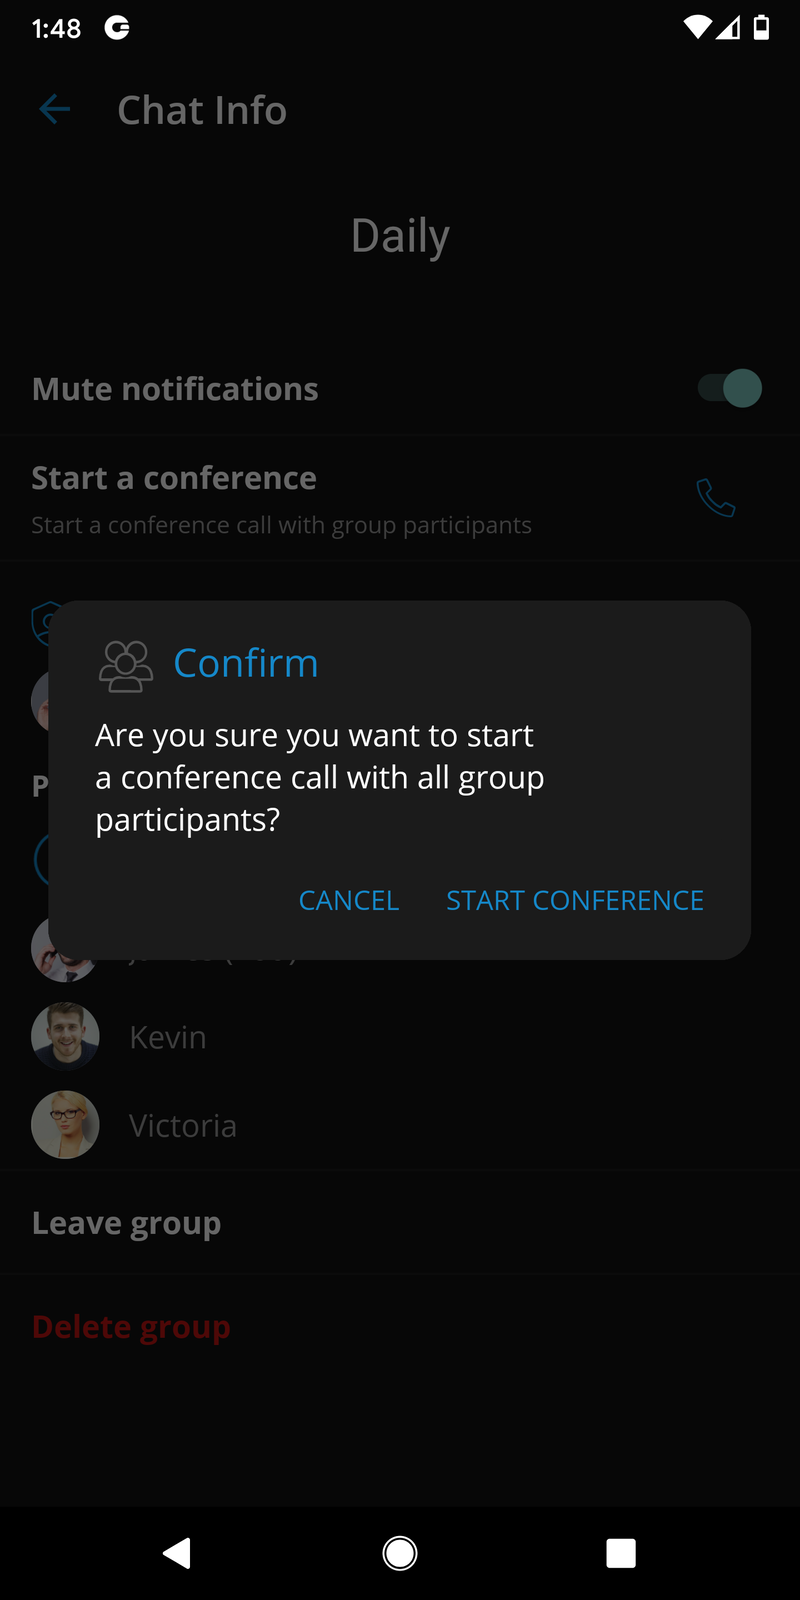
The group chat user interface is the same as for one-to-one chat. The call button has a different function, and in group chat, it will start a dynamic conference with group members. If there are more than 20 group members, calls will be disabled.
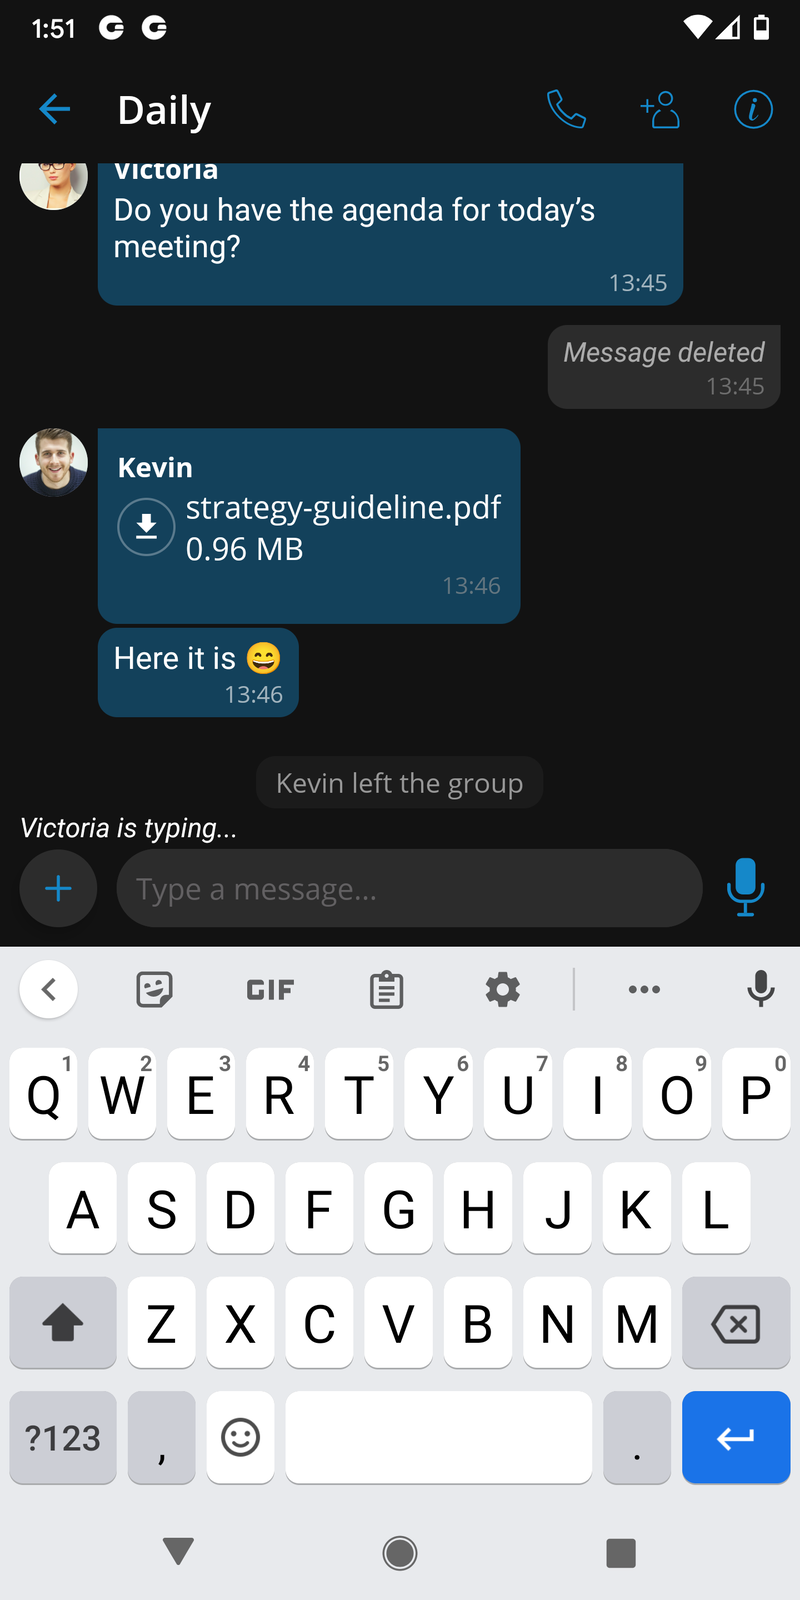
Group chats have events informing users that the chat name has been renamed or some users joined or left the chat.
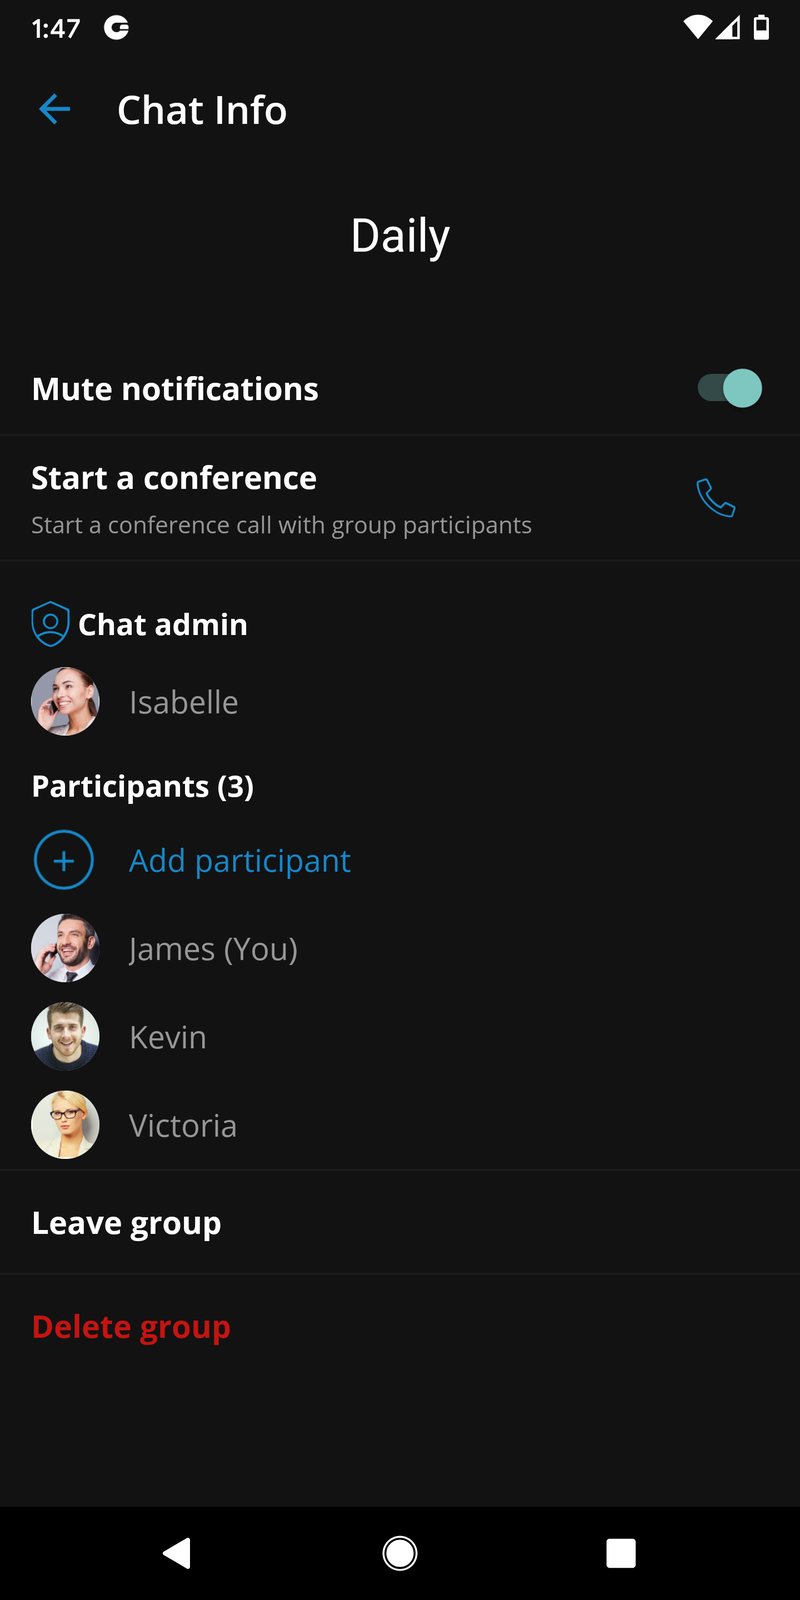
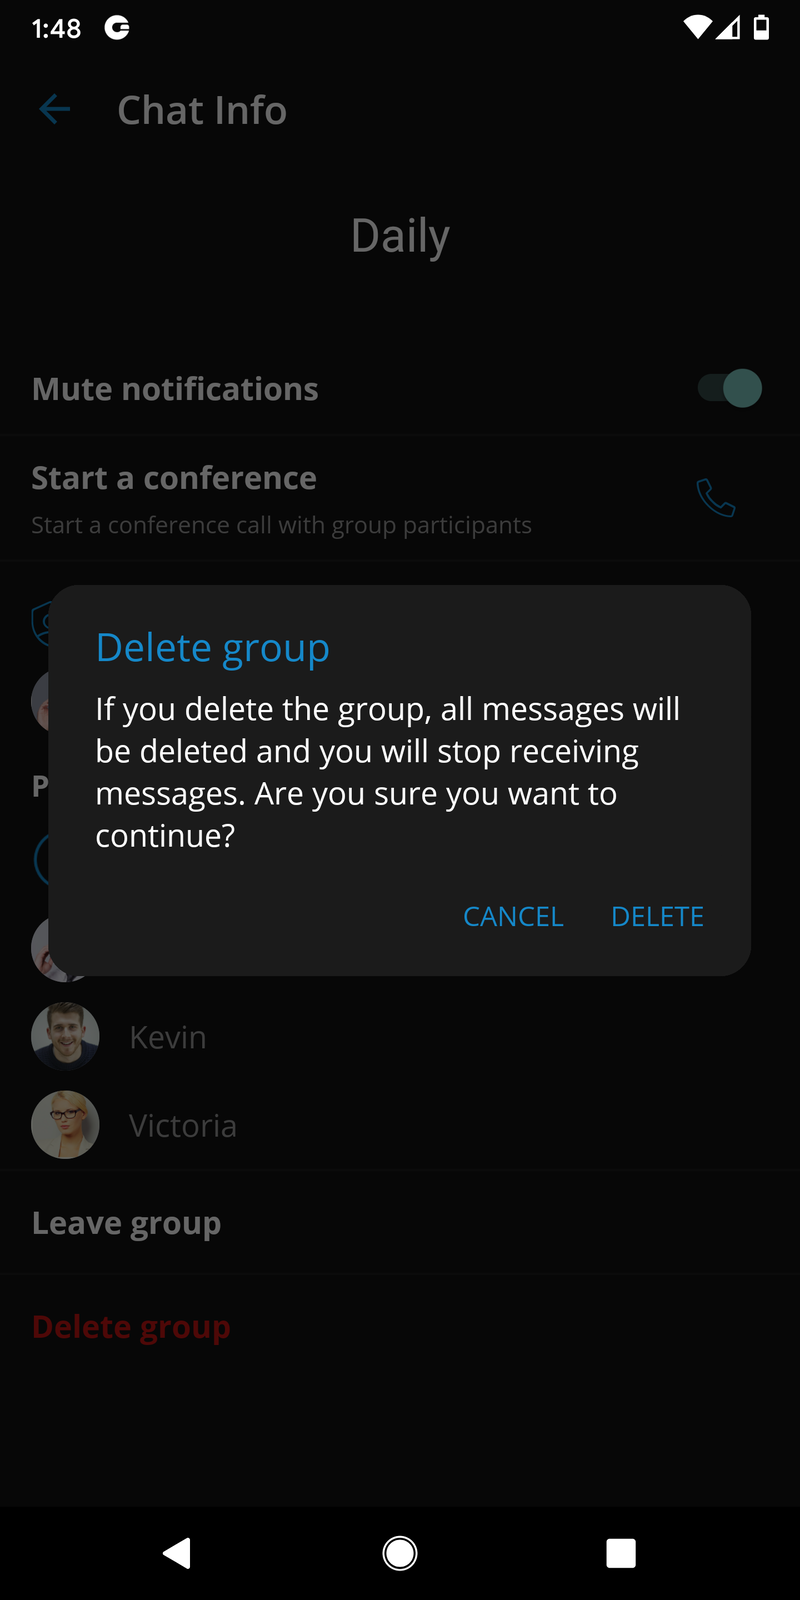
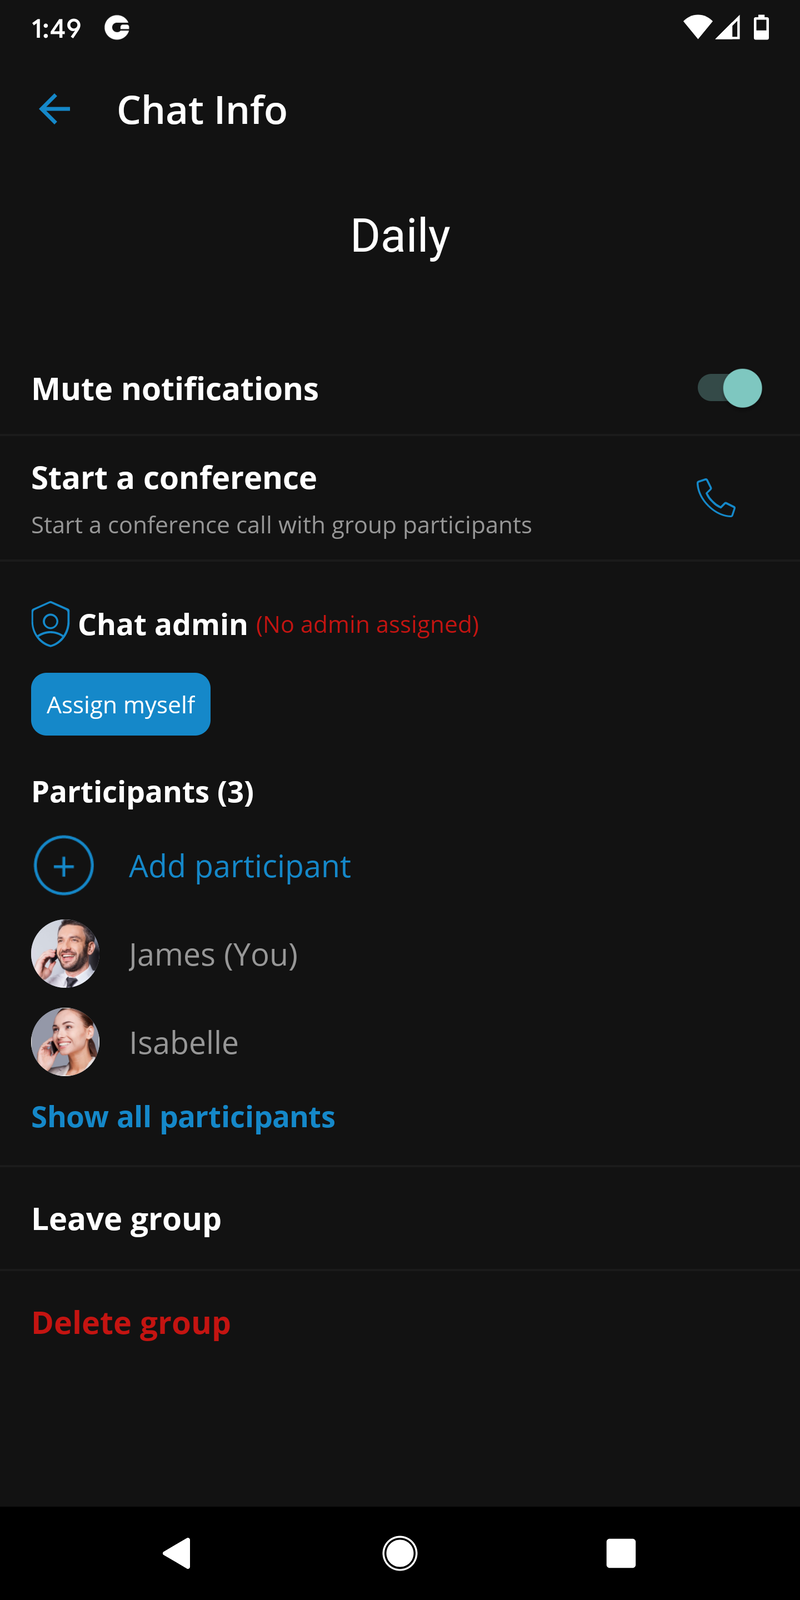
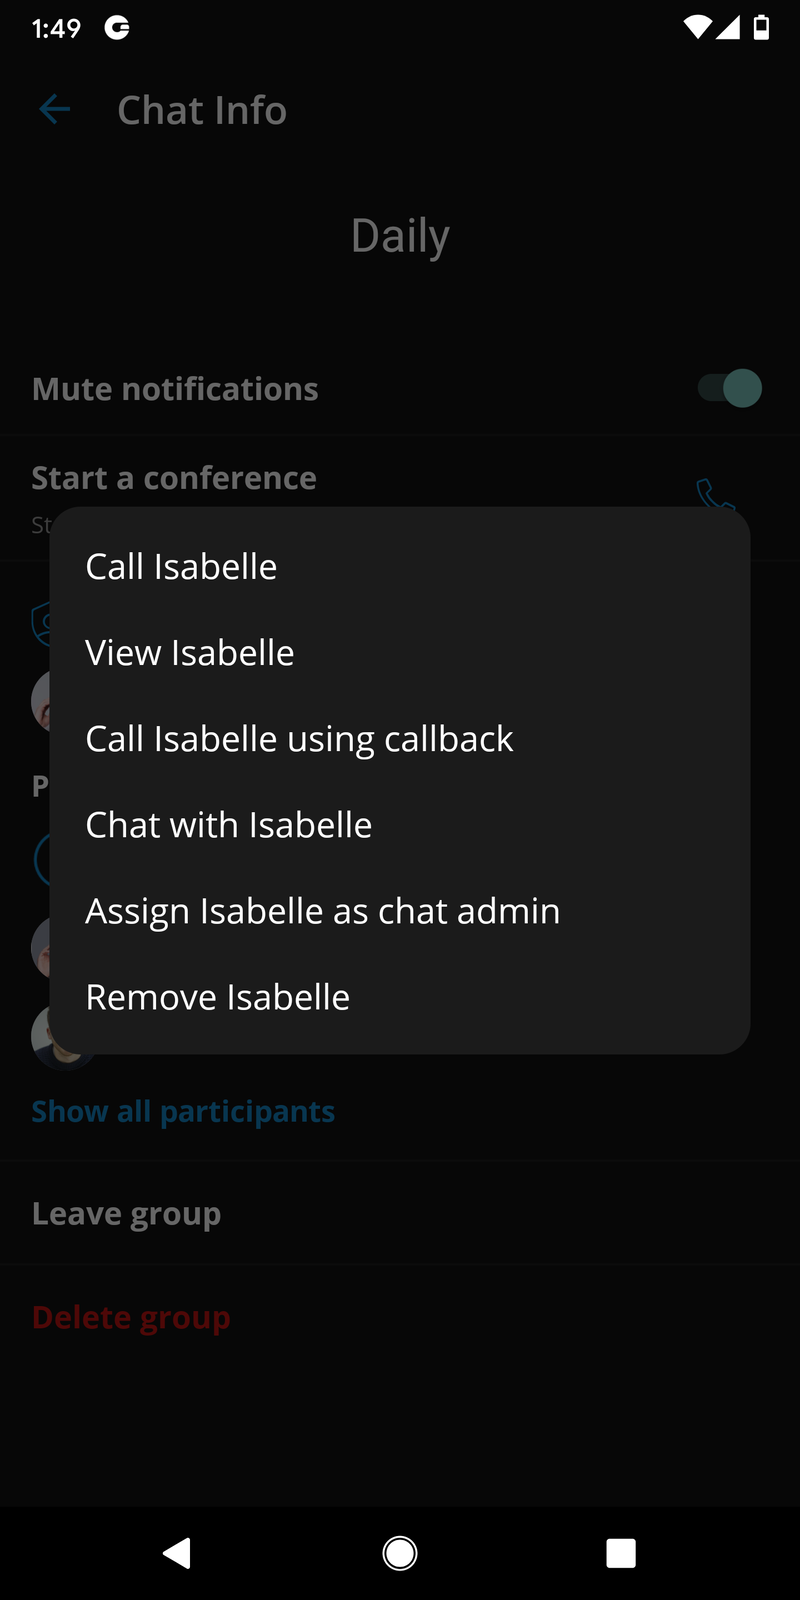
The chat info screen for a group is different than a one-to-one chat info screen. On the chat info screen for a group, users can add more participants to the group, see all of the group participants, mute group notifications, and start a dynamic conference for that group. The group administrator also has an option to rename the group chat.
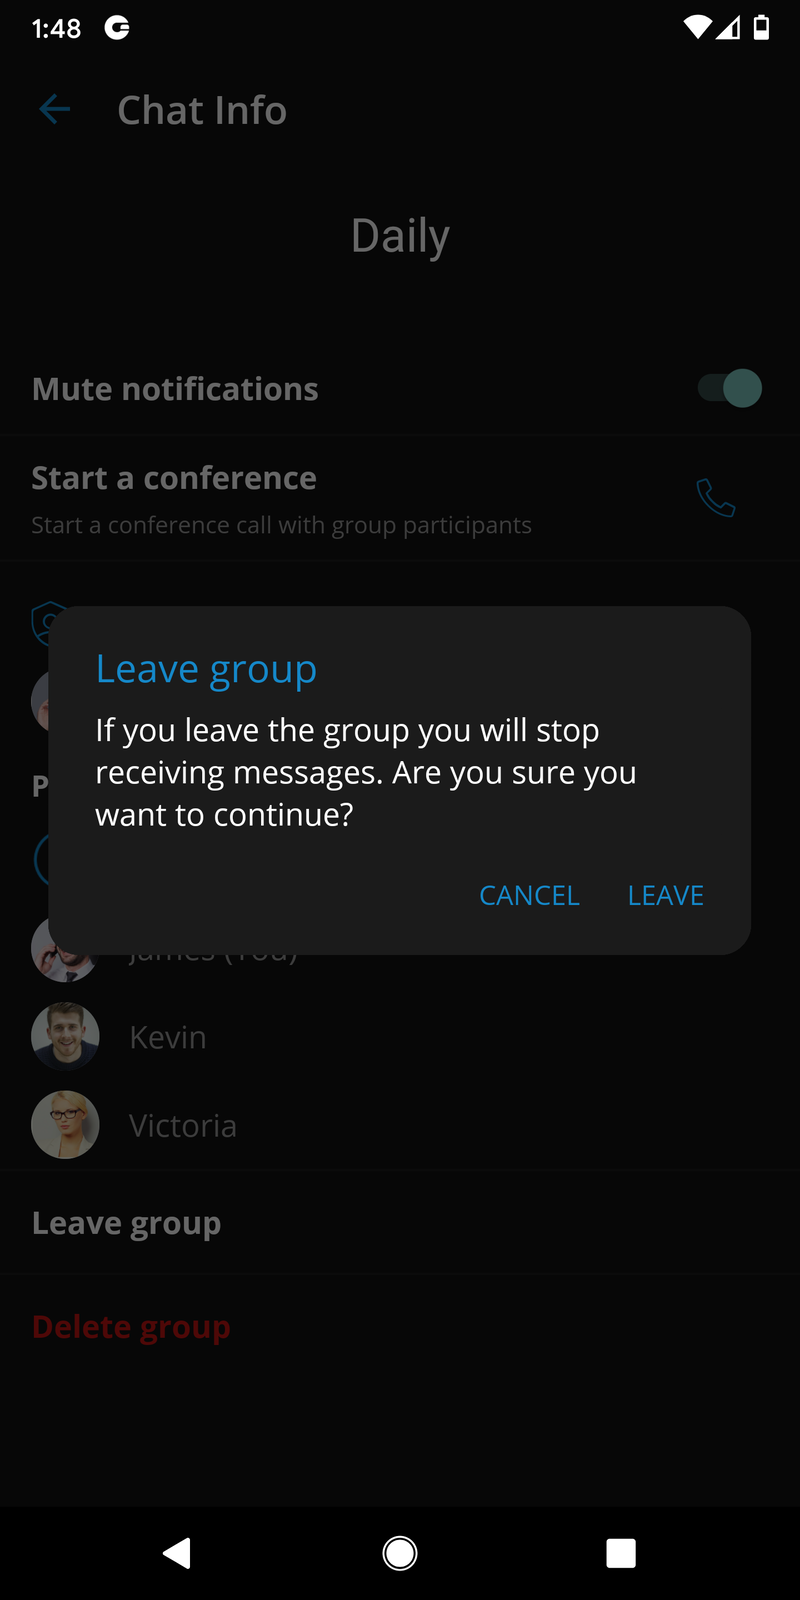
It is also possible to leave the group, meaning that the history of all messages until the user has left the group will be synced by client apps. Another possibility is to delete the group, and then the history will not be visible, and the group chat will be deleted for that user.
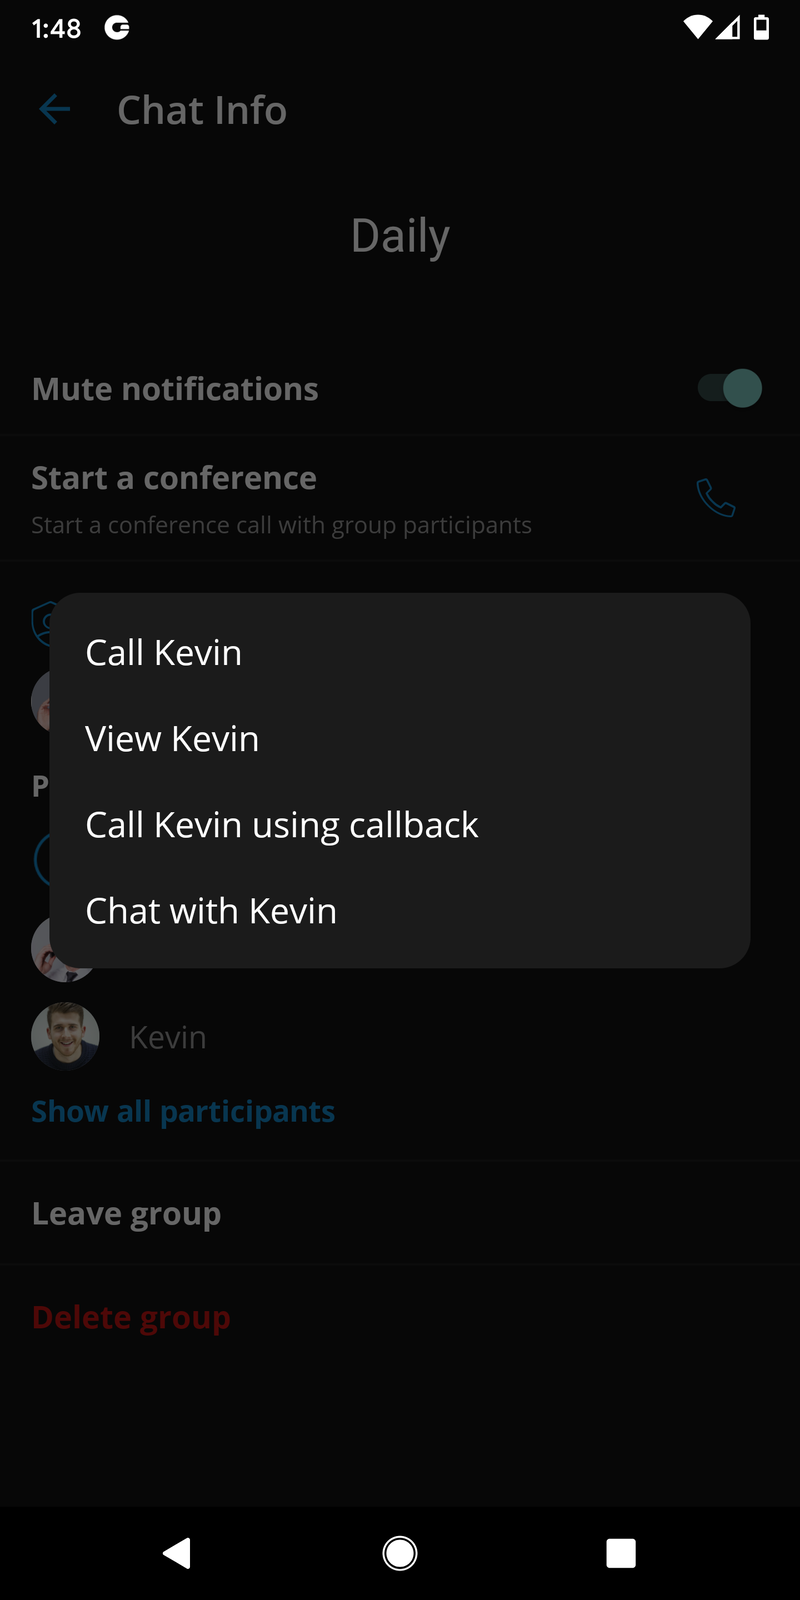
When pressing a chat participant in the chat info screen, users can view their user profile, call them or start a one-to-one chat. Group administrators also can assign participants as group administrators or remove them from the group chat.
When the group chat session is muted, users will not receive notifications (push and in-app) for that chat session. The mute option is synced between all users' devices.
A muted chat session will have a mute icon in the chats list indicating that the session is muted.
Shared Groups
Users can create a shared group in which all group history will be visible for newly added participants.
When creating a new group chat, the user can set the group name, and enable the Allow full history visibility option. After enabling this option, a popup window will inform the user that the chat history will always be visible to newly added participants.
Group chat info will indicate that the full chat history is visible to all new participants.
Mention
Mention is a great way to get someone's attention in a group chat conversation. Only group participants can be mentioned in a message. When mentioned, the user will receive a push notification which will override any mute action that the user has set for the group.
Mentions start with the @ symbol followed by a name. When the @ character is typed in the input field, a suggestion list of participants will appear. The mention feature brings support for smart auto-completion based on user input.
Clicking on a mention link has the same functionality as clicking on a user avatar inside a chat conversation.
Chat message status info
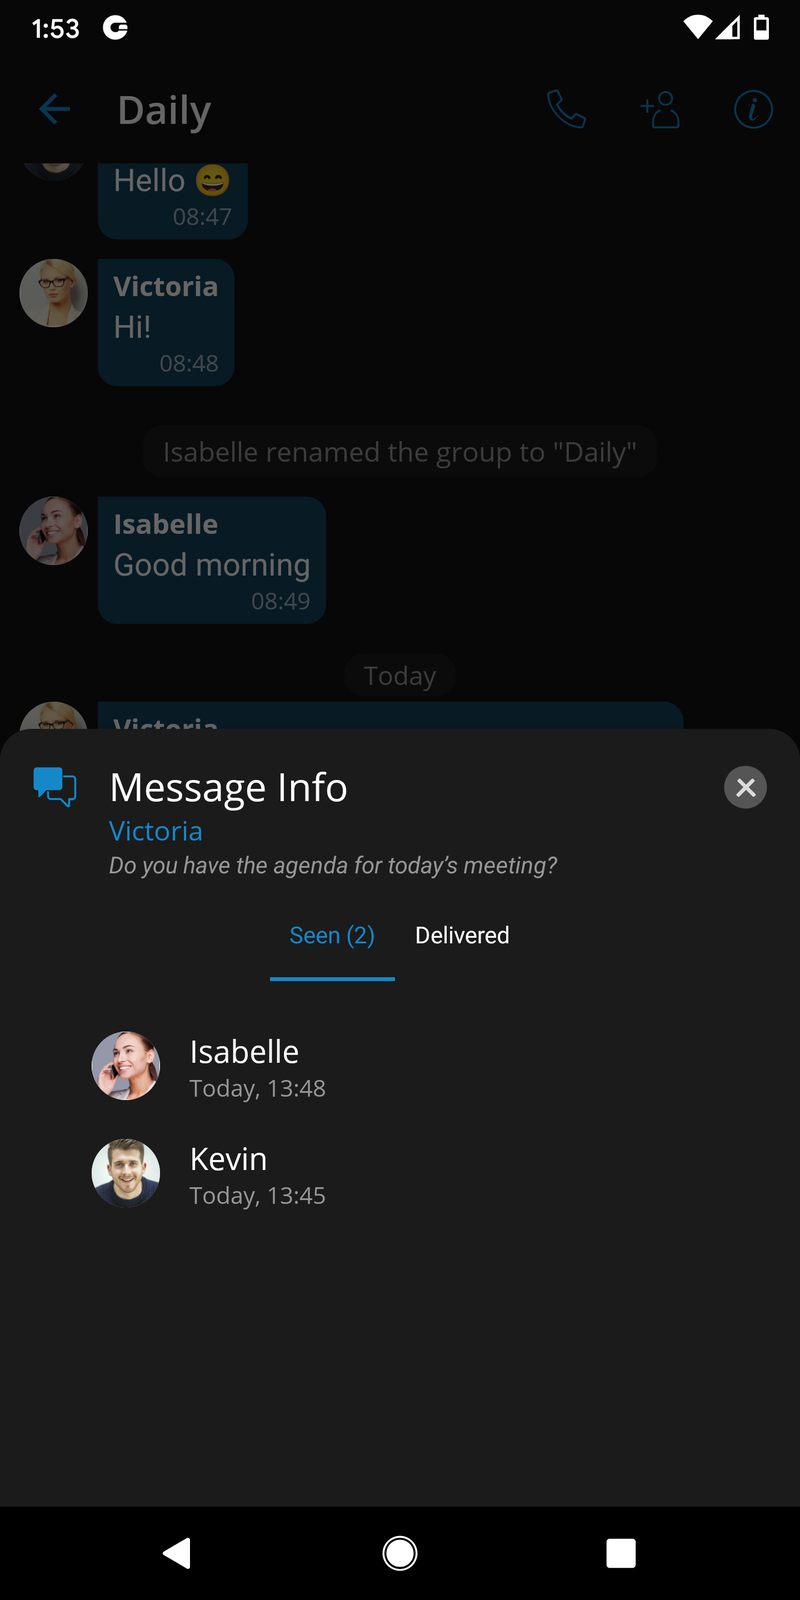
Message info allows users to see delivery and seen reports for messages. The message info window can be accessed by long-pressing on a message and then selecting info in the context menu. The message info option is only available in group messages.
The message info window opens from the bottom of the screen and takes up a small portion of the screen. It is possible to expand the message info window to full screen by dragging the window up or collapse it by dragging the window down. The window can be closed either by tapping outside the message info window or by pressing the close button in the top right corner of the message info window.
The message info screen is arranged so that it shows the name of the person who sent the message, the content of the message, and two tabs. The seen tab and the delivered tab. By selecting the seen tab you will see a list of users that have sent the seen report. The users will have their name and time, when they have sent the report, printed out. Respectively by selecting the delivered tab, you will see a similar list, but in this case, users that have sent the delivered report. In case any one of the tabs is empty, it will show an appropriate message.
If the info window is opened on a device connected to an earlier version of the server, a message will appear in the message info window stating that the action is not supported.

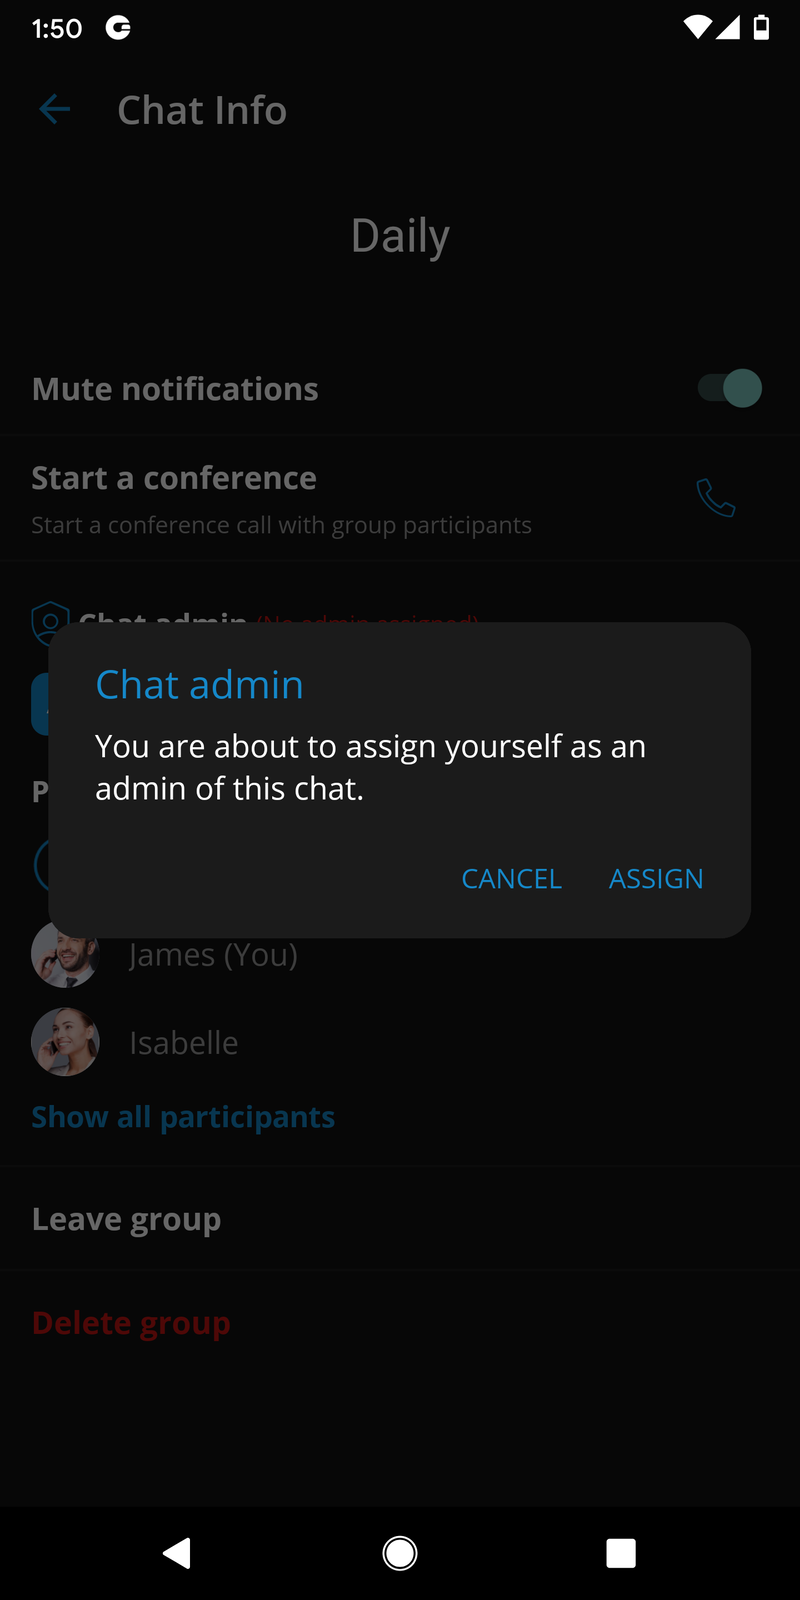
Admin transfer in group chat conversations
Group chat conversations now have a new feature-admin transfer. It offers the chat admin to assign one of the group chat participants as a new admin of group conversation. Pressing on an active participant of the group chat, a dialogue will appear offering the current admin to assign the selected active group chat participant as a new admin.
One of the group chat participants can also request to become an admin of that chat conversation after the previous admin has left. Once the group chat admin leaves, chat info will indicate that there is no admin assigned to the group chat. The remaining group chat participants can request to become admin by pressing the Assign myself button in the chat info.
If this feature is not available on older servers, a notification message will appear, informing the user that this action is not yet supported and instructing them to contact their system administrator for more information.

Draft messages
Unsent messages will be remembered inside the app as draft messages.
Users can safely close the app, go to another screen, and the message that they were composing will be saved.
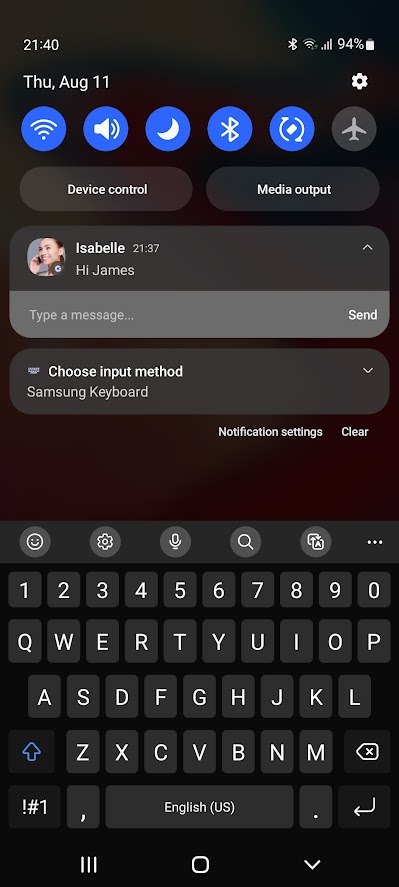
Reply from notification
Users can reply to a message directly from the system notification bar without going to the chat screen.
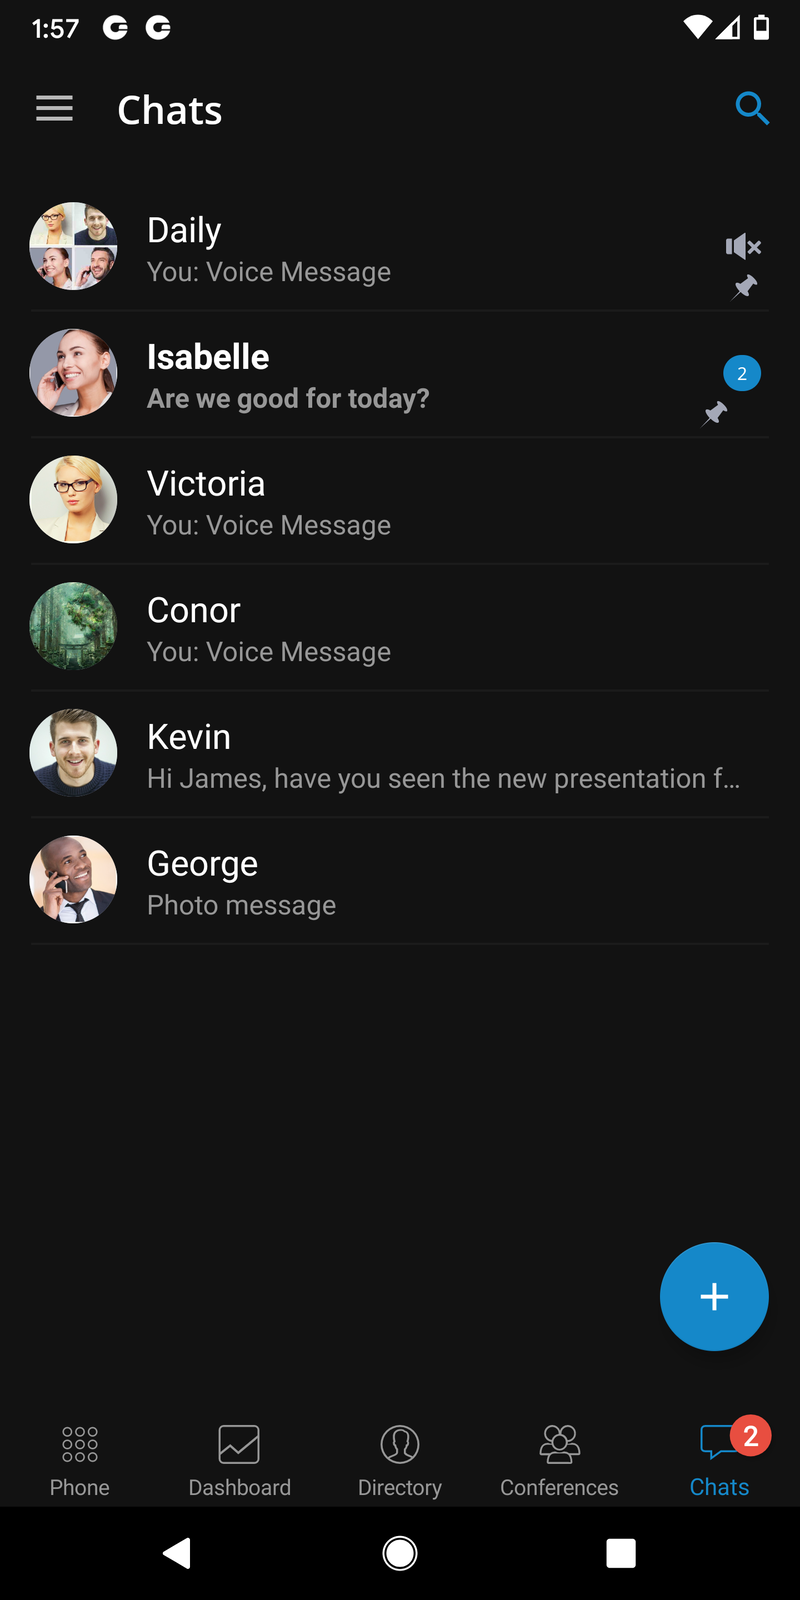
Mark Chat Conversation as Read/Unread
This feature offers a possibility to mark any conversation as Read/Unread. When choosing the conversation as Unread, the Unread indicator will be displayed for this conversation in the chats list screen.
With any action taken within that conversation, the Unread status will be removed. Also, opening that conversation or marking it as read will remove the unread indicator.
Ability to send messages to myself
Users can send a message to themselves in case they wish to keep notes or transfer some messages between gloCOM apps.
Typing indicators for single and group chat
Typing indicator at the bottom of the chat screen shows that someone is typing within the chat session.
In group chats, multiple participants can type simultaneously, so the notification will show a message: ''3 participants are typing'' (when 3 participants are typing simultaneously).
Users can also see when someone is typing a message from the chat list screen.
Remove user from the group chat session
This feature allows the group administrator to remove a participant from the group chat.
Once a participant is removed, all other participants receive a notification that this person is removed from the group, including the removed participant.
The removed participant can enter the group chat and view all messages until the moment of removal but will not be able to write, send files, or see new messages from other active participants.
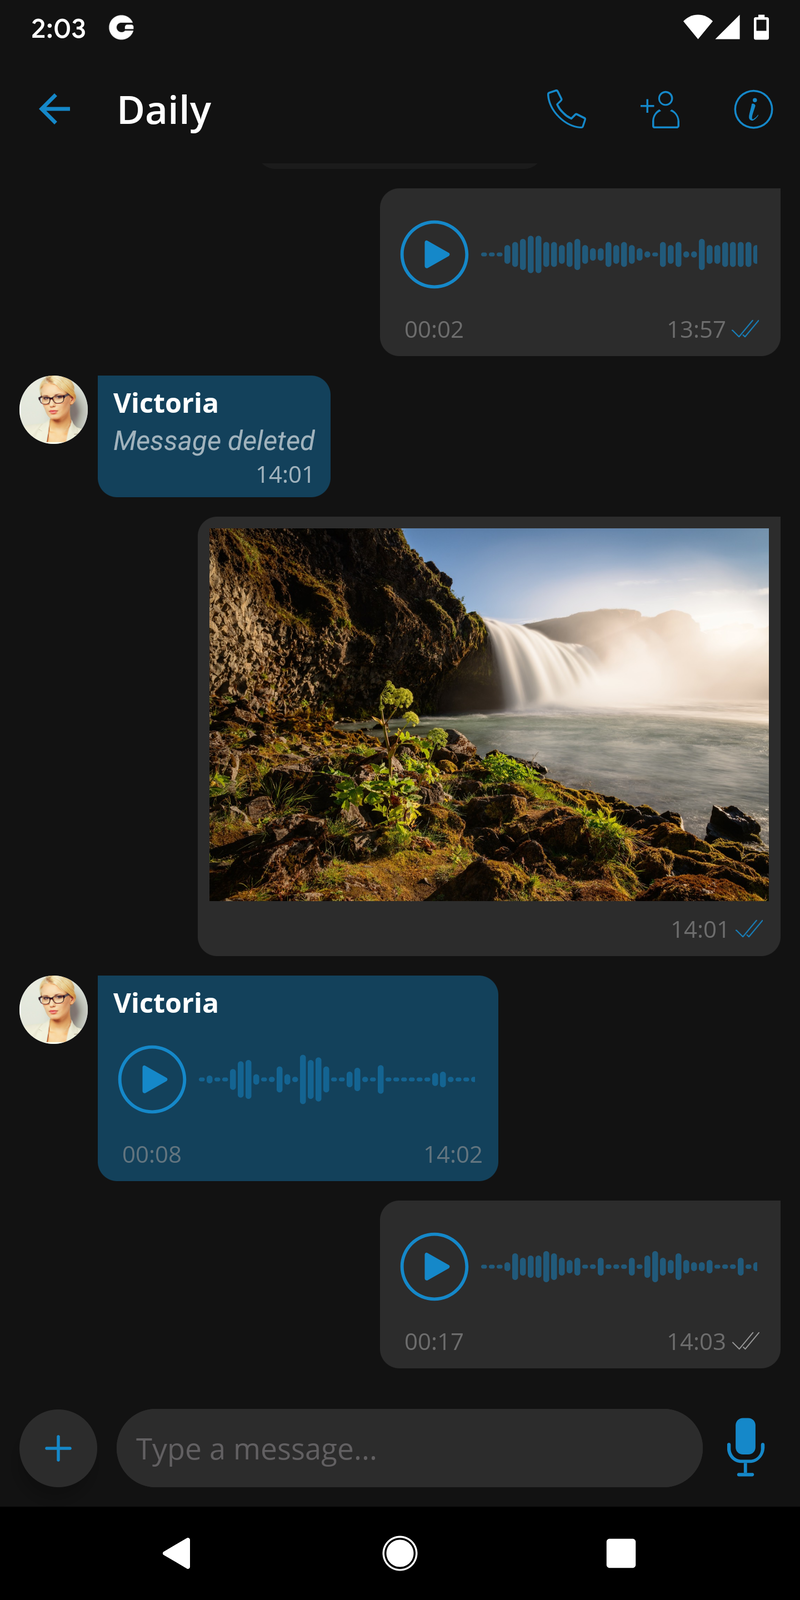
Messages
There are three types of messages:
-
Text messages
-
Voice messages
-
File messages (photo, video, gif, pdf, zip, etc.)
Every message that is sent to the server has one of the three states:
-
Sent (message is sent to the server)
-
Delivered (message is delivered to the recipient)
-
Seen (recipient has seen the message)
Messages can also be in the waiting or failed state, depending on network conditions.
If the text message contains a URL, users can press it to open it.
All waiting messages will try to be resent to the server on the next app start. Failed messages will not be automatically resent.
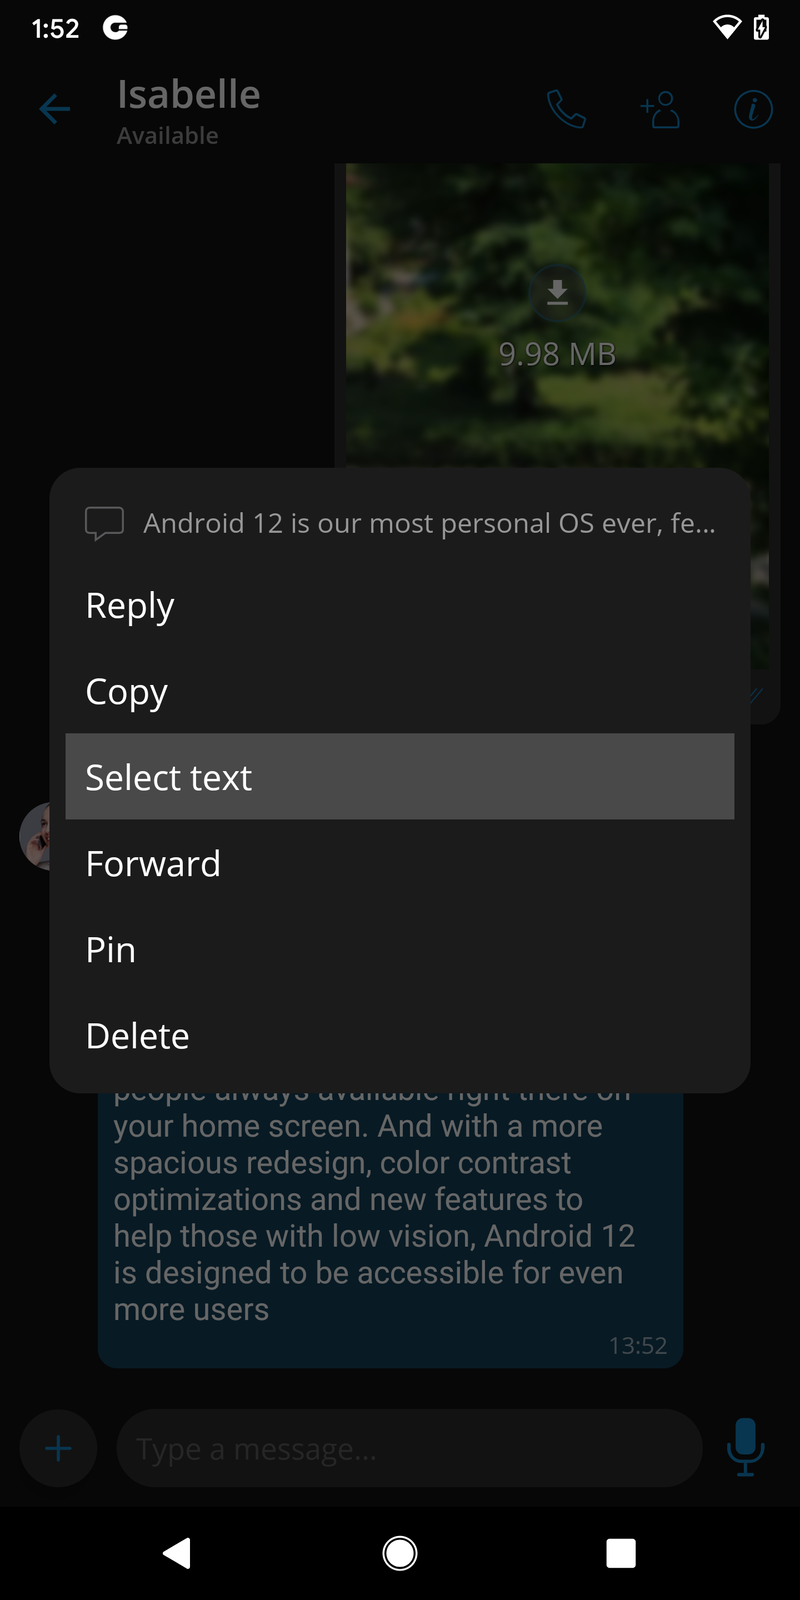
With a long press on a message, you can copy its contents.
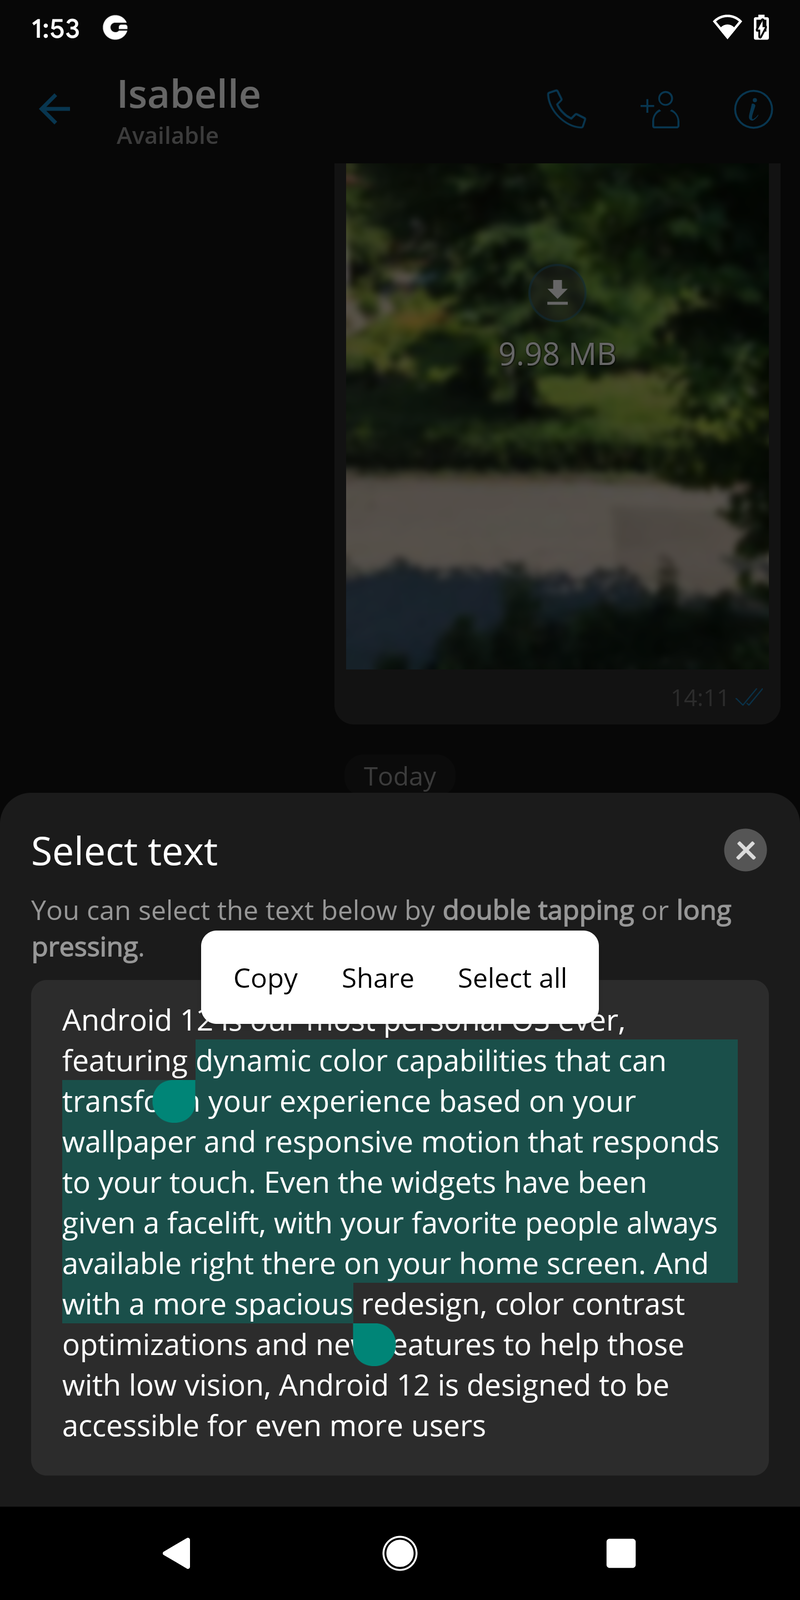
Select Text
Users can copy only the portion of text messages by using the Select Text option that can be selected by long-pressing a text message and pressing on it in the context menu.
File messages
To send a photo or a video from the Gallery app, users can press the + button and then the Gallery icon on the chat screen. After the file has been selected, it will be compressed (to preserve bandwidth) and sent to the chat server.
To send any document, press the + button and then the document icon, which will open the document browser.
The progress of the uploads or downloads can be seen in the chat view. It is possible to cancel the transfer of the file message by pressing the X button.
Downloaded photos, videos, or documents will be saved to a local gallery or file system.
Files smaller than 500kB will be automatically downloaded if users are connected to WiFi and not to mobile data.

Send more than one file at once
When pressing the gallery or file explorer button a window will appear where the user can select multiple images or files.
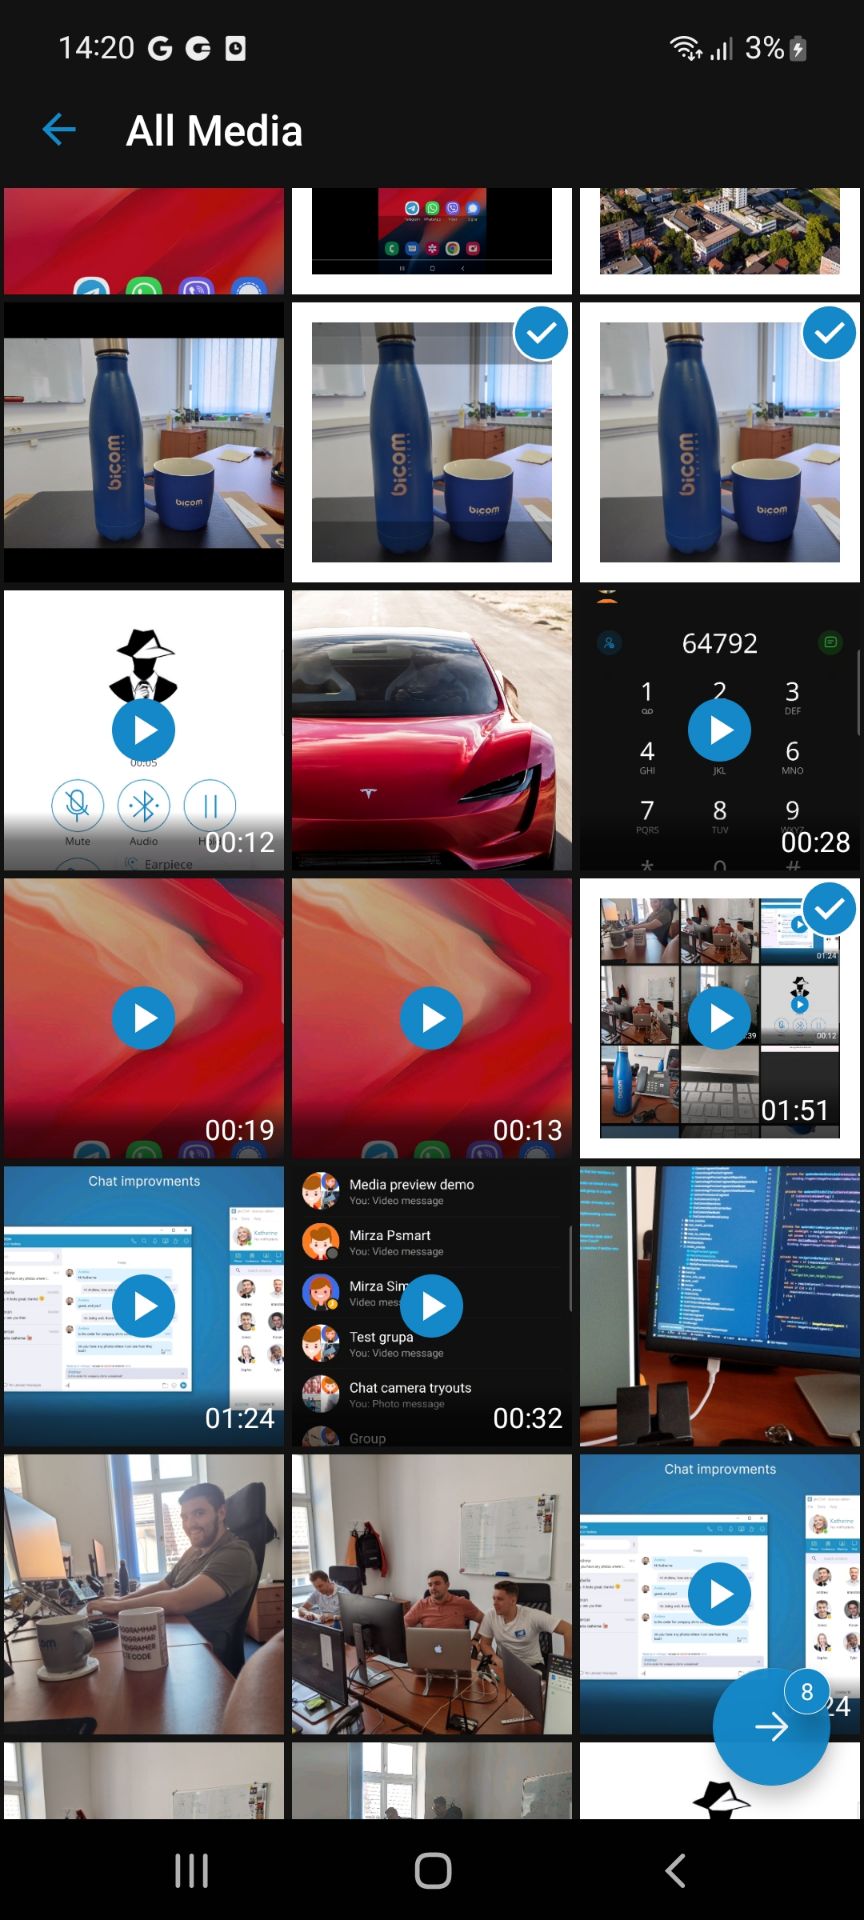
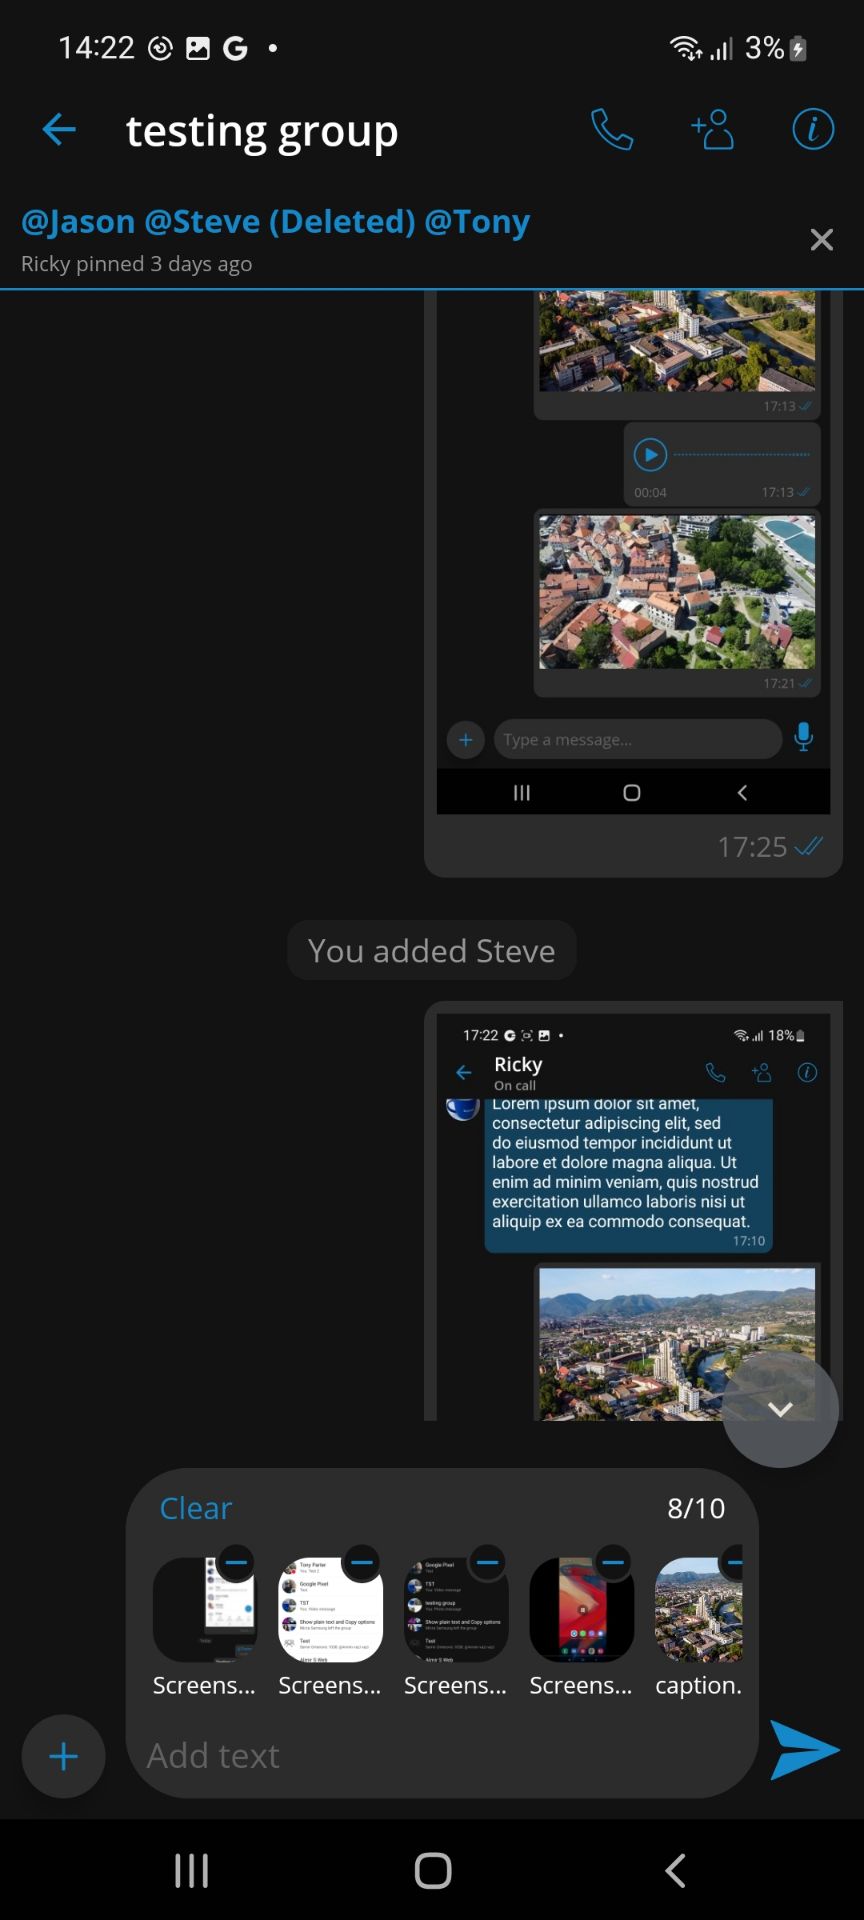
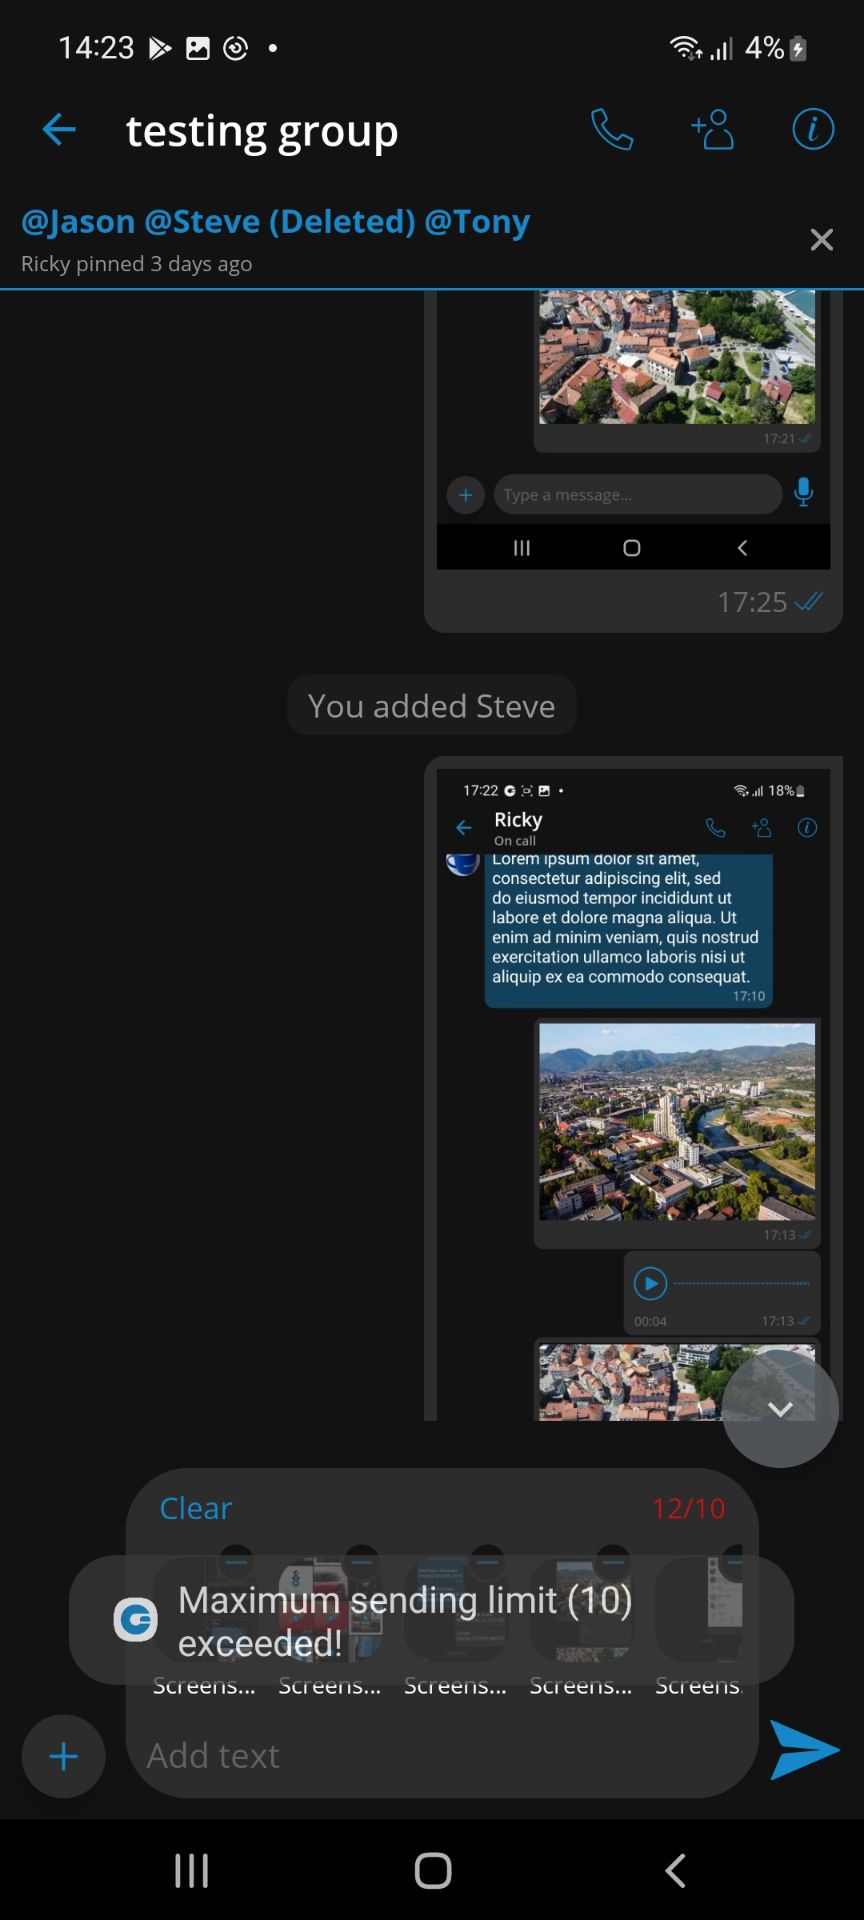
In the bottom right corner, a button will allow the user to confirm the current selection. There is also a counter that shows how many files have been selected. After pressing the button, the user will return to the chat screen and there will be a file counter above the type text field where the user can preview the selected images or files. The user can put multiple files in that preview but there will be a label with the limit on how many files can be sent. If the user exceeds the limit and tries to send, the system will prompt the user with a message that the limit has been exceeded.
If at least three media files have been selected the preview will have a clear button in the top left corner. Pressing the button will clear all selected files in the preview.
Chat media preview screen with orientation support
User has an option to rotate the screen on chat media preview screen. Chat media preview screen can be opened by pressing on any downloaded file message.
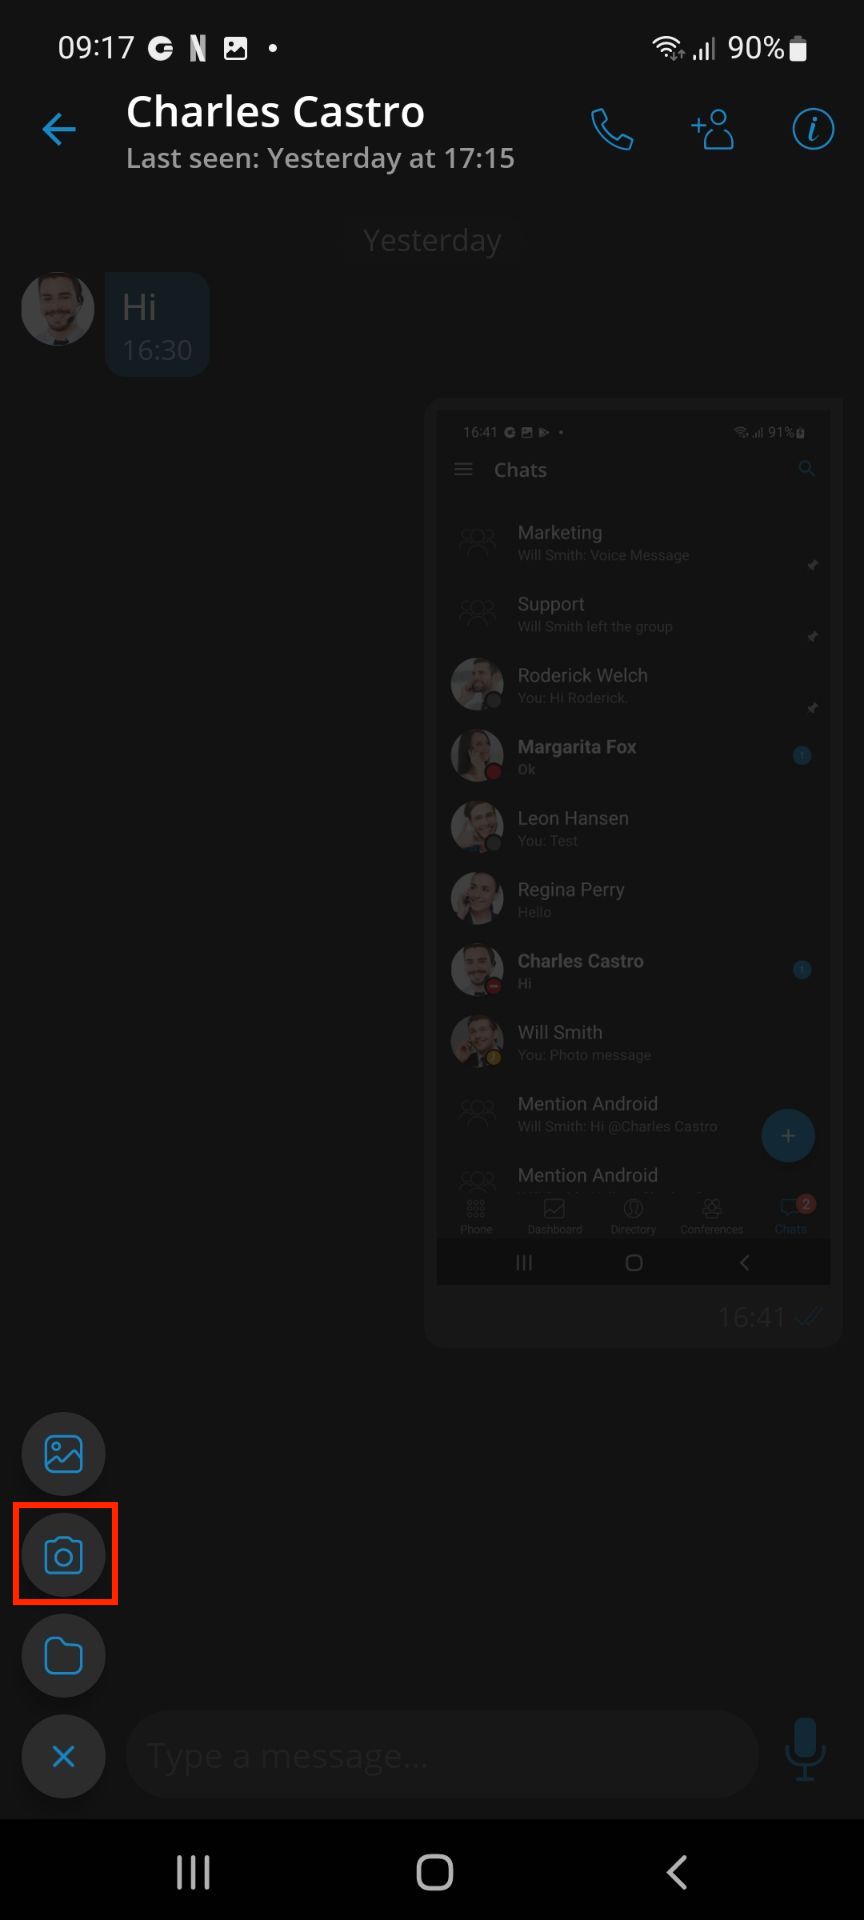
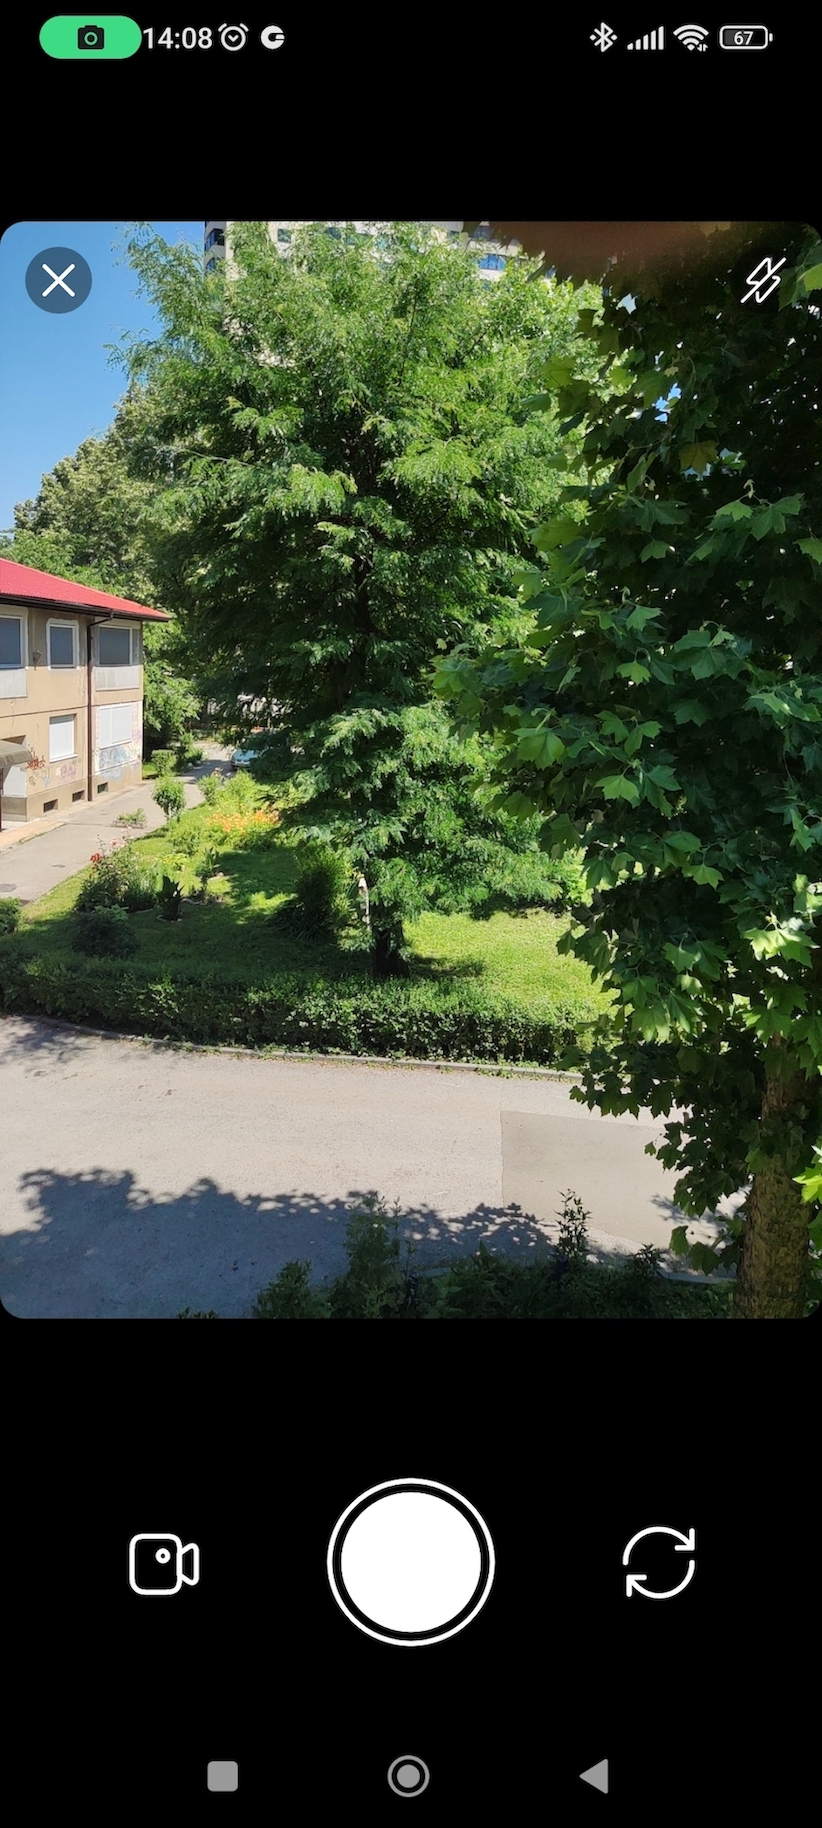
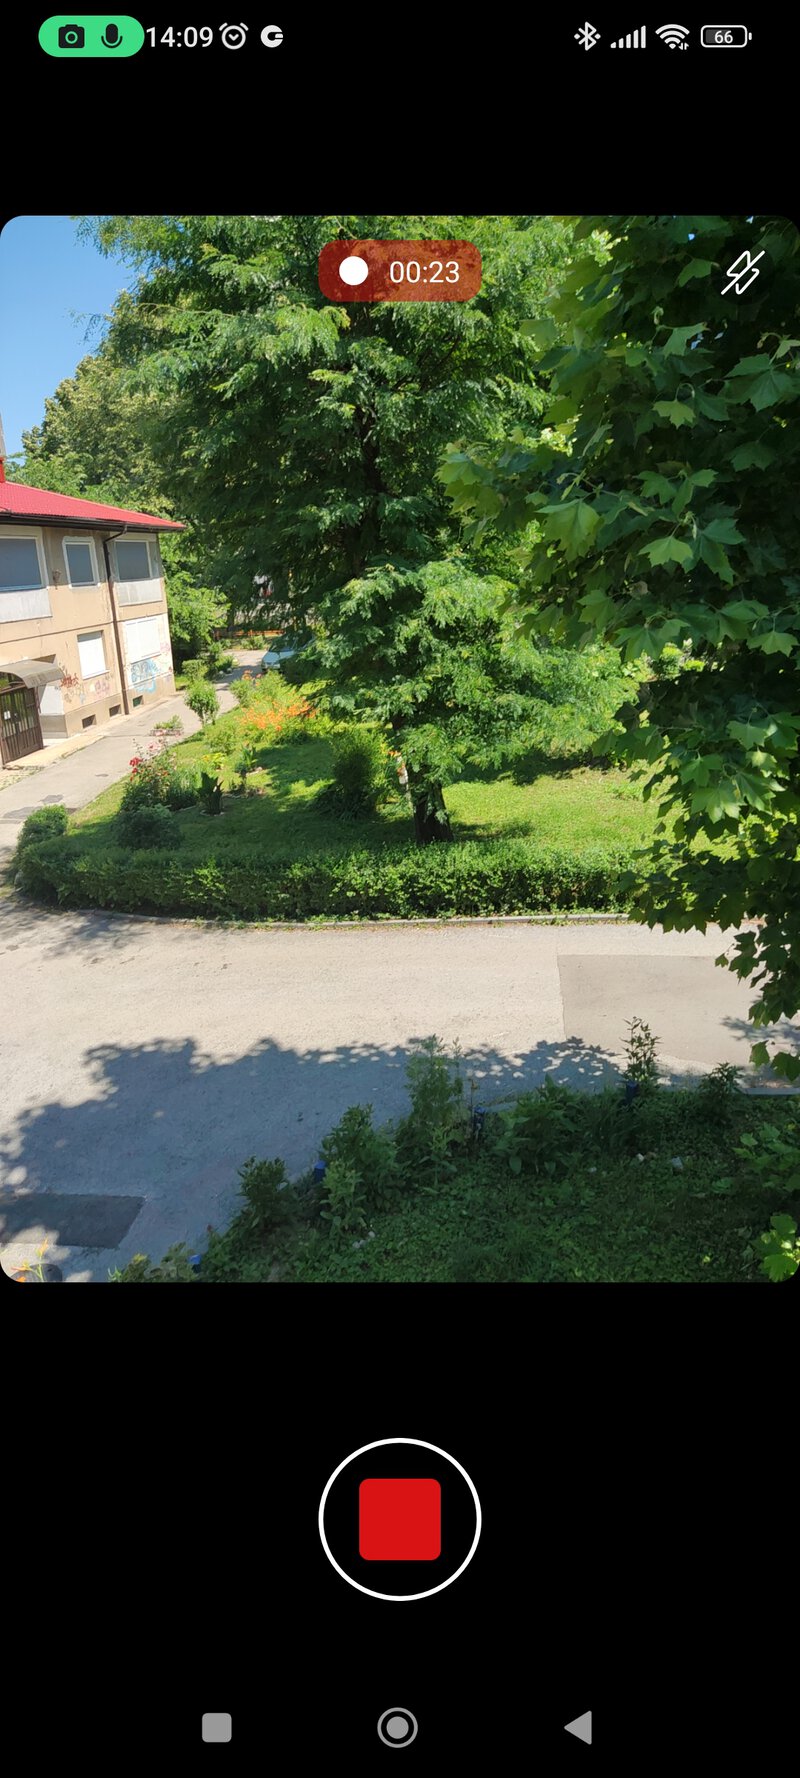
Take pictures and videos with camera inside chat conversation
In addition to sending media files from the gallery, there is an option to take a photo or record a video inside the chat conversation screen to give users a better chat experience. By pressing a + button, the user has an option to click on the camera button that opens a camera screen to take a photo or record a video. After taking a photo or recording a video, the user can choose whether to save the file to the gallery, discard it or send it in the chat.
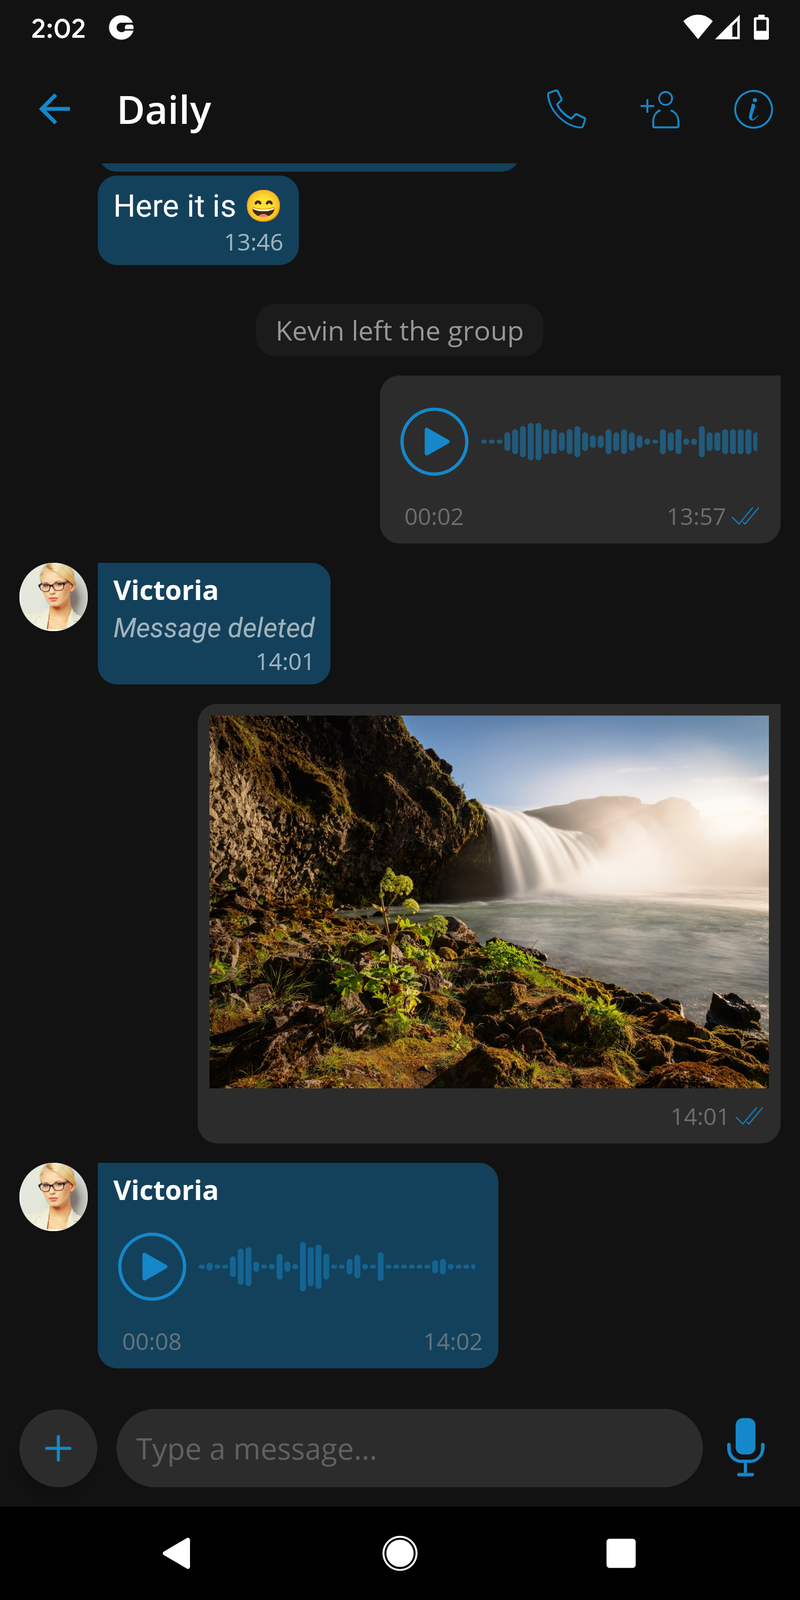
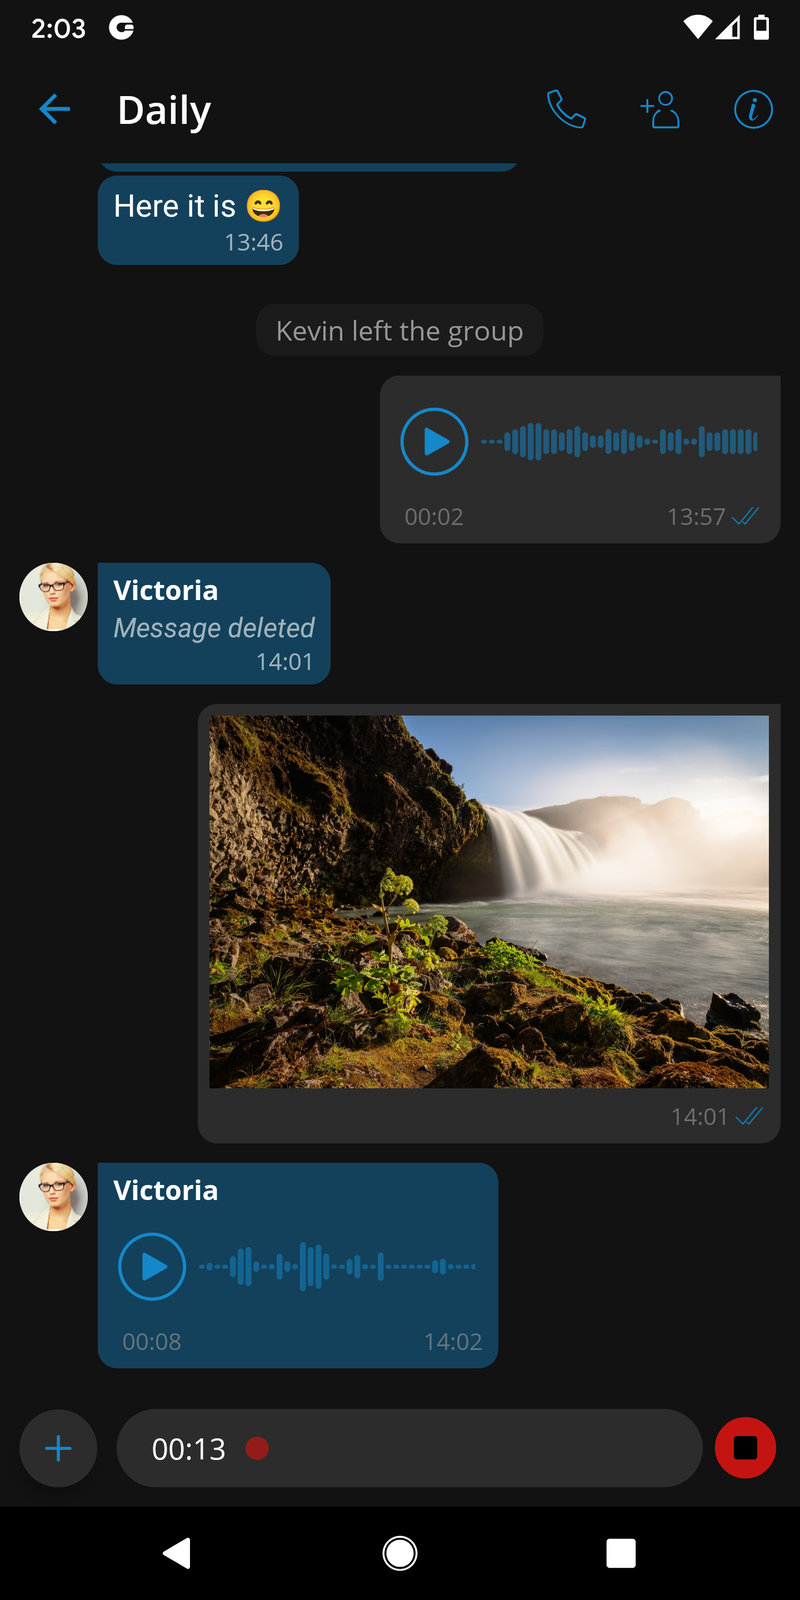
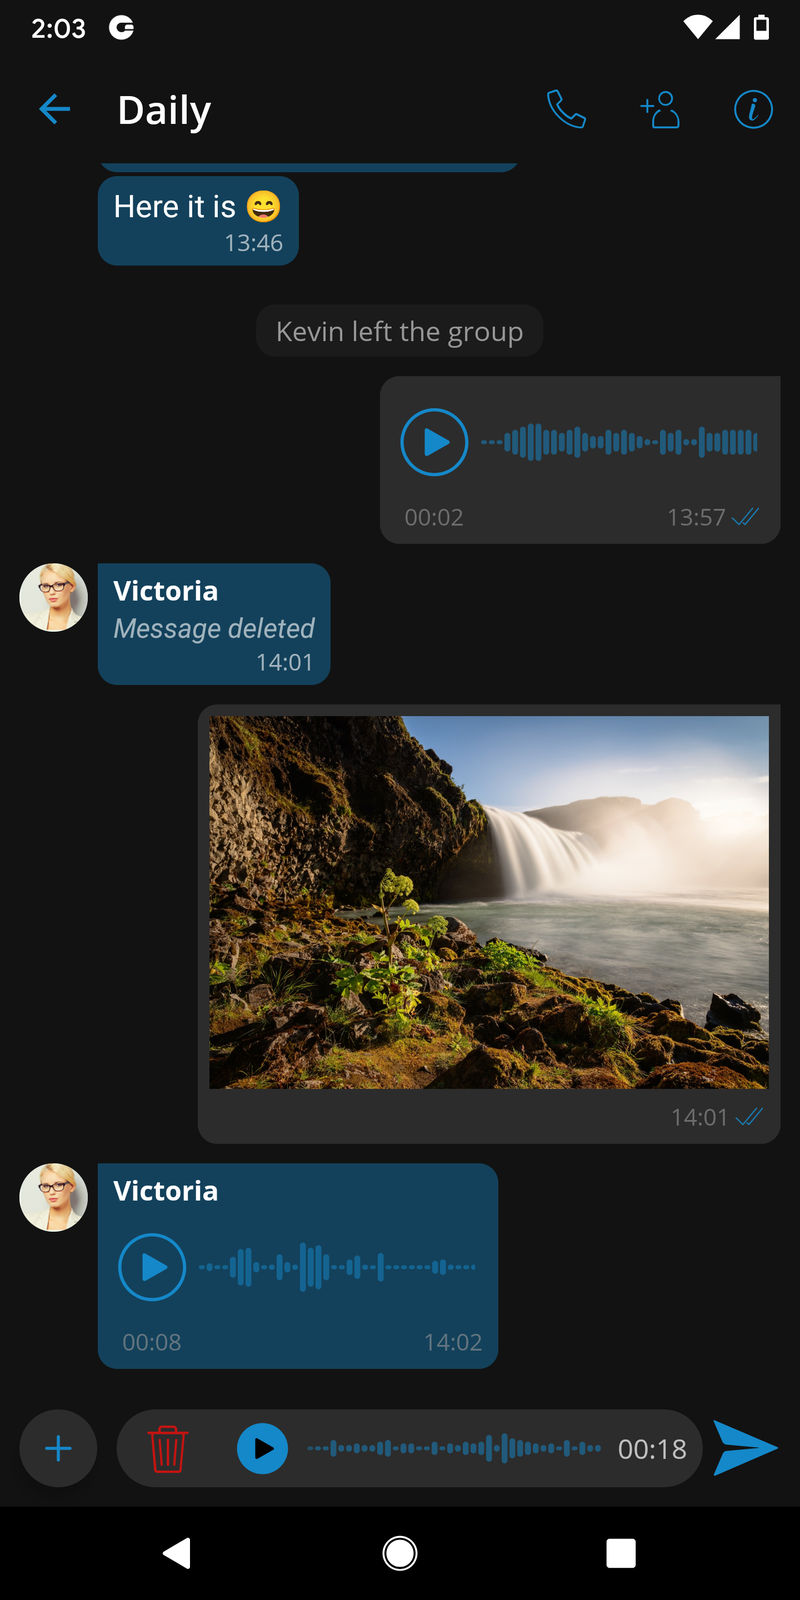
Voice messages
gloCOM GO 6 users can send a chat voice message when they cannot type. The maximum duration of the recorded chat voice message is 2 minutes.
An automatic screen lock will be disabled during the recording of the voice message. While recording, if the back button or the screen lock is pressed intentionally, or if the user switches to another app, an active chat voice recording will be canceled.
When listening to the recorded voice message, if the user goes back to the chat list, the recording playback will be stopped.
During playback of received chat voice message, the user will have visible control buttons in the notifications even when switching to another app, because of media player integration. This offers users the flexibility to still listen to the playback, even when switching to another app, or home screen.
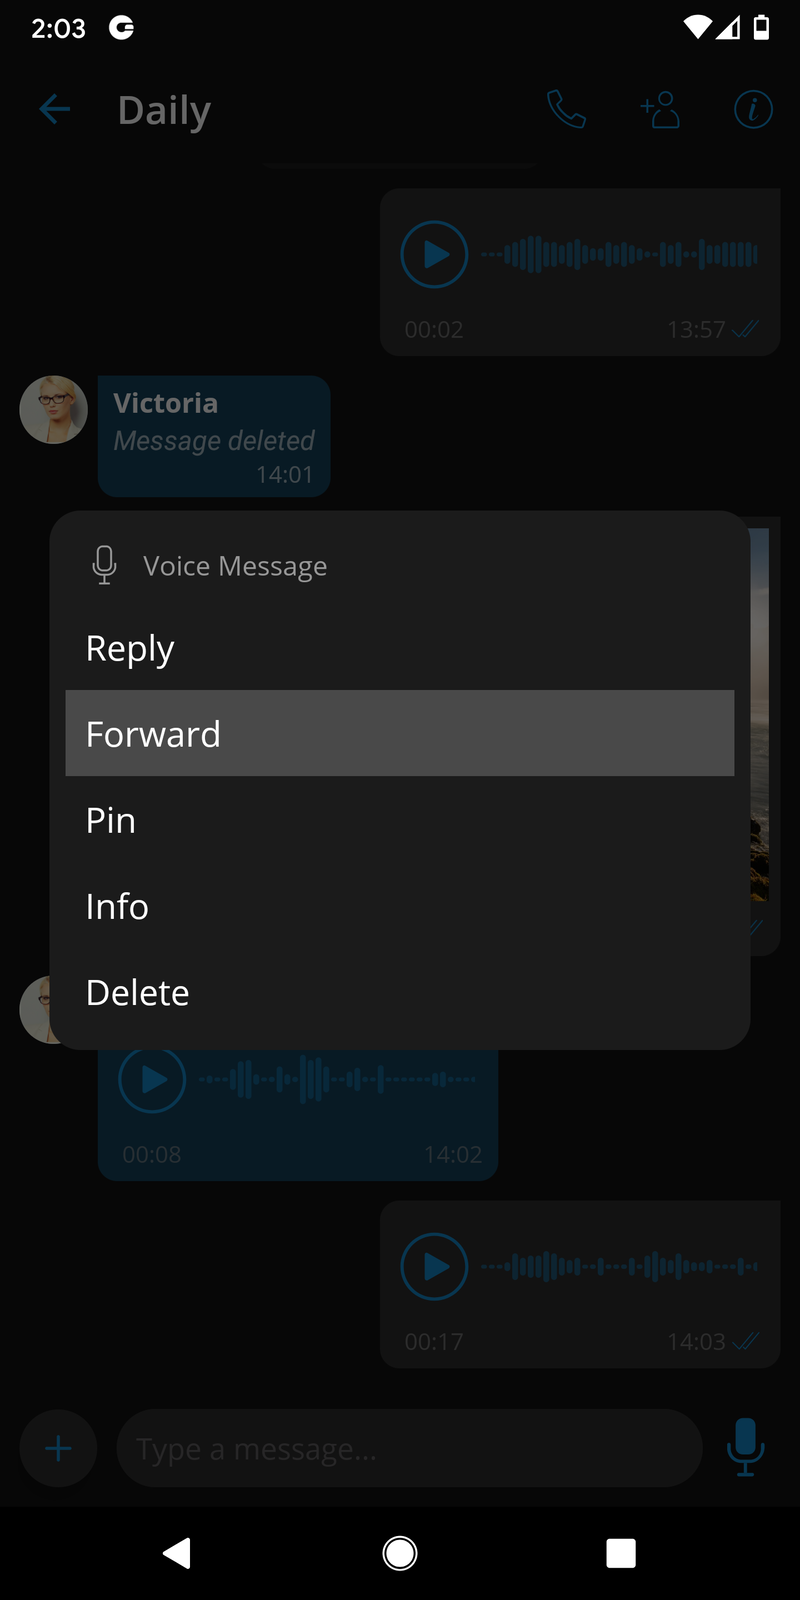
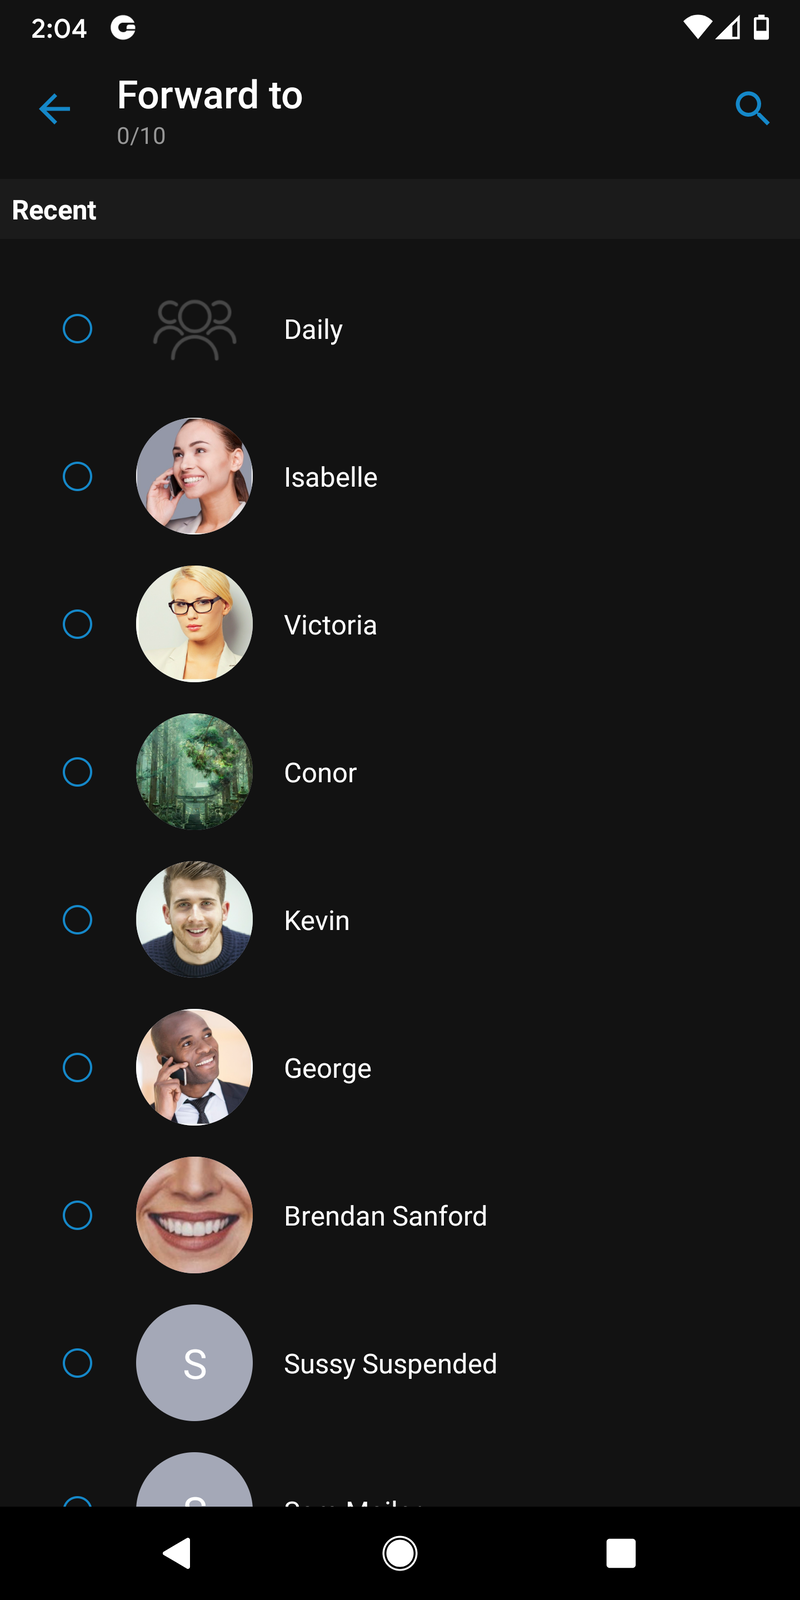
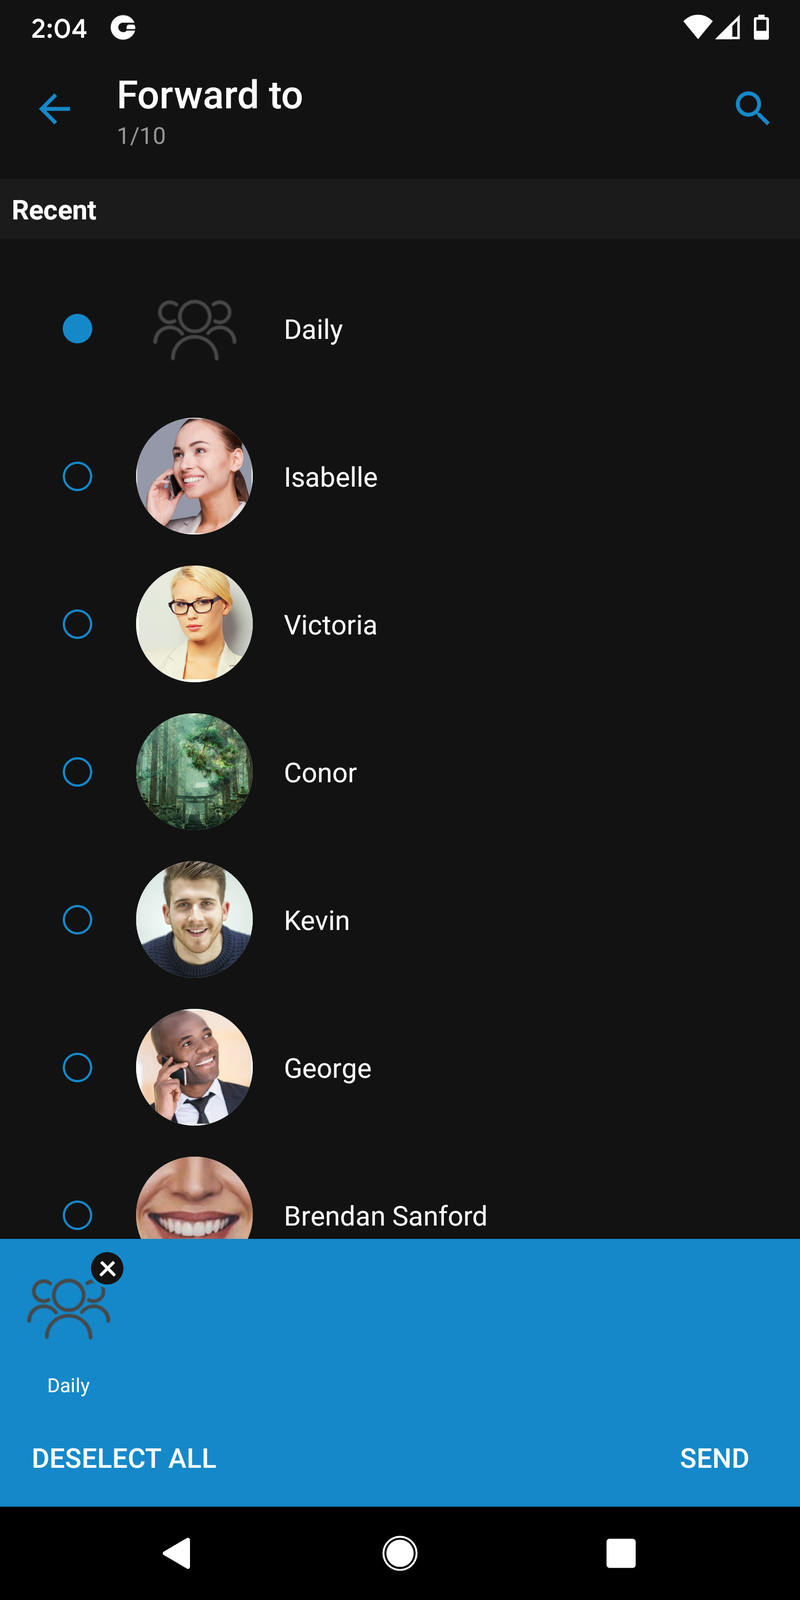
Forward chat messages
Users can forward the message or file up to 10 conversations/contacts at the same time.
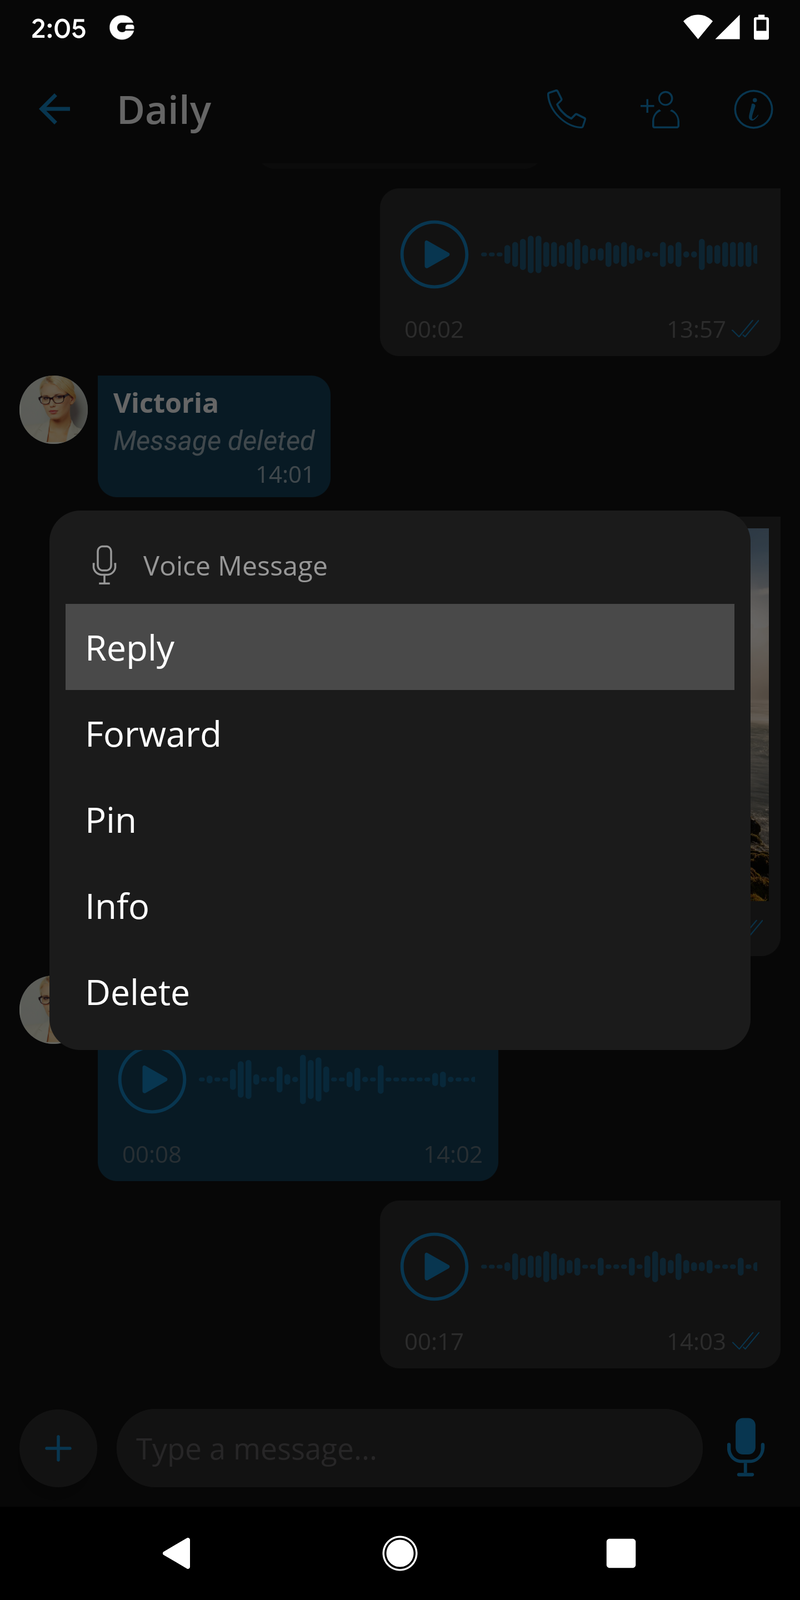
By long-pressing on the message, a menu will appear with an option to forward the message.
After pressing the forward option, a chat picker will open, and users can choose which contacts they wish to forward the message to.
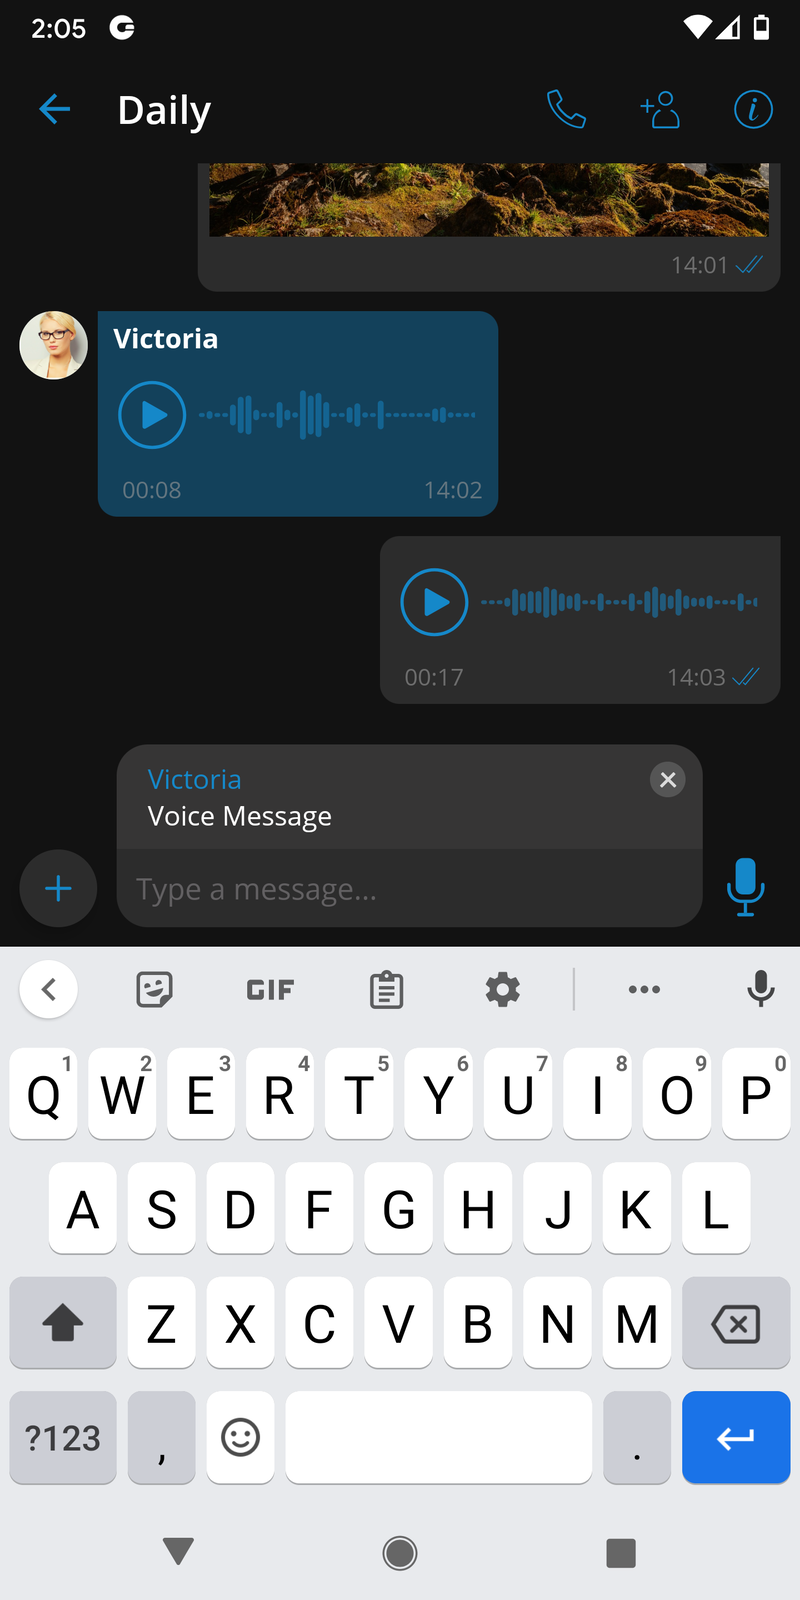
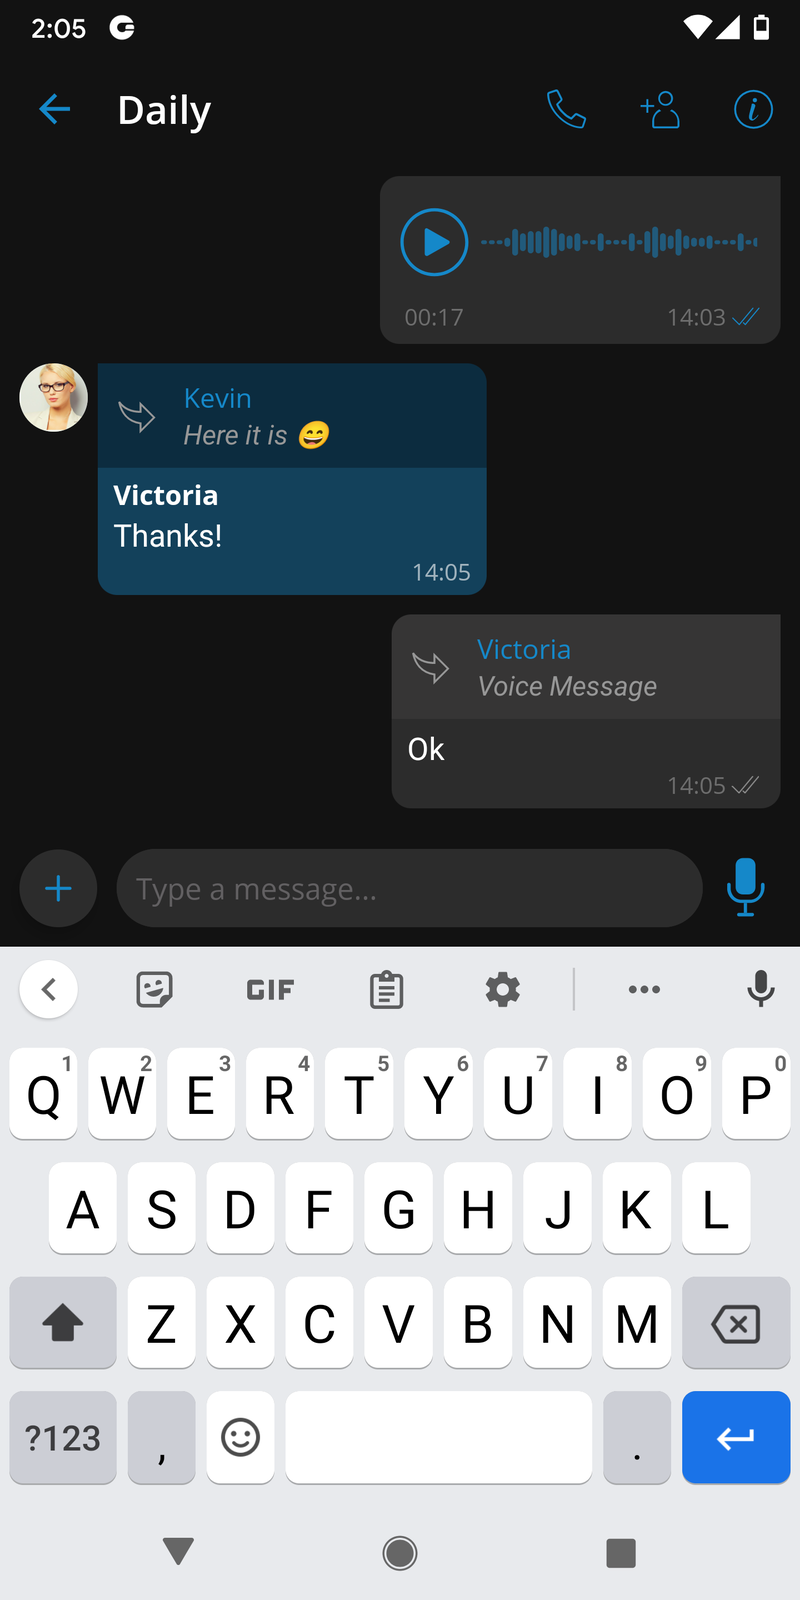
Chat messages reply mode
The reply option allows users to reply to a specific message. To reply to a message, users need to long-press on the message they wish to reply to and select the '''reply''' option from the menu.
As a result, the message to which the user wants to reply will appear above the message input field. Another way to reply is to swipe right on the message the user wishes to reply to.
Pressing on the reply part of the message in the chat will take the user to the original message.
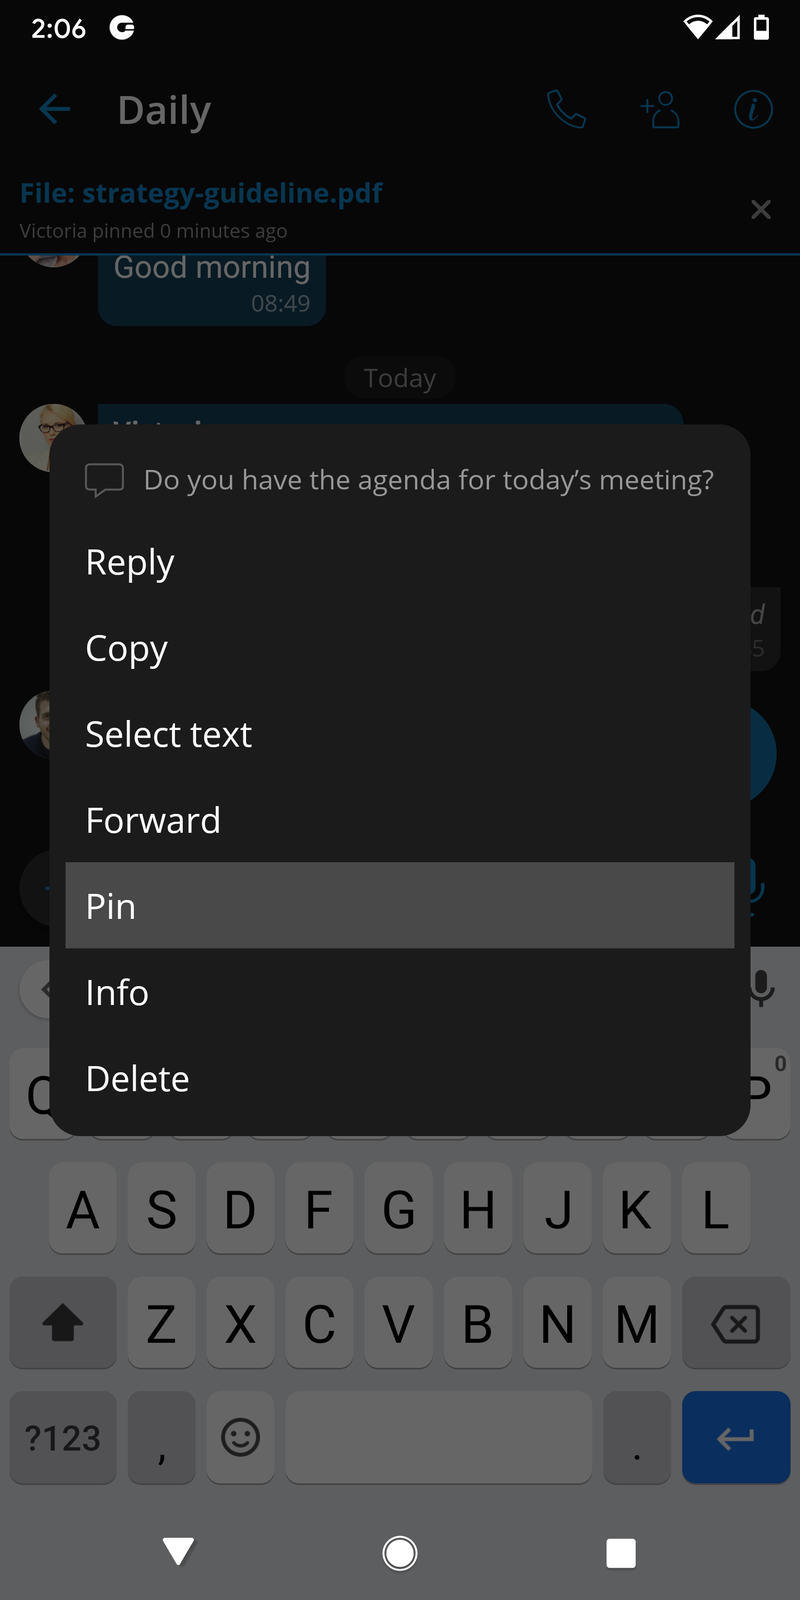
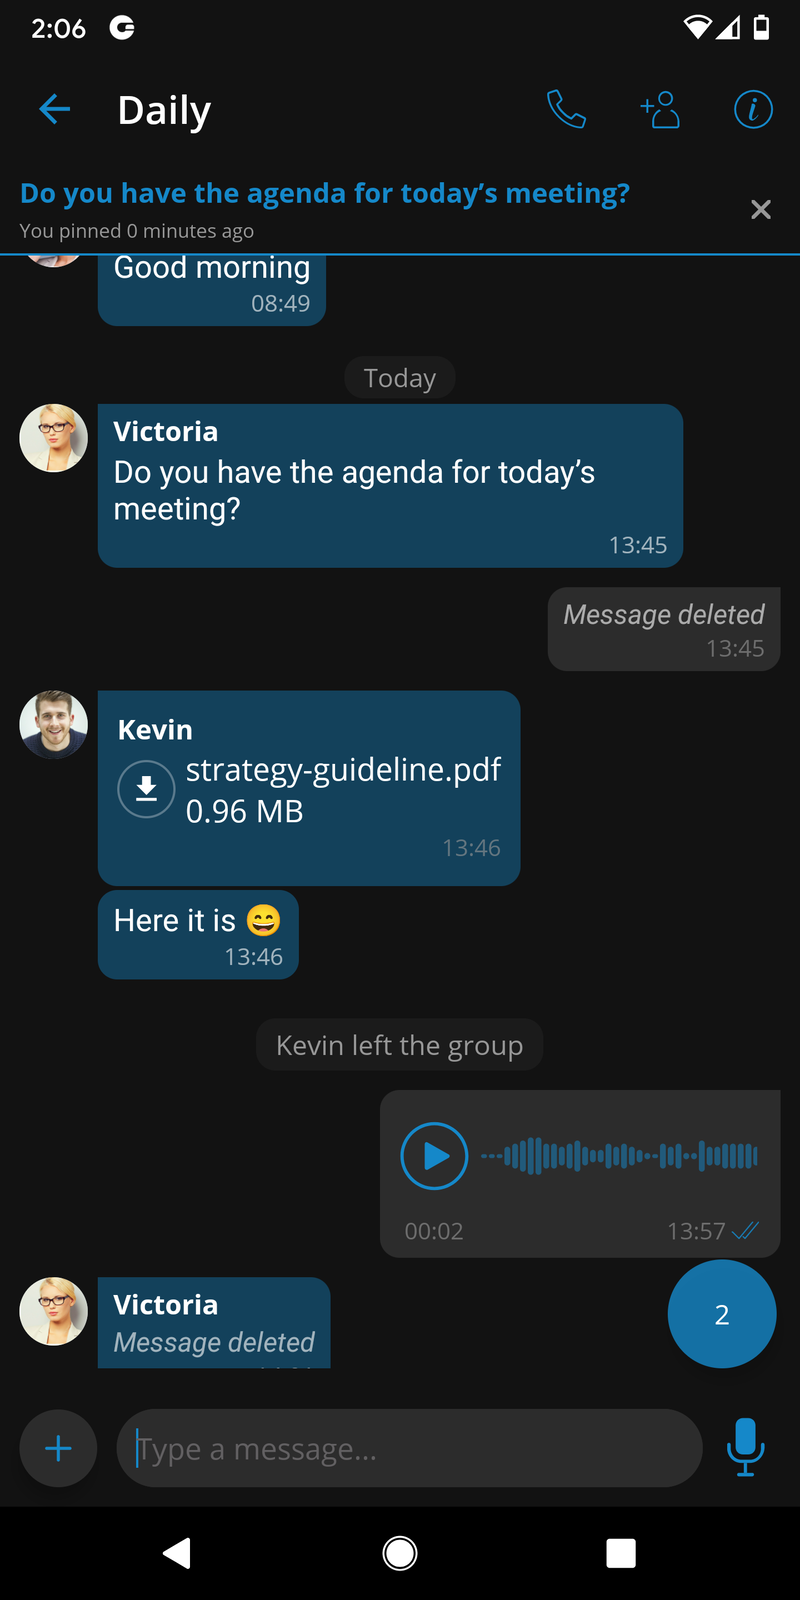
Pin messages for single and group sessions
All messages in single and group conversations can be pinned. Pinned messages are synchronized across all of gloCOM apps. Users can long-press a message and select the '''Pin''' option on the menu to pin a message.
After pinning the message, the pinned message indicator will show at the top of the screen, and by pressing on that indicator, users can scroll to the message that is pinned. Pressing the '''x''' button on the pinned message indicator will unpin that message.
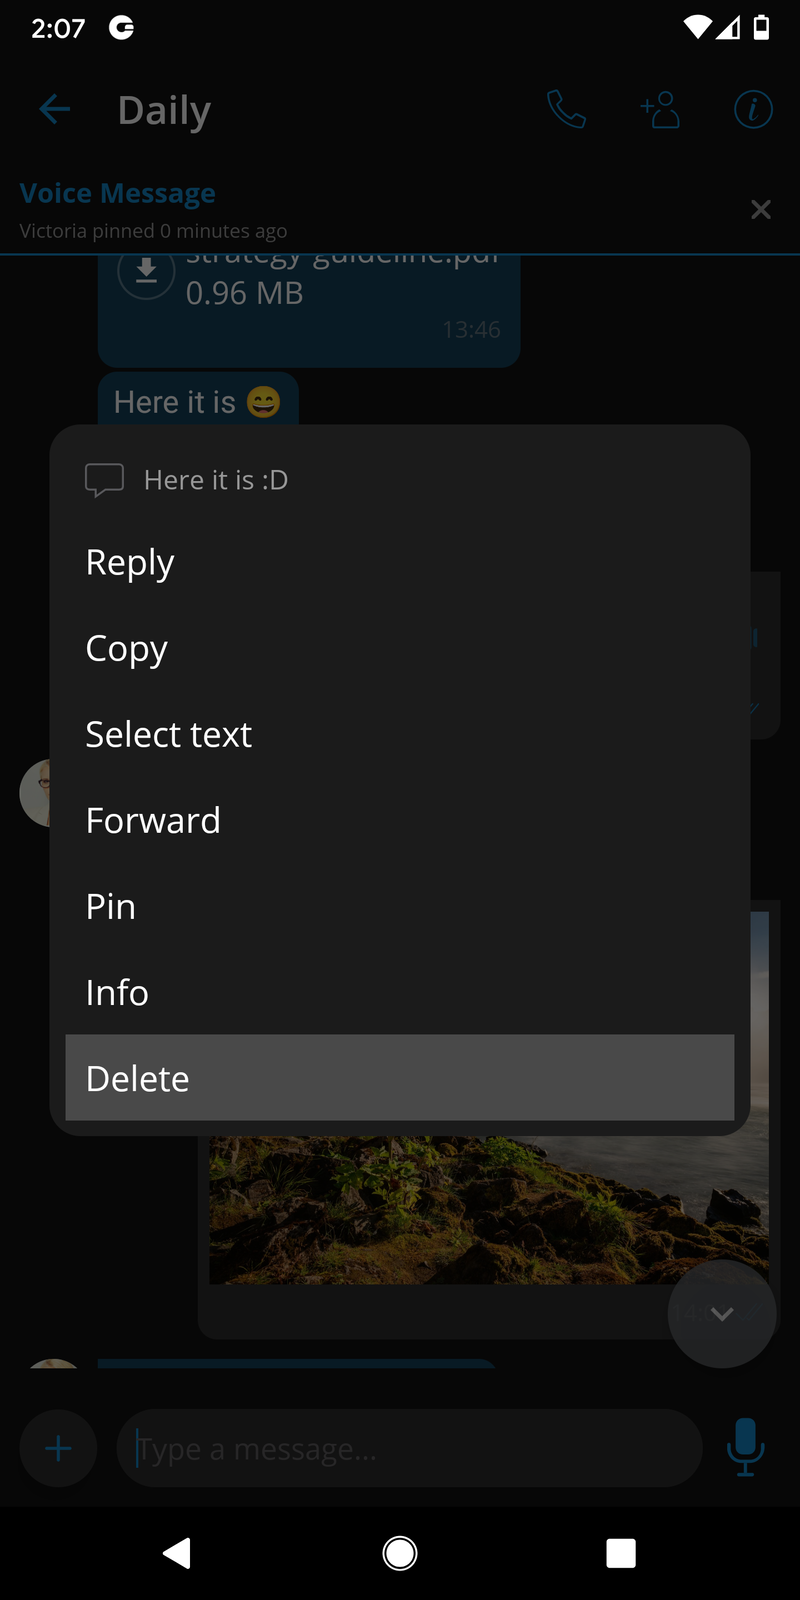
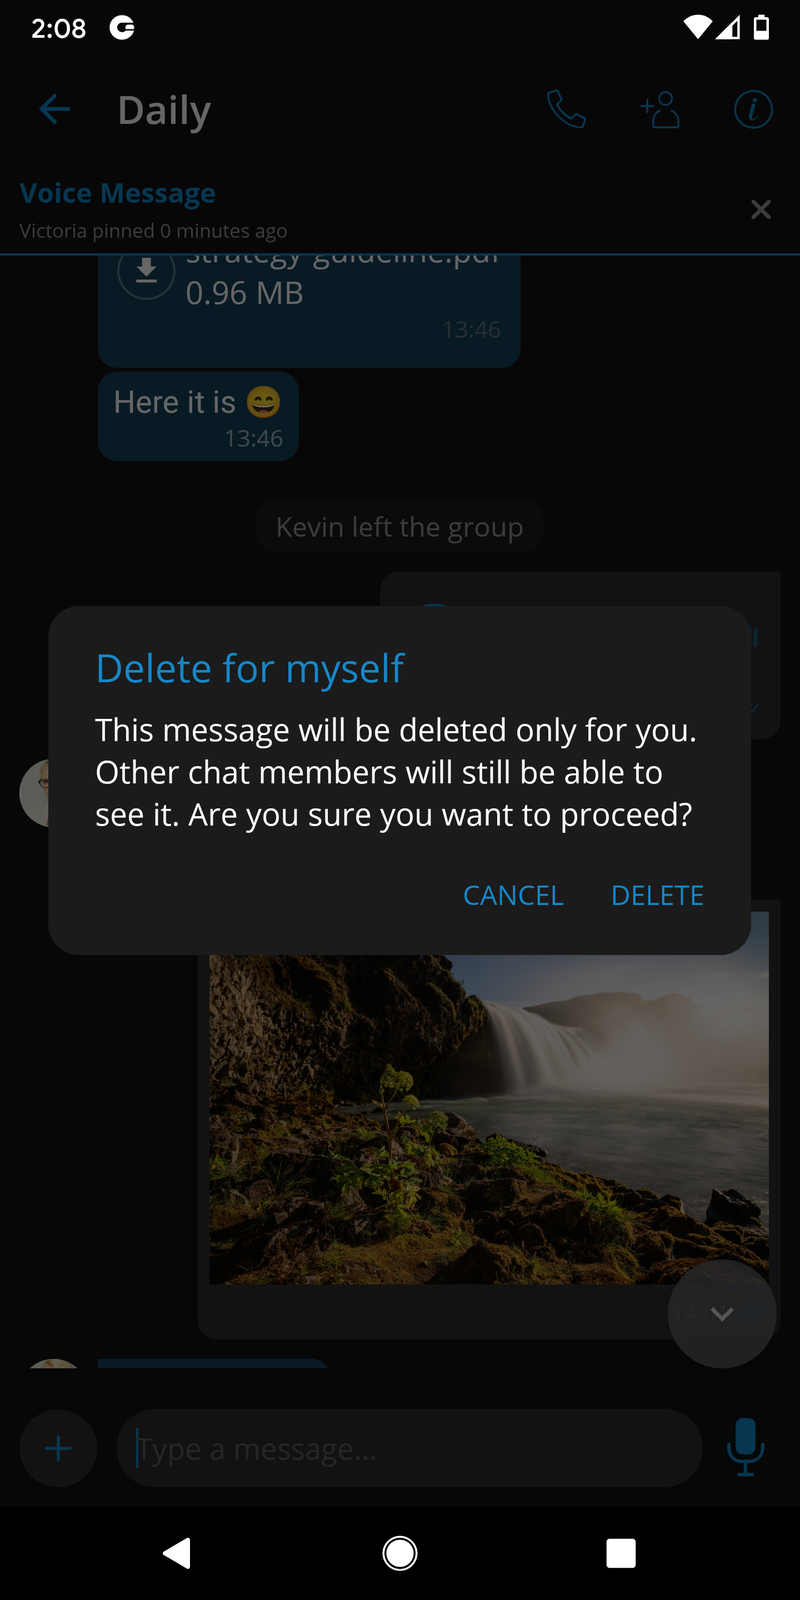
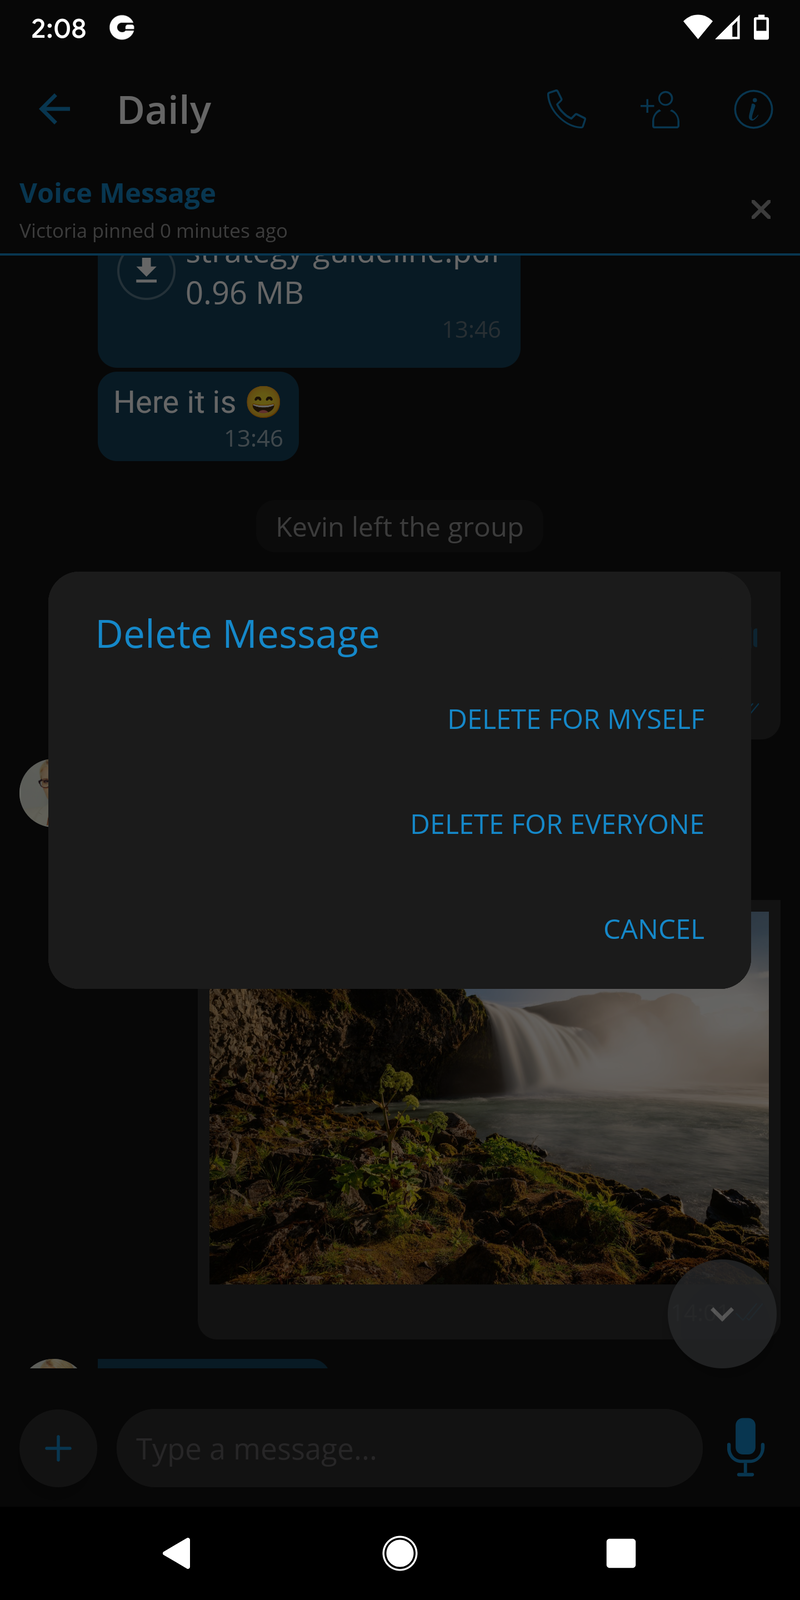
Delete Chat Messages
This option allows users to delete chat messages. To delete the desired message, long press on the message and select '''delete''' from the menu.
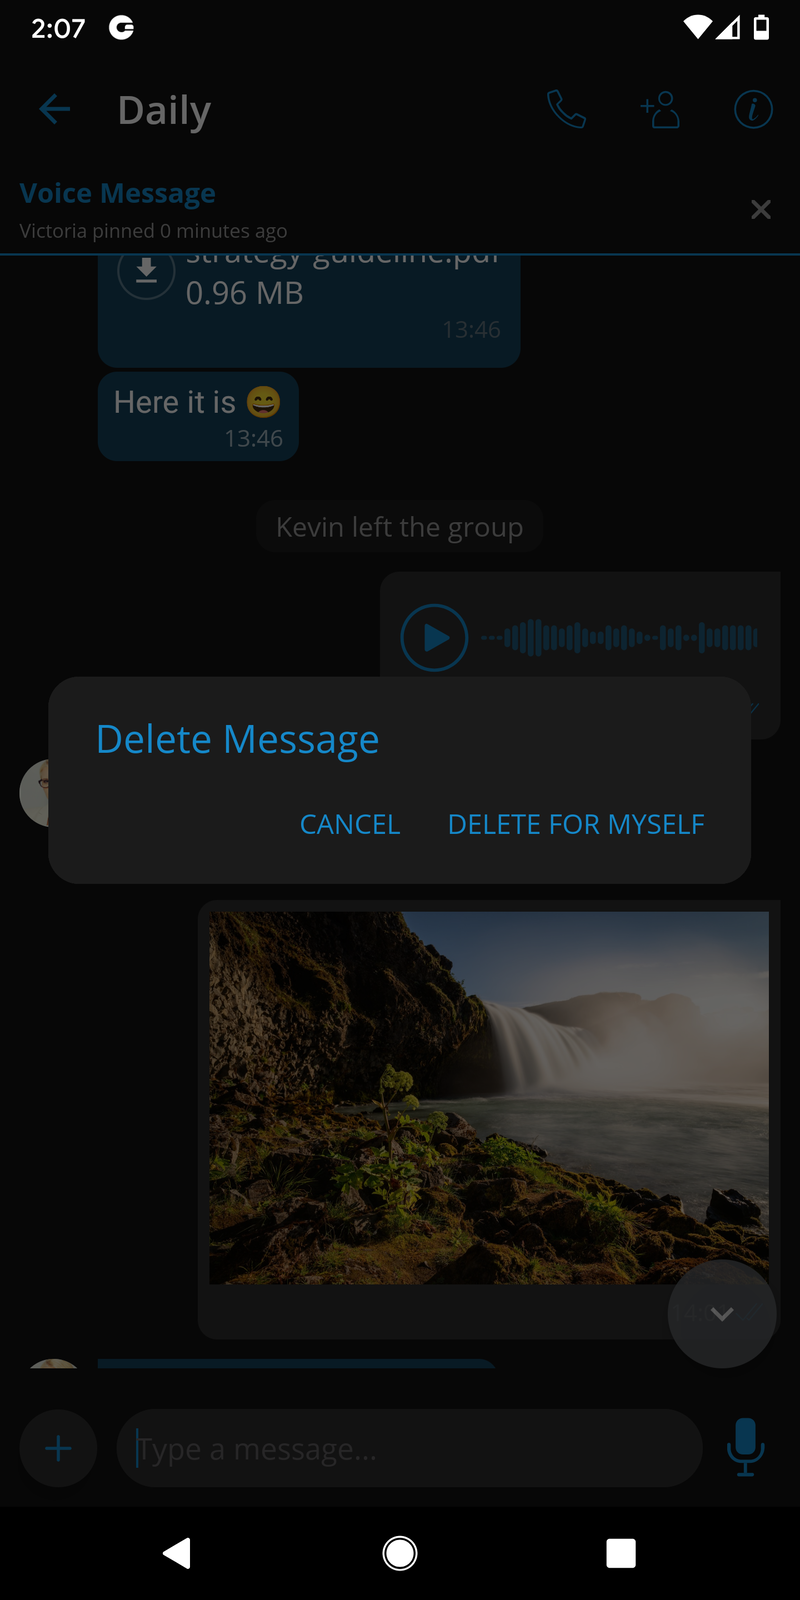
After pressing the delete action, the confirmation dialog will show up with two options for outgoing messages:
-
Delete for myself with the following sub-content: This message will be deleted only for you. Other chat members will still be able to see it. Are you sure you want to proceed?
-
Delete for everyone will automatically delete the message for all participants without additional confirmation dialogue.
For incoming messages, there is only one option:
- Delete for myself with the following sub-content: This message will be deleted only for you. Other chat members will still be able to see it. Are you sure you want to proceed?
After deleting the message, the message interface will be displayed with the ''deleted message'' indicator.
Share files and text from other apps
Share files and text from other apps to gloCOM GO 6, by simply selecting gloCOM GO 6 in the system’s share dialog.
App chat picker will open with recent chats where users can select multiple chats that will receive the file or text.

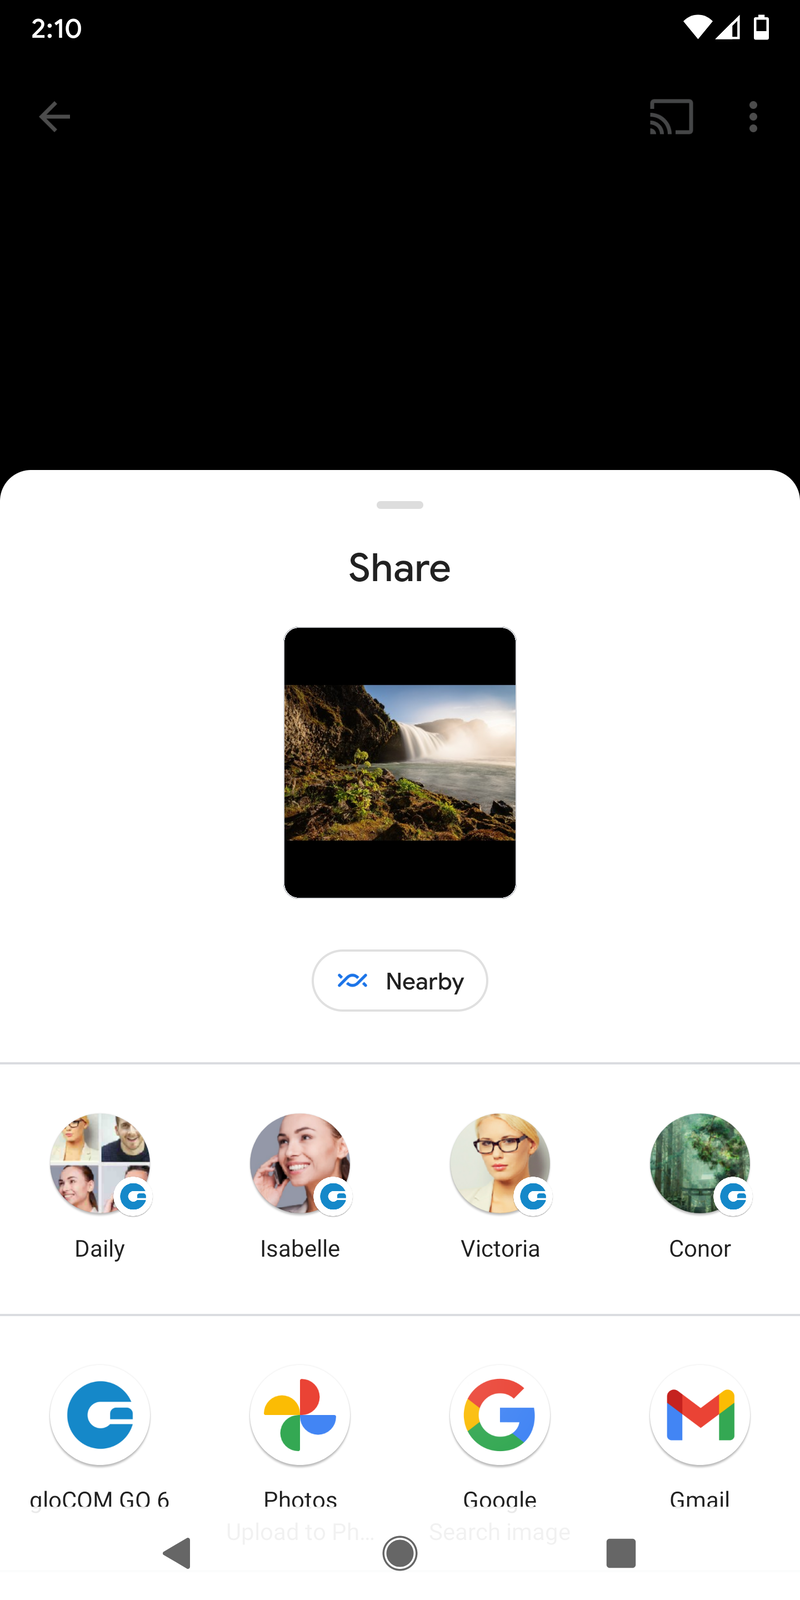
Direct share
In addition to standard share functionality with direct share, users can now share text, files, videos, and images from other apps directly to conversations. This means that when a user wants to send text/file/video/image from another app, the most recent conversations will pop up in the share menu, from where the user can choose to directly share the conversation without any additional steps.
Direct share is available on devices that run Android 10 and higher.
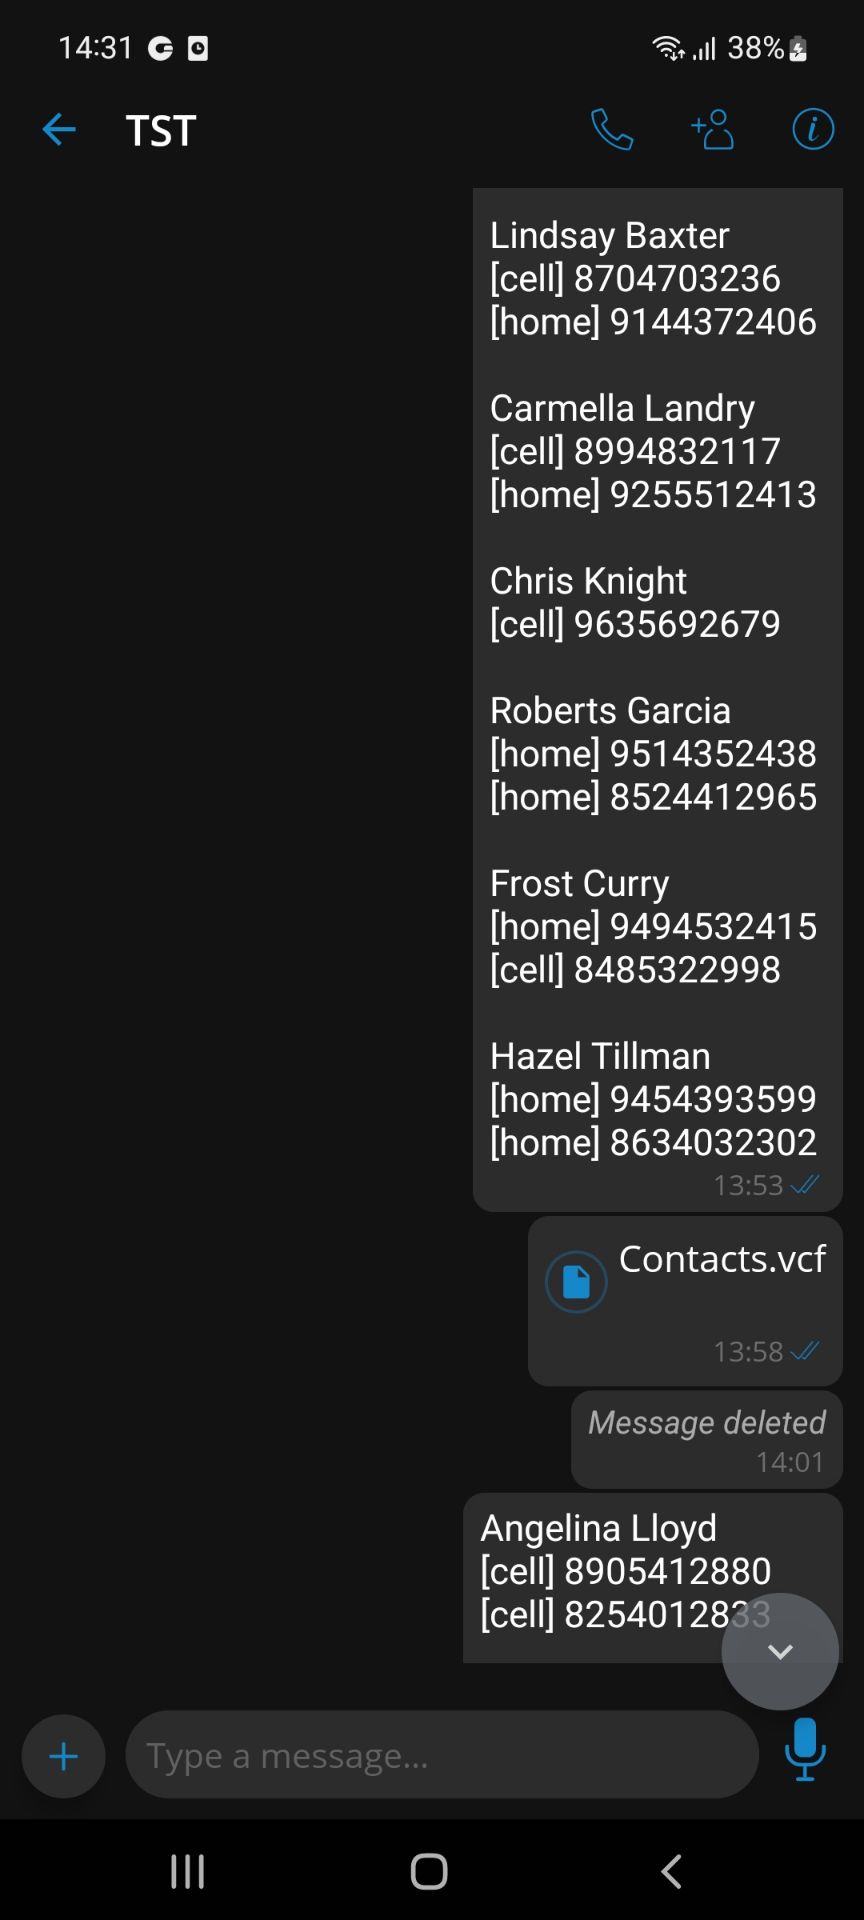
Contact share from other apps
gloCOM GO users have an ability to share contact details from phonebook or any other application to gloCOM GO.
Contact sharing displays contact data as a chat message to the selected gloCOM user.
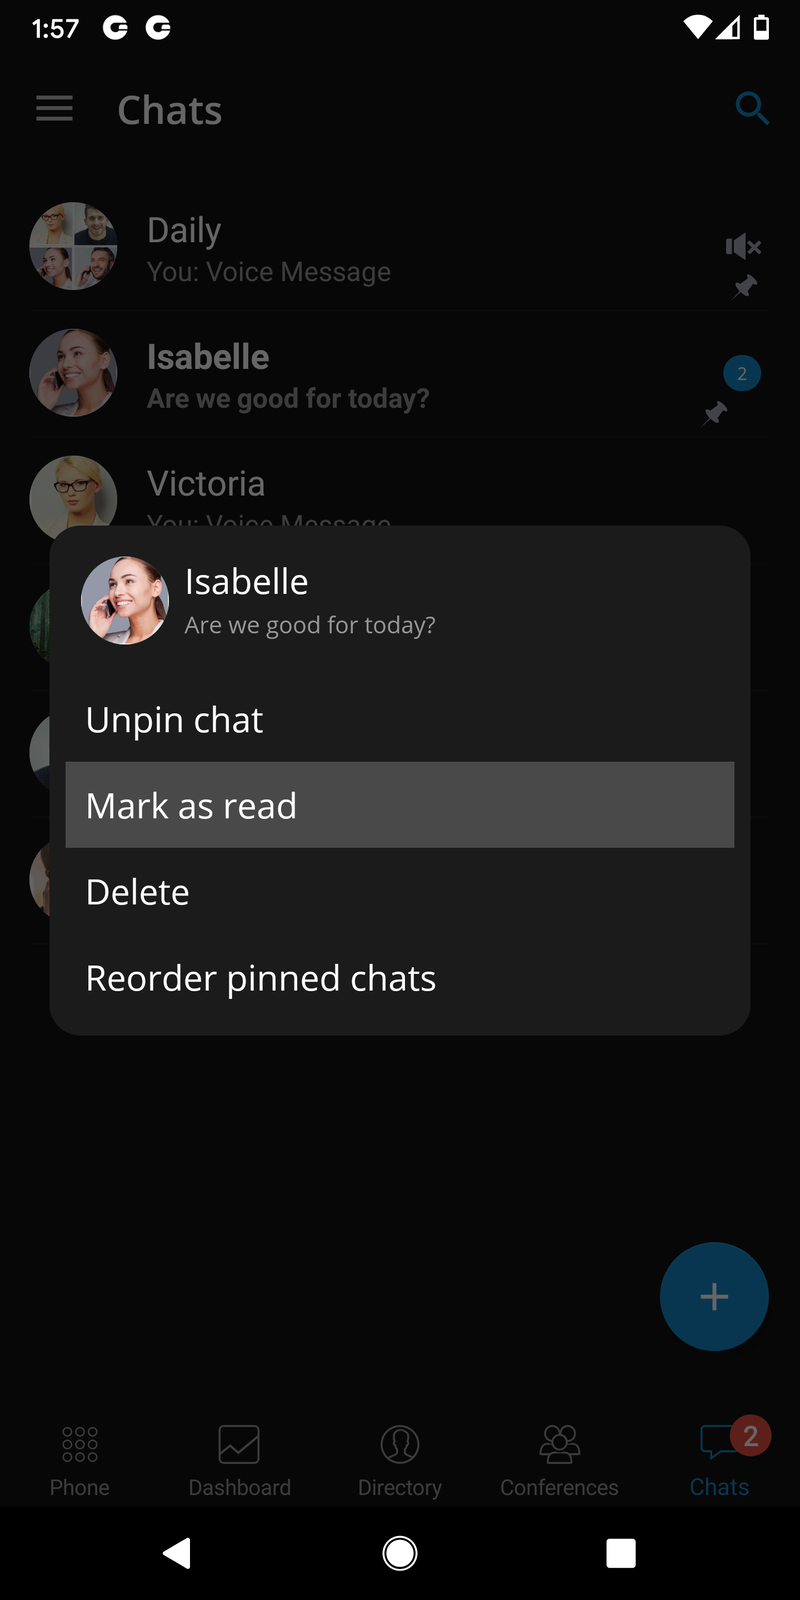
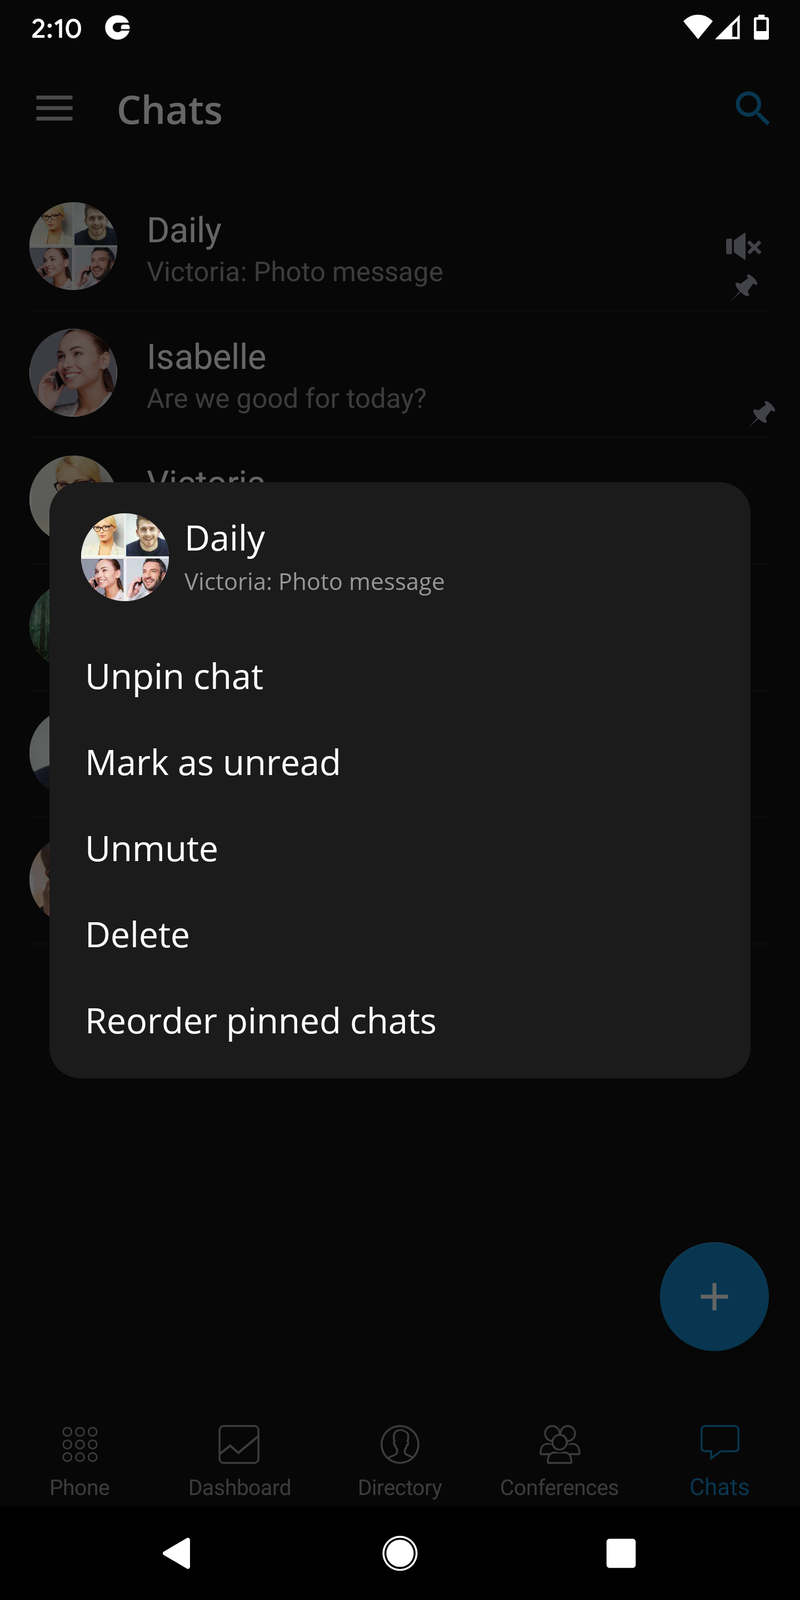
Quick actions for chats on chats list
Users can perform multiple actions for chats by long pressing on the chat in the chats list screen:
-
Pin - Pins or unpins the chat sessions
-
Reorder pinned chats - Opens a new screen that will allow users to reorder pinned chats
-
Mute - Mutes or unmutes the group chat session
-
Delete - Deletes the chat session
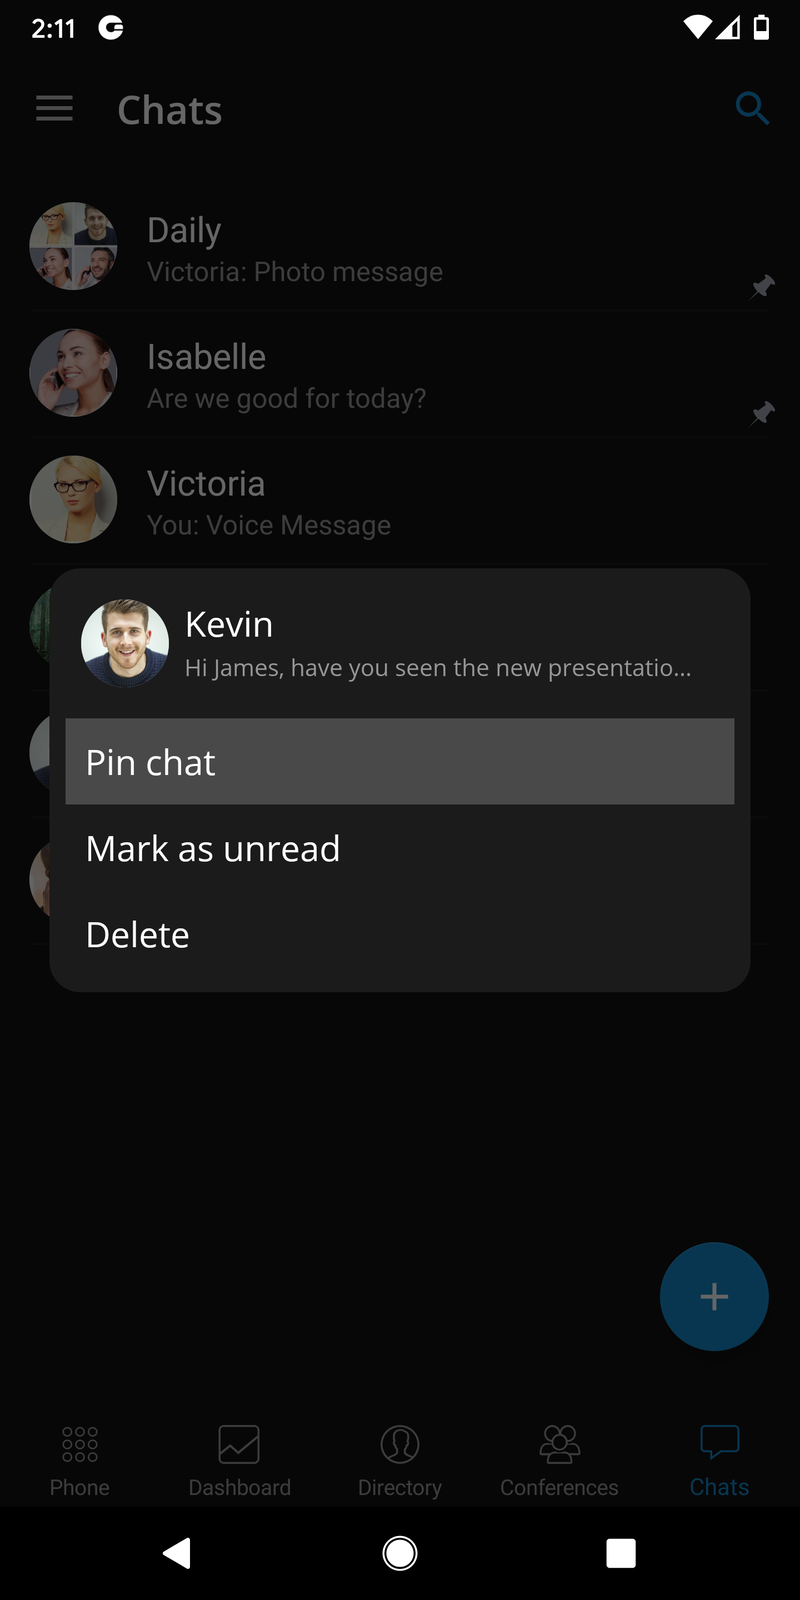
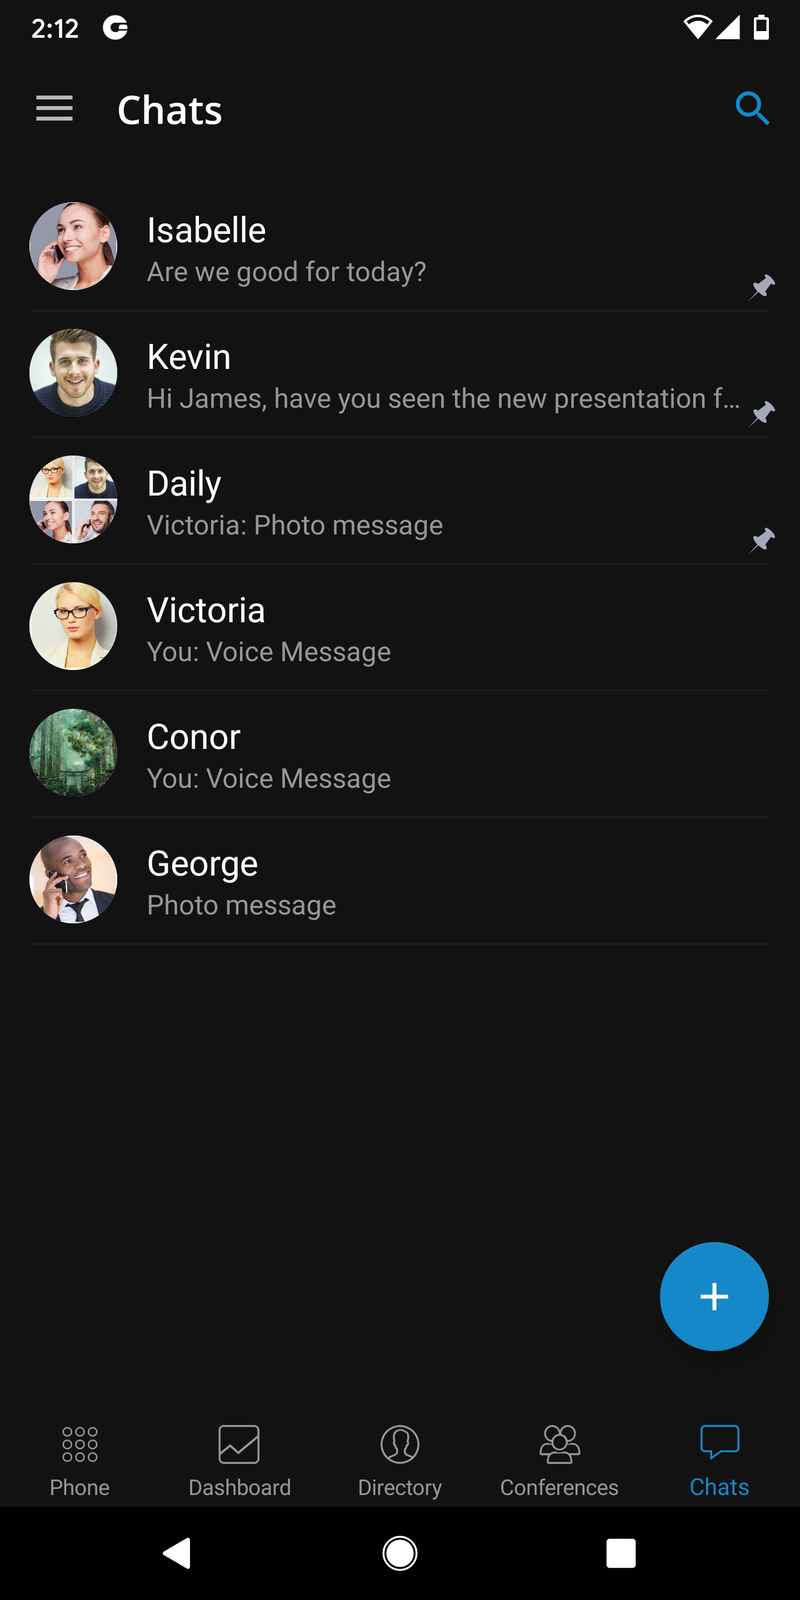
Pin chat sessions
gloCOM GO 6 allows users to pin their most essential and frequently used chat sessions to the top of the chat list screen.
This will help users find groups or contacts they chat with most often quickly.
When users long press on the chat session they wish to pin, a menu will open with the option to pin or unpin the chat session.
Once the chat session is pinned, it will be moved to the top of the screen and remain there even when users receive new messages from chats that are not pinned.
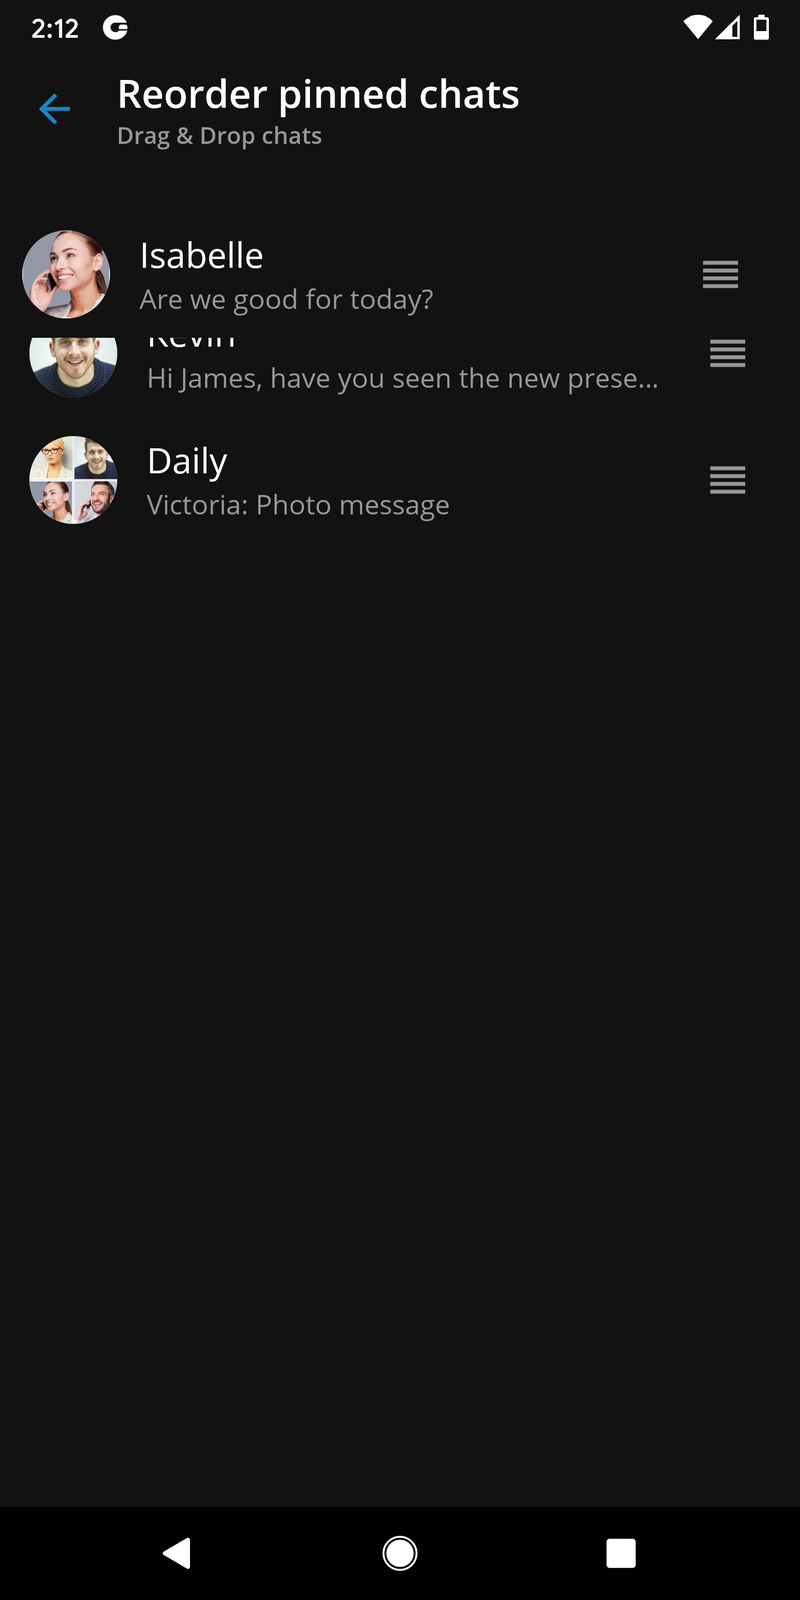
Reorder pinned chat sessions
Users can rearrange pinned conversations by long-pressing on an already pinned chat session and pressing the Reorder pinned chats option.
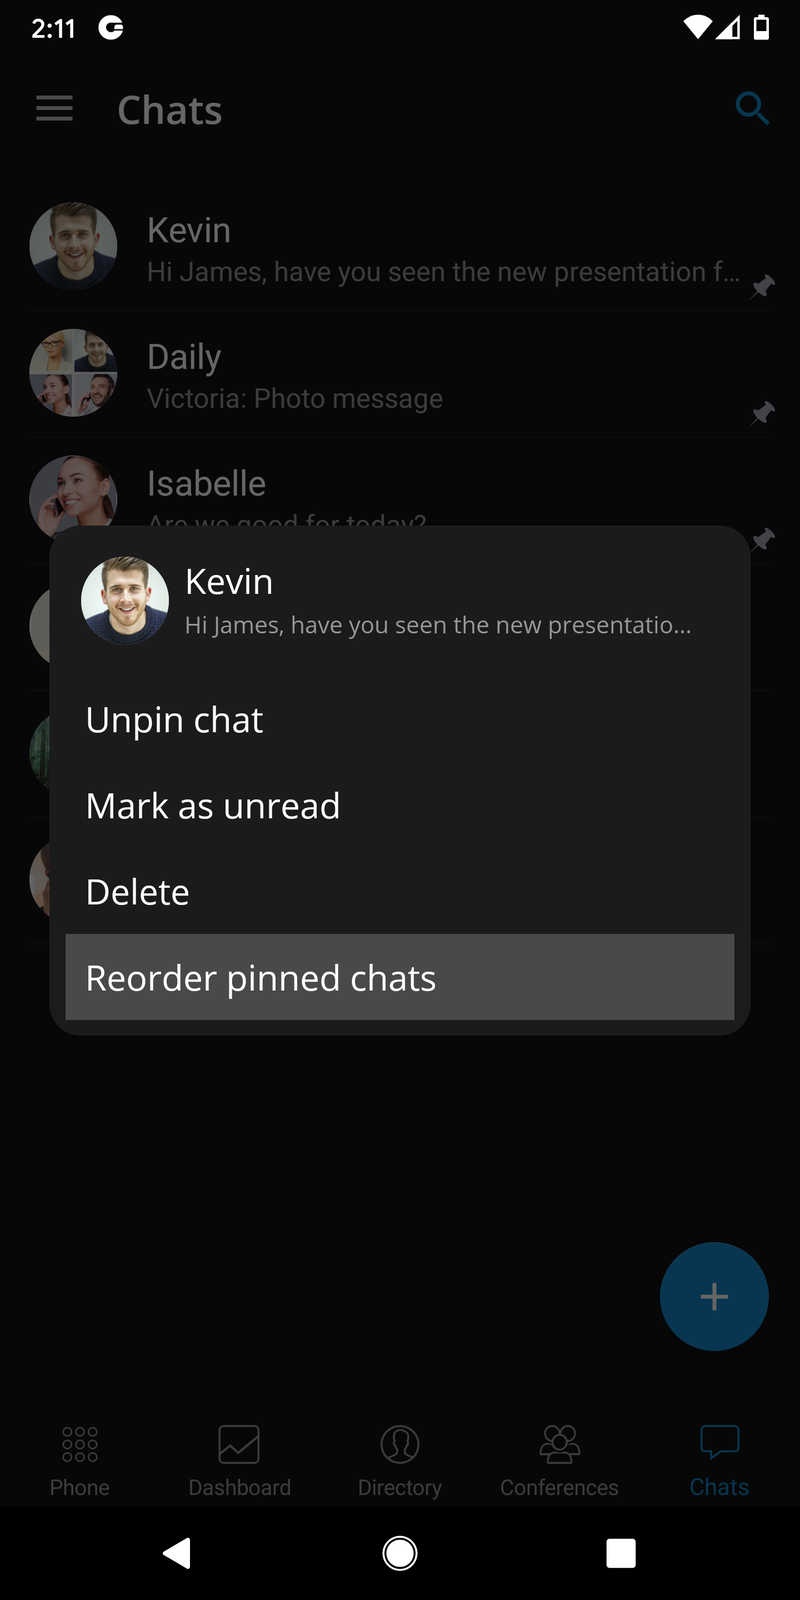
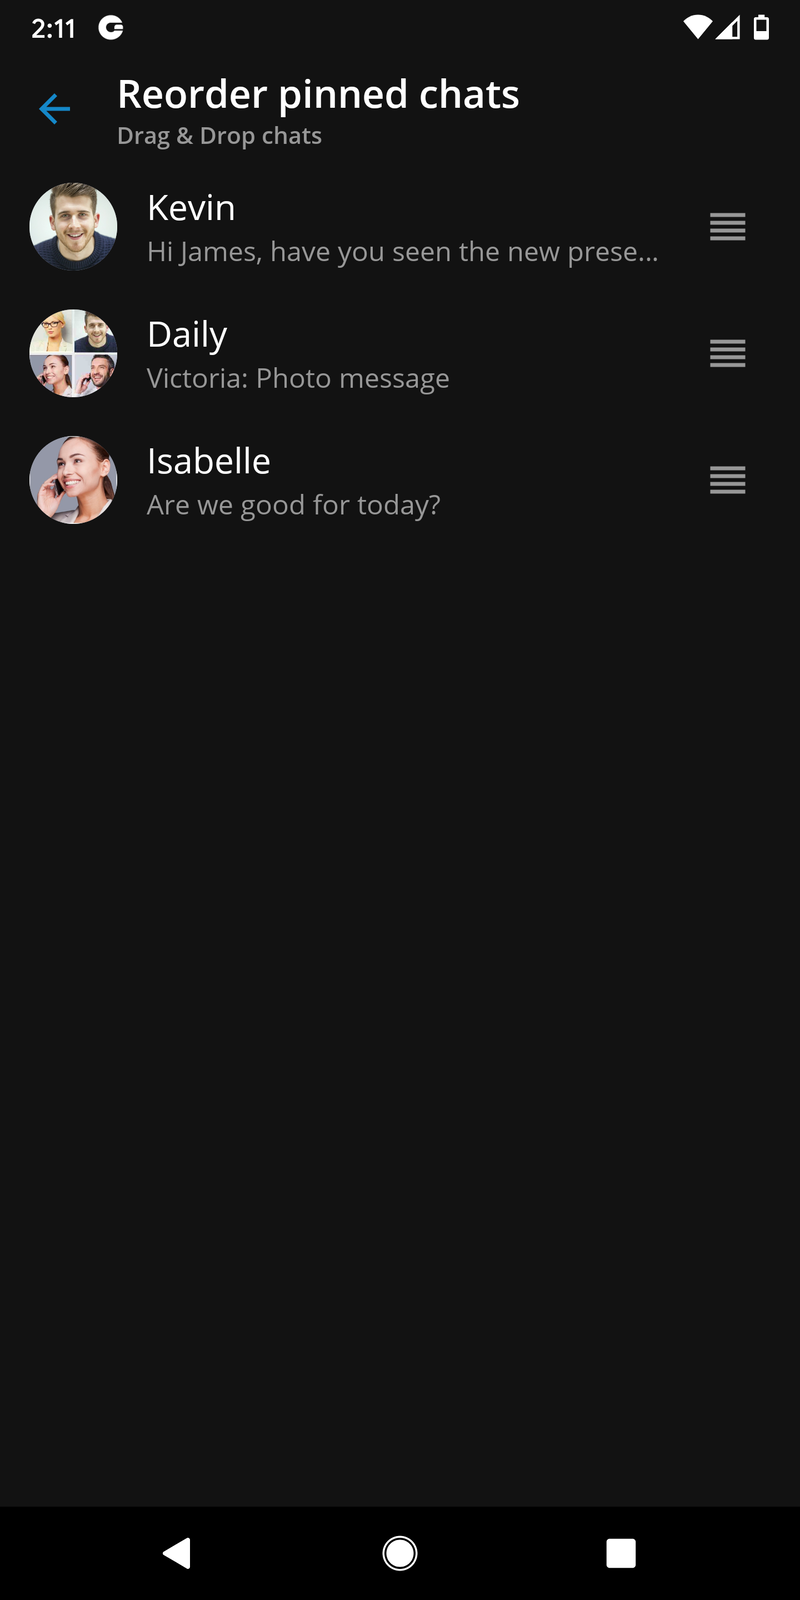
Users can move pinned conversations by using drag and drop. This allows users to prioritize pinned conversations.
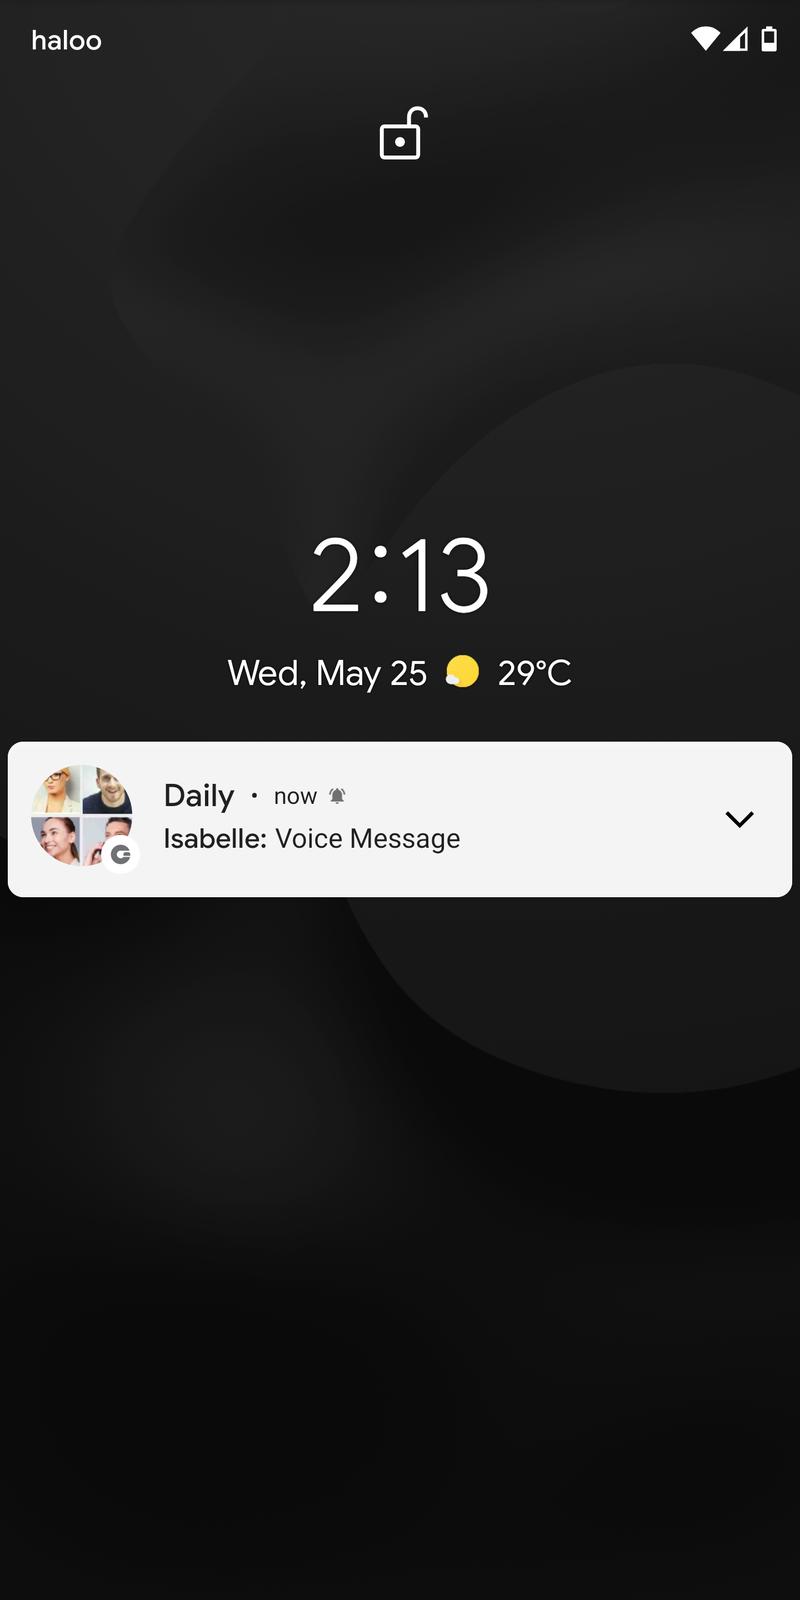
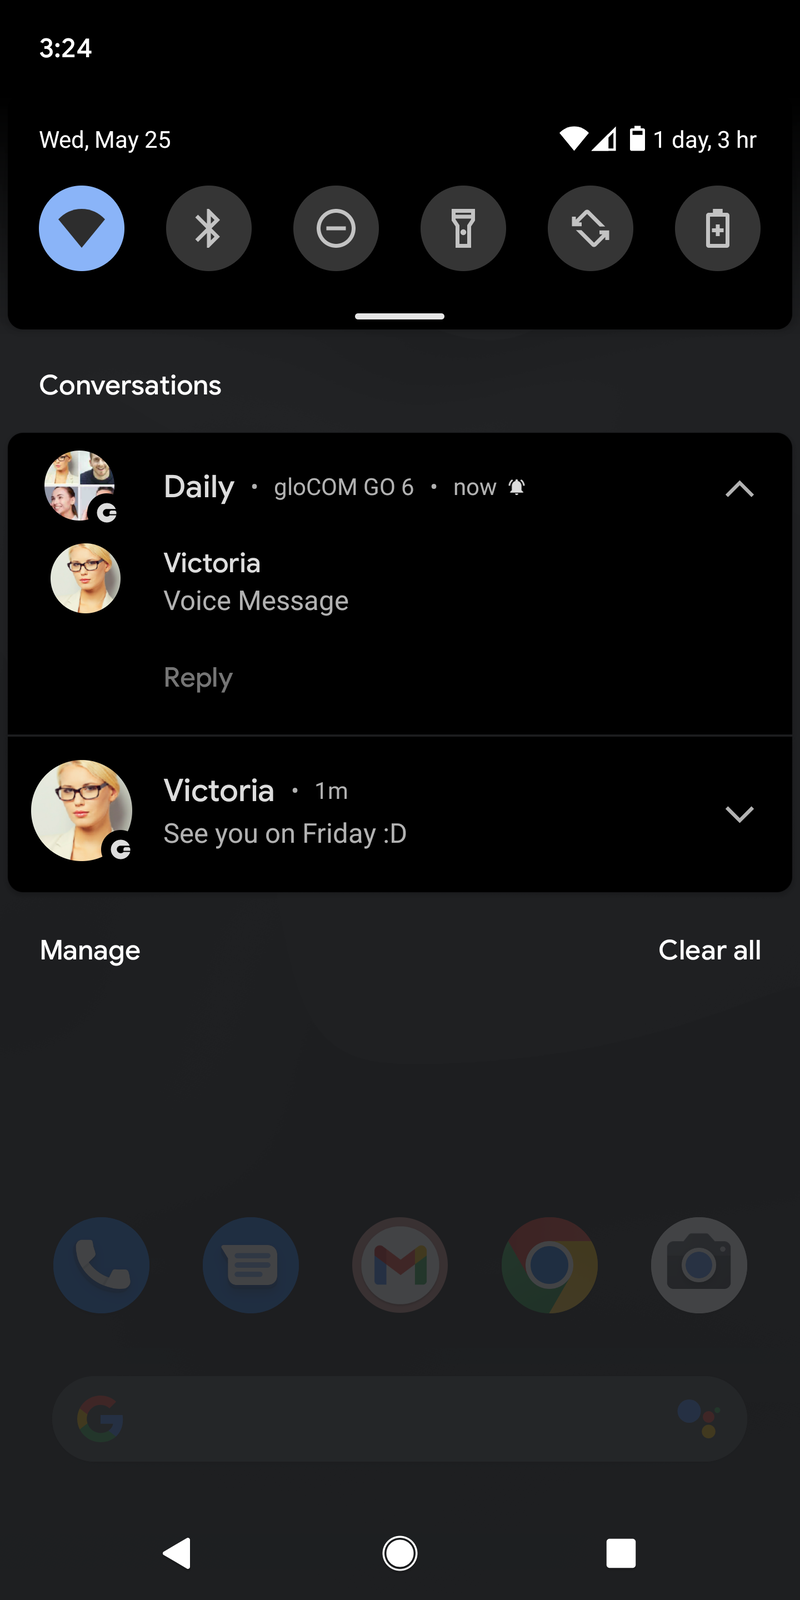
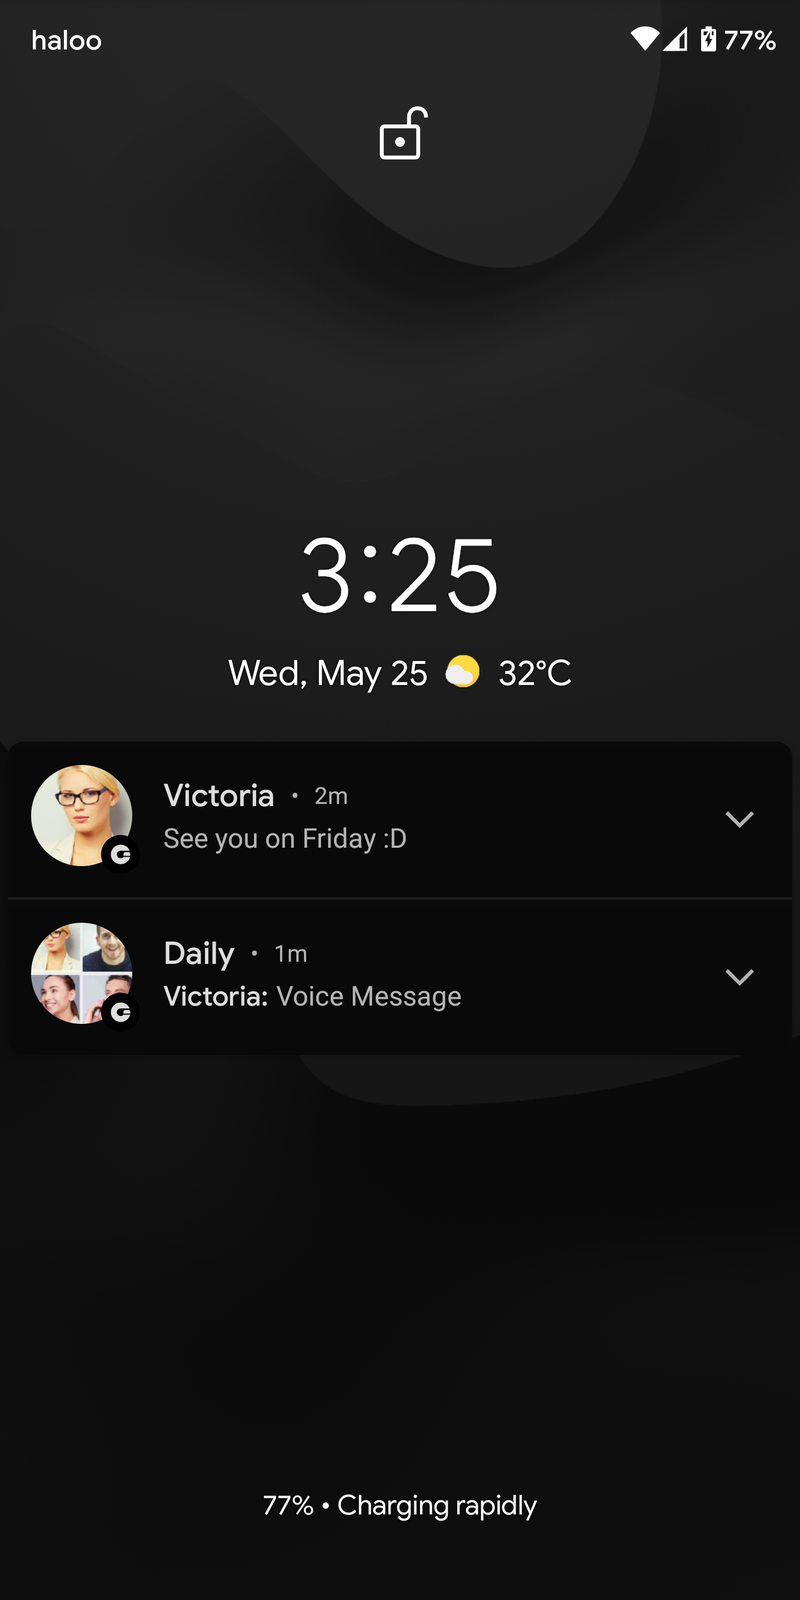
Notifications
For new messages or group events, users will be notified with a notification. Pressing a notification will open a chat session associated with that notification.
The system’s user interface groups notifications for the same chat session.
Chat notifications use messaging style notifications. With this style, notifications for group conversations are much more descriptive with every message in the conversation having the sender’s name and avatar attached. Unlike notifications for group conversations, one-to-one conversations are slightly changed.
On devices that run Android 11 or android 12 conversations, notifications will appear under the conversations tab which is displayed higher in the notifications drop down.
Depending on the device’s android version, notifications will look different.
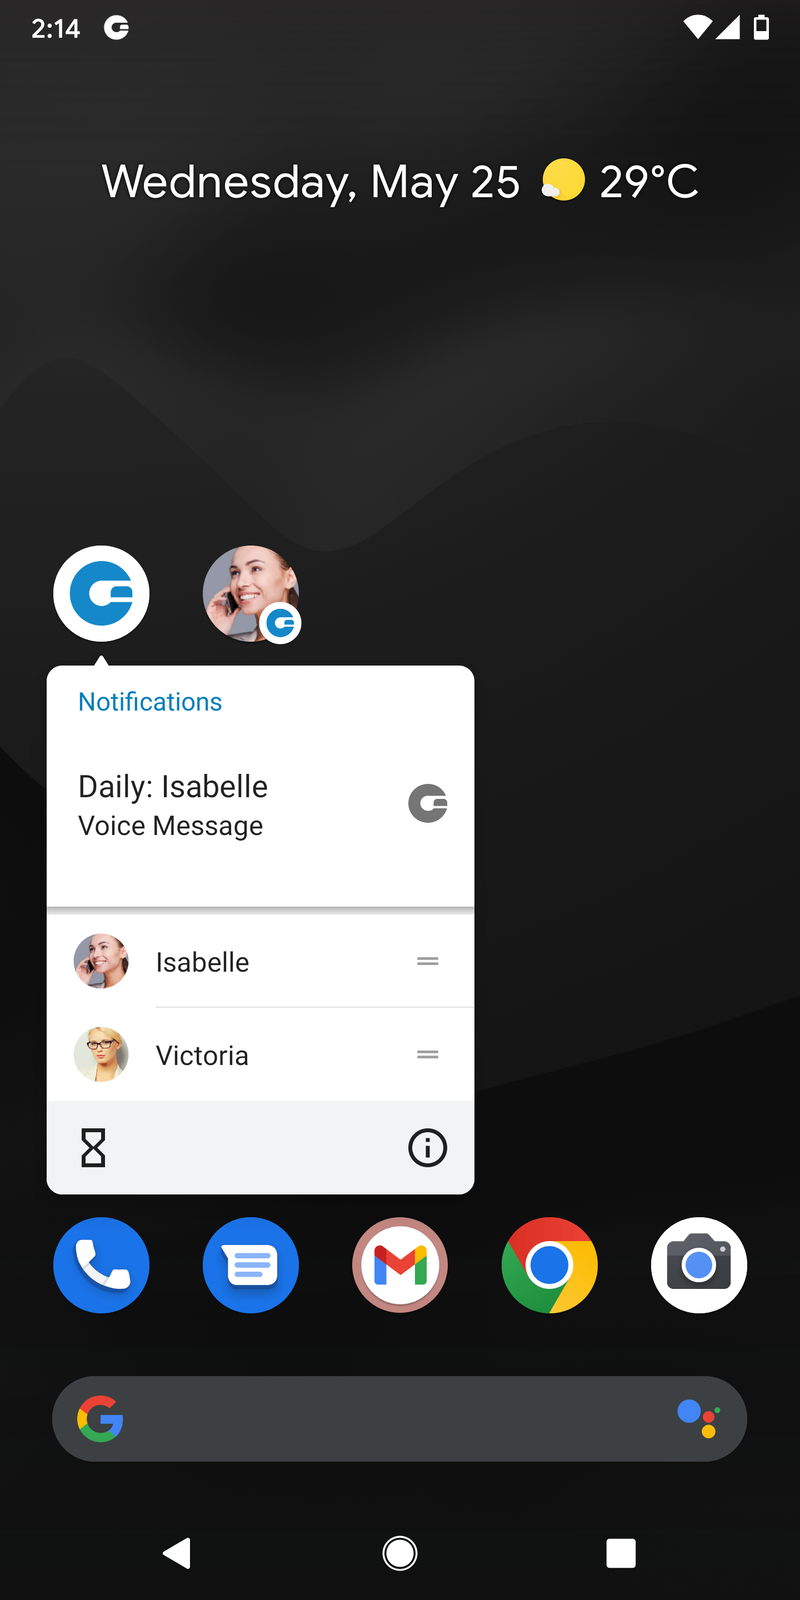
Shortcuts for conversations
Shortcut for conversations allows users to quickly and easily access the most recent chats. They are created when a user opens up a chat list screen or receives a chat notification.
Shortcuts are accessible from the pop-up menu which opens by long press on the app icon. Users can also drag shortcuts directly onto the home screen from the pop-up menu.
A single press on the shortcut opens up a chat conversation immediately.
Archived users and Chat history
Deleted users will be marked as archived, and users will not lose chat sessions with those users. The user will not be able to start new chat sessions or start new calls with archived users.
Deleted users will be labeled with a ''(Deleted)'' message at the end of their names.
Feature Flagging - Enabling/disabling chat features based on server settings
Some chat features that are described above can be enabled/disabled depending on the server settings.
Failover Support
gloCOM GO 6 supports SIP and server failover. This feature will enable the users to stay connected at all times. gloCOM GO 6 queries the DNS for SRV records while connecting to PBXware and SIP service.
If the primary host as defined in the SRV records is not working or it is stopped, the gloCOM will try to connect to the next host ordered by defined priority in the SRV records. Timeout between connections is 6 seconds.
To enable this feature DNS records should be configured like this:
* _pwproxy._tcp.domain. 86400 IN SRV 0 5 10009 pbxserver.domain.
* _pwproxy._tcp.domain. 86400 IN SRV 0 10 10009 pbxserver.domain.
If the primary server starts working after the downtime, the app will connect to it the next time it is resumed from the background.
If users connect to the SIP service hosted on the same PBXware, the SIP service will also support failover. To support this kind of SIP service failover, there should not be any IP address added to PBXware in fields that are sent to the gloCOM clients (e.g., in PBXware field gloCOM SIP Proxy).
SIP service failover
If the users connect to the SIP service using SBCs or proxies that are not hosted on the same machine as the PBXware, the failover must be correctly configured.
For SIP failover to be enabled, a new field is added to PBXware that indicates if SRV resolve will be used for the SIP proxy.
The new field is called gloCOM Use DNS SRV Lookup, and it can be found in the Servers options for a master or specific tenant(s). If the value is set to, No or Not set the gloCOM GO 6 will use the value from gloCOM SIP Proxy Address when connecting to the SIP service. SIP host and SIP proxy values will be equal.
If the value is set to Yes on gloCOM Use DNS SRV Lookup field, and an IP address or IP address: port is entered into the SIP proxy address field. In that case, the app will use the hostname of the currently connected PBXware as a SIP host, and the value of the SIP proxy will be the IP address:port combination.
If the value inside the SIP proxy address field is a hostname or hostname:port, the app will query the DNS for SRV records. The protocol used for SRV querying is defined on the PBXware Protocols page.
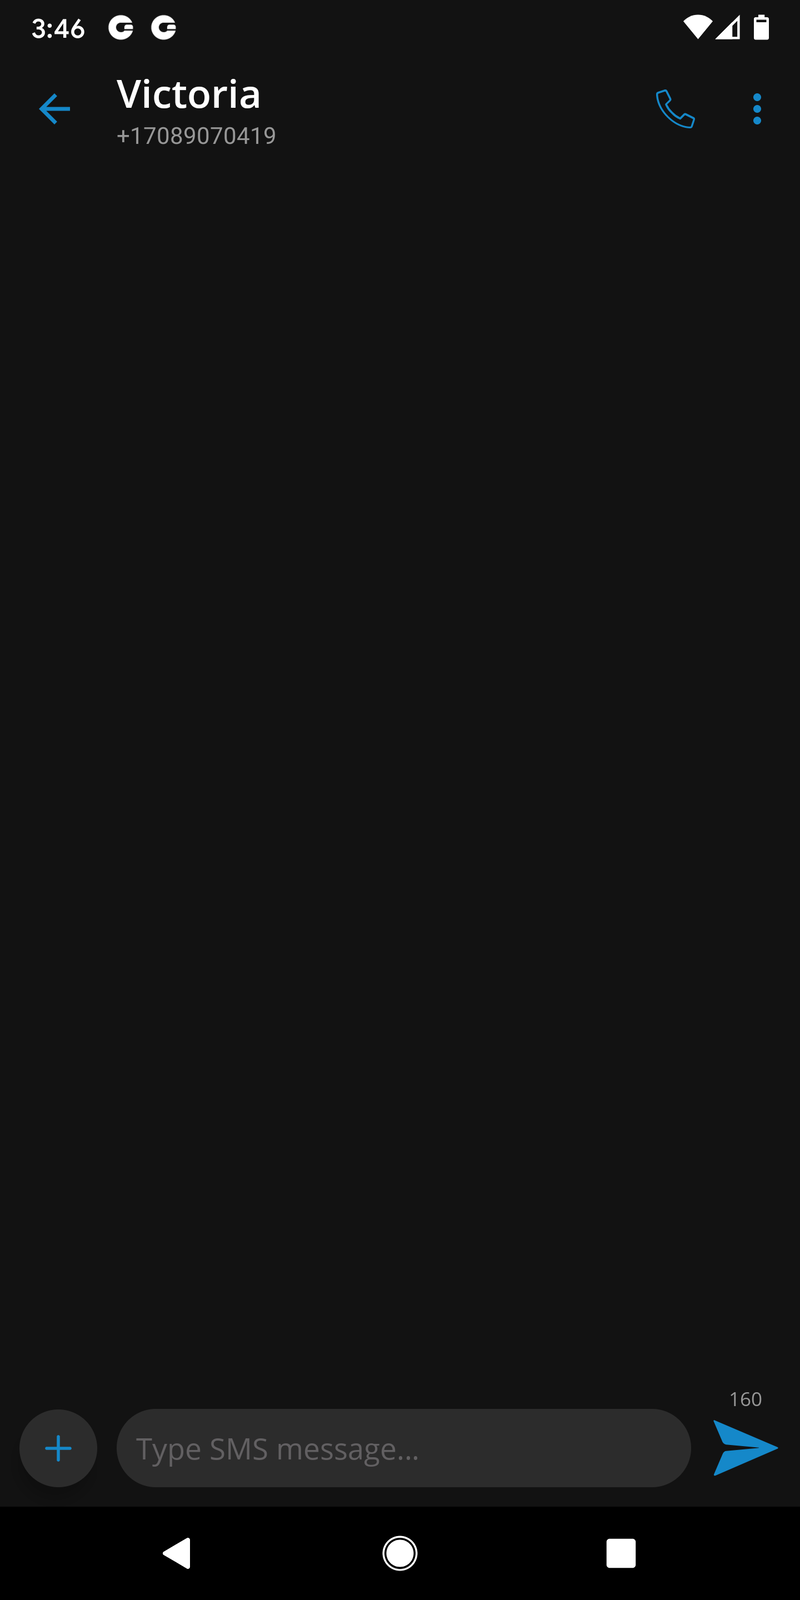
SMS
SMS feature allows users to send and receive SMS or MMS messages using gloCOM GO 6. SMS needs to be enabled in the PBXware license, and the user using the gloCOM GO 6 needs to have an SMS number associated with their account.
Users can start an SMS conversation from:
-
SMS icon at the Menu toolbar
-
User info screen by selecting the recipient’s number
-
Entering a phone number in the Phone dialpad and pressing on send SMS icon
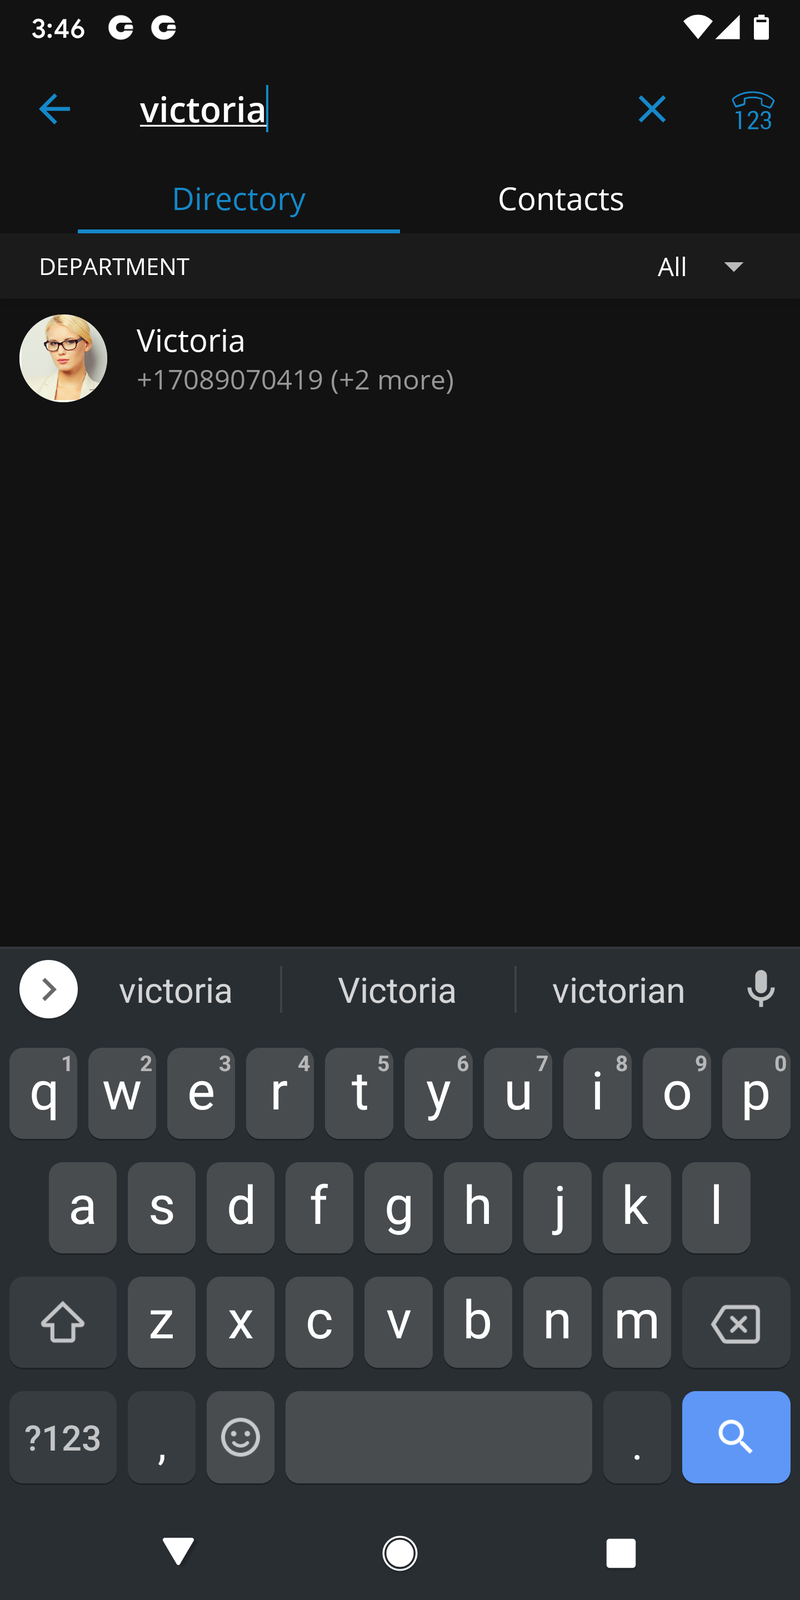
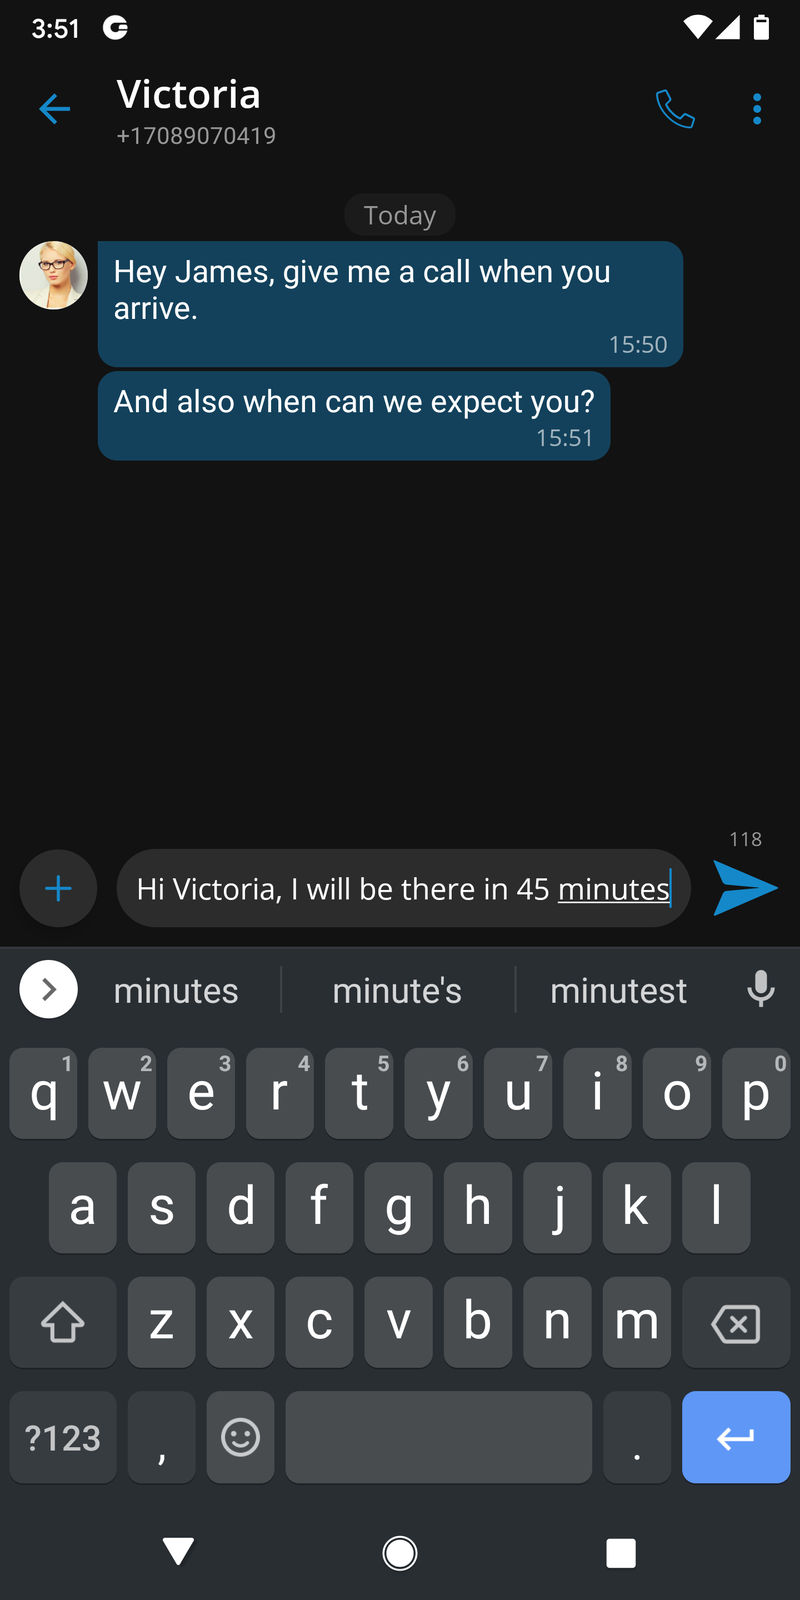
Users can start SMS conversations on the SMS tab by pressing the + button located at the bottom right of the screen. Users can then select recipients from Directory, device Contacts, or enter a phone number manually for numbers not stored in contacts.
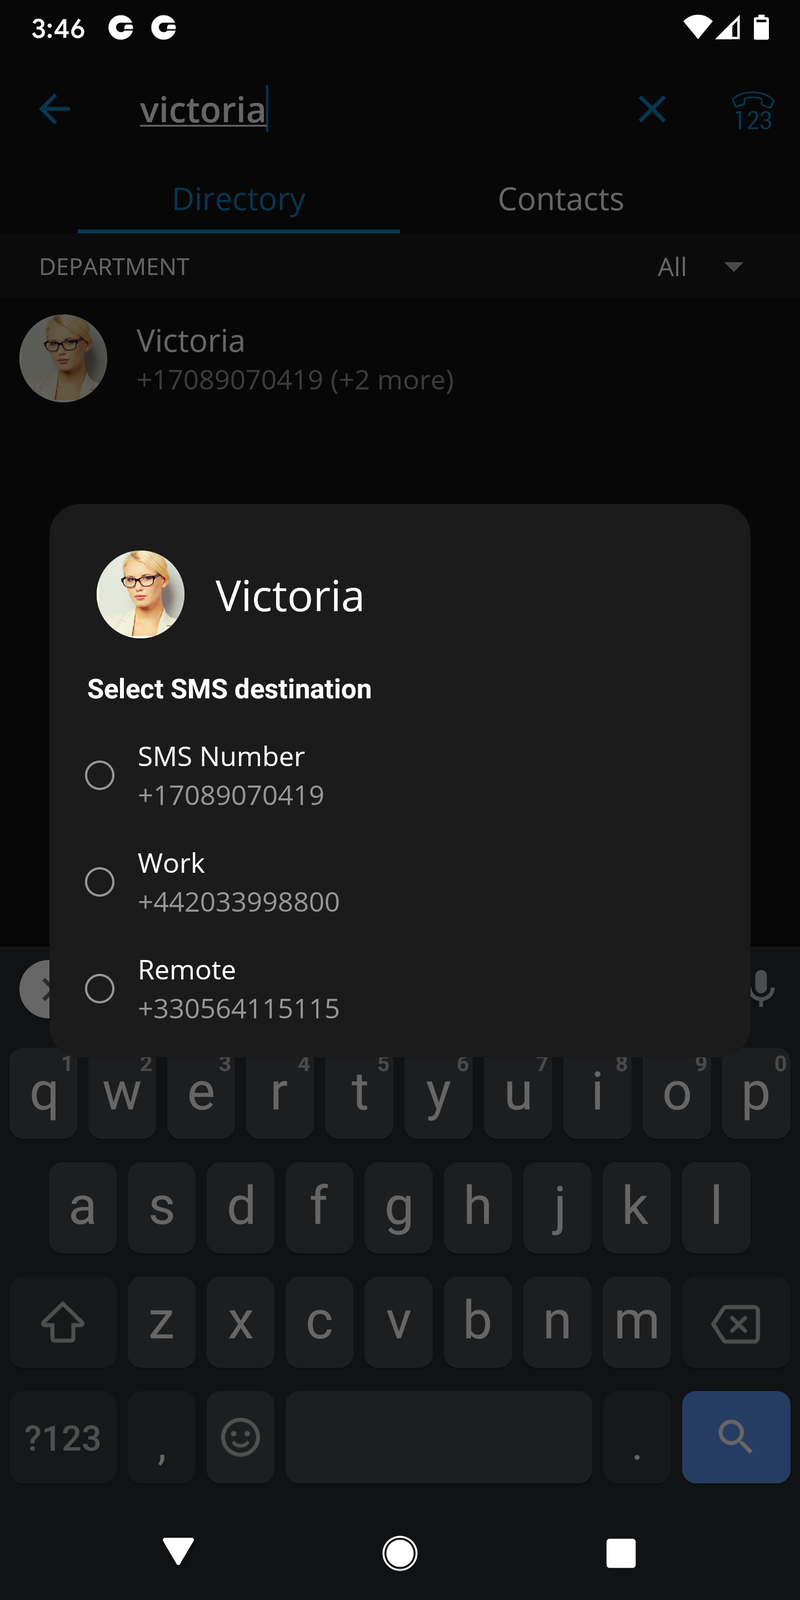
In cases when a user has more than one number entered in their numbers list, a pop-up window will appear, allowing users to choose which number to send the SMS to.
The maximum number of SMS messages sent at once is 4. The SMS counter is located next to the send button at the bottom of the screen.

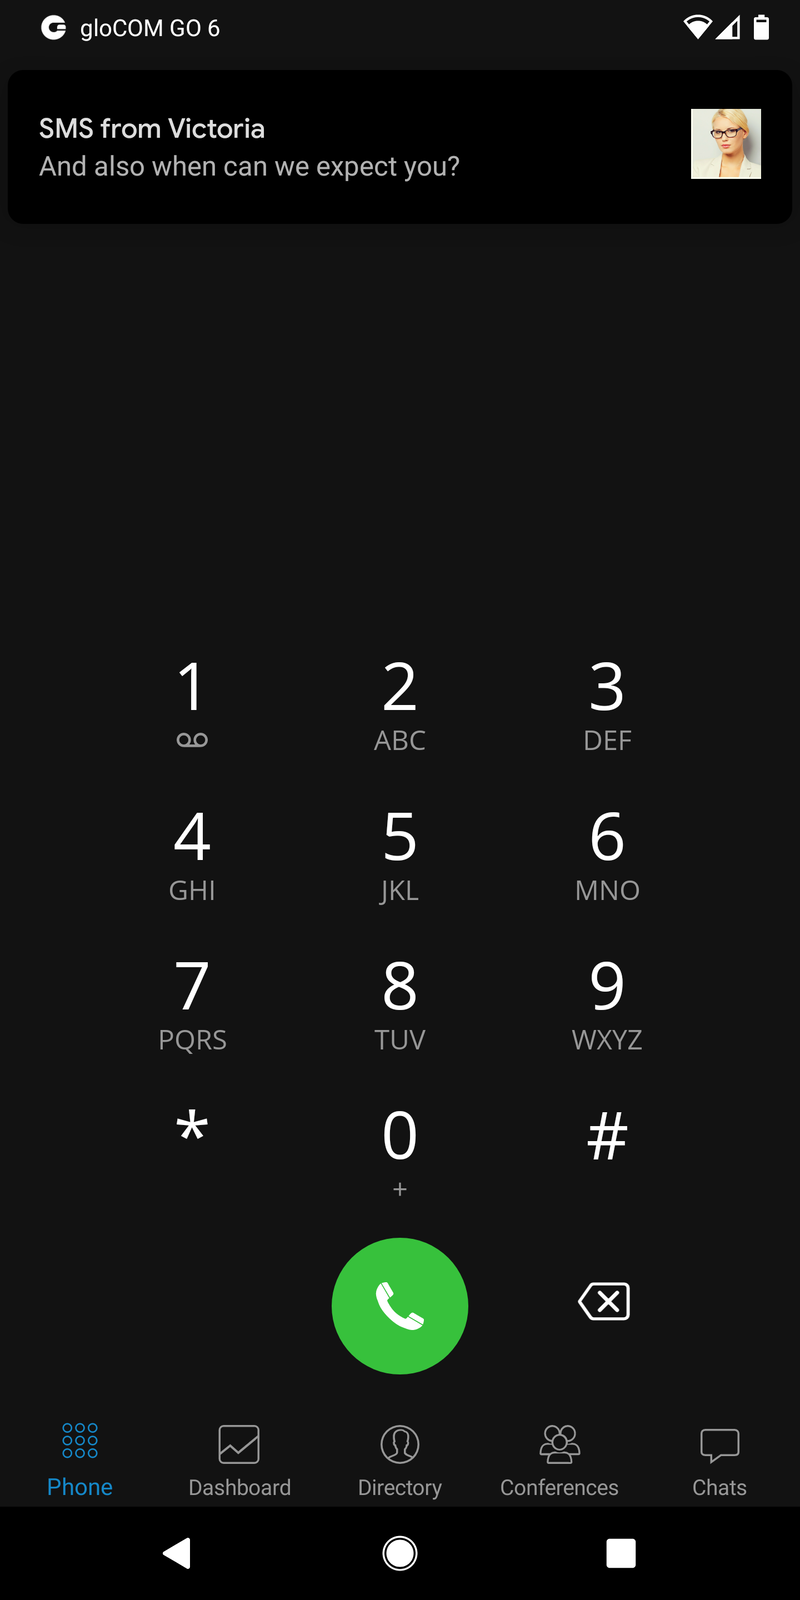
Receiving SMS messages
When users receive an SMS message, a pop-up notification will appear on the top of the screen. In case when users are offline, the pop-up notifications will appear after the sync is completed on the next app login. Currently, there is no support for push notifications for SMS messages.
SMS unread count badge will be visible in the SMS icon in the Main menu displaying the number of unread messages.
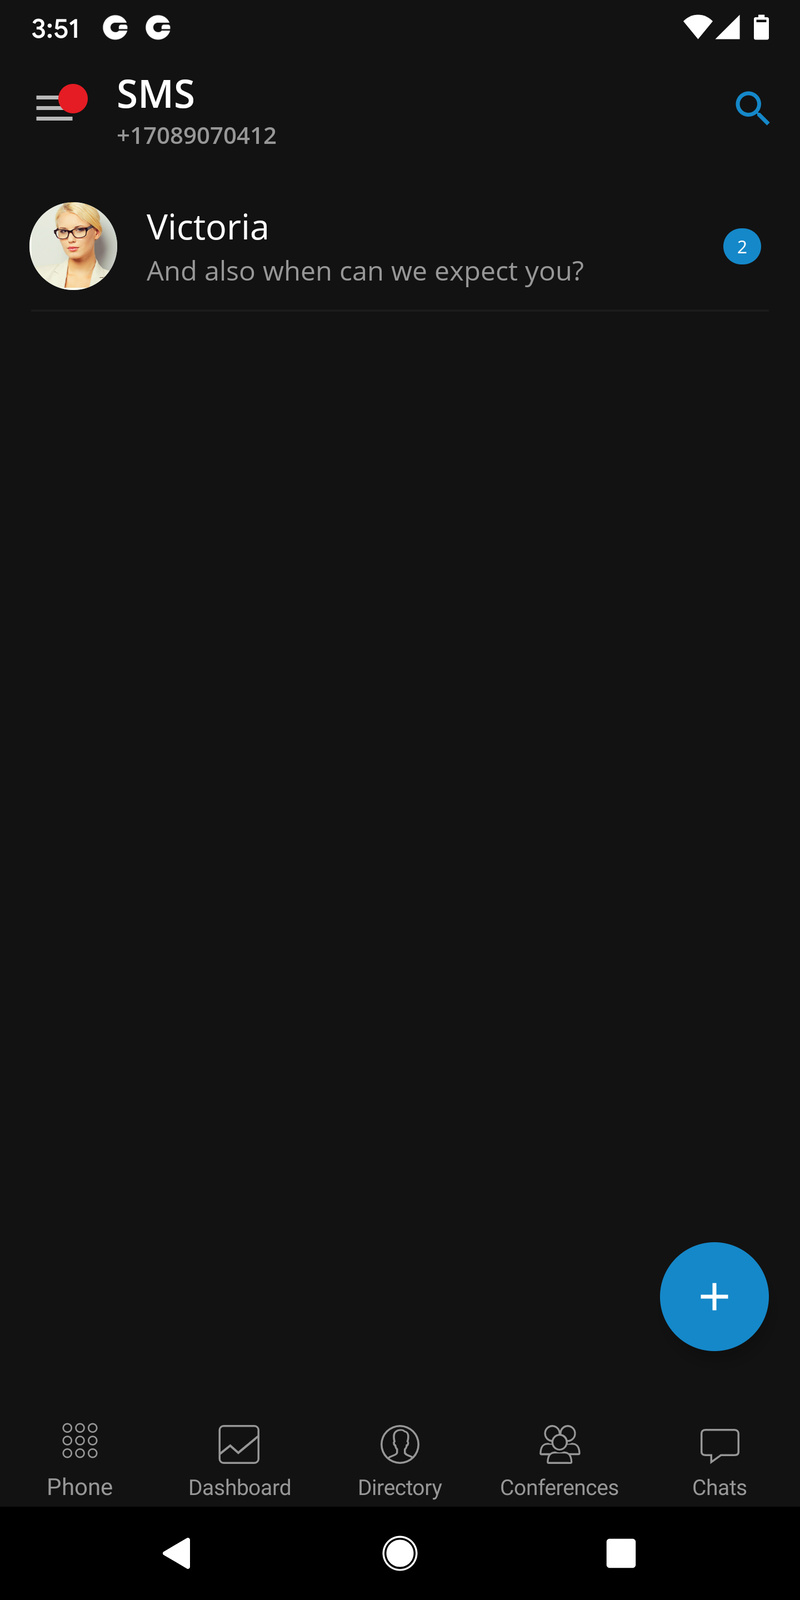
Search existing SMS conversations
The search bar in the SMS conversations list screen allows users to search messages by name or phone number.
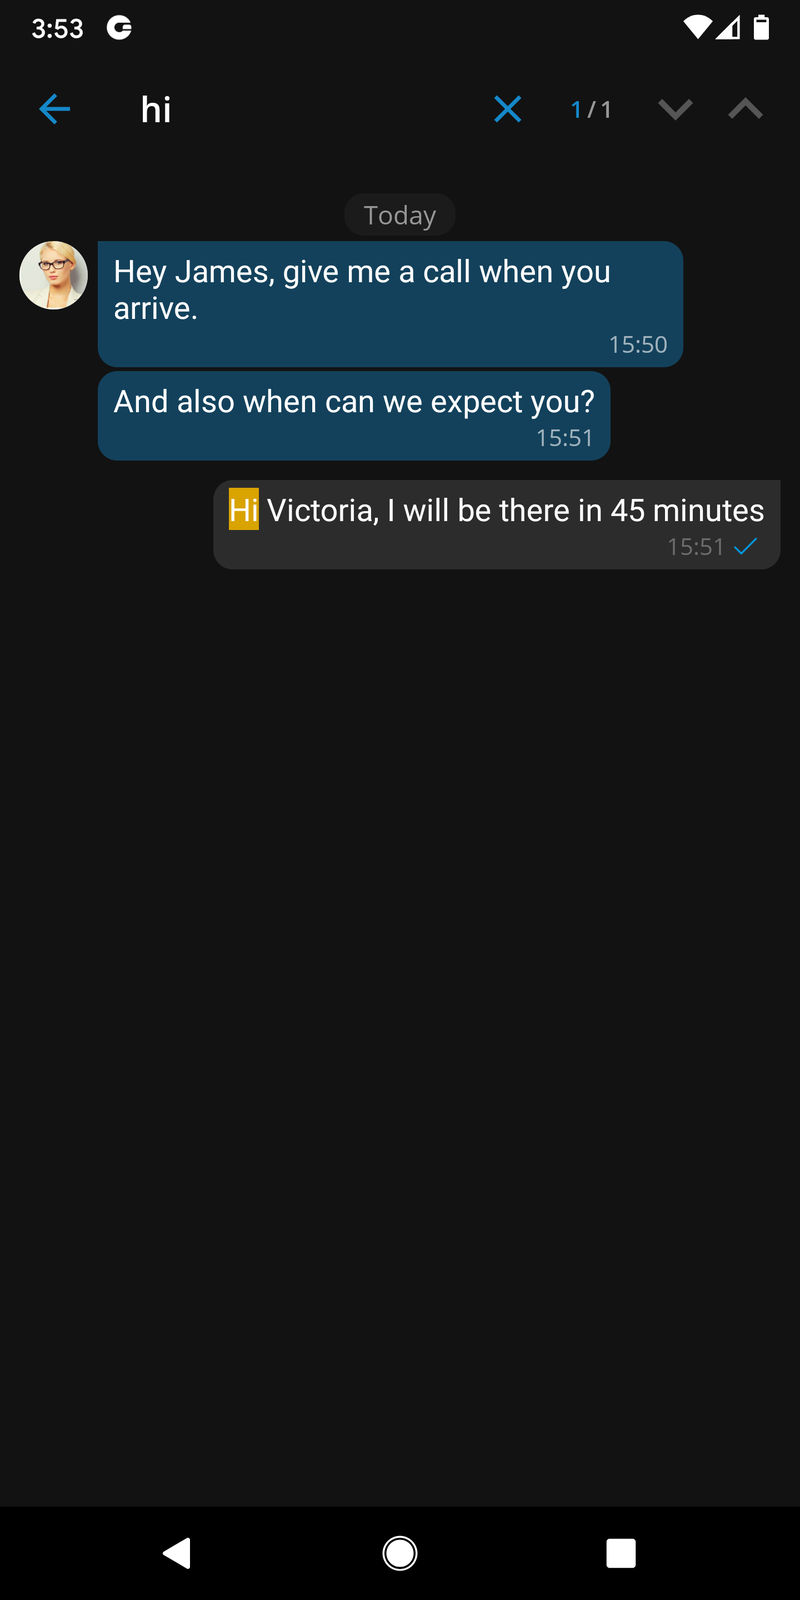
Full-text search for SMS messages
Full-text search can be done by entering an existing SMS conversation and by pressing on the Search icon in the upper right corner of the screen. After entering the search query, users can move up and down between search results using the arrow buttons at the top of the screen.
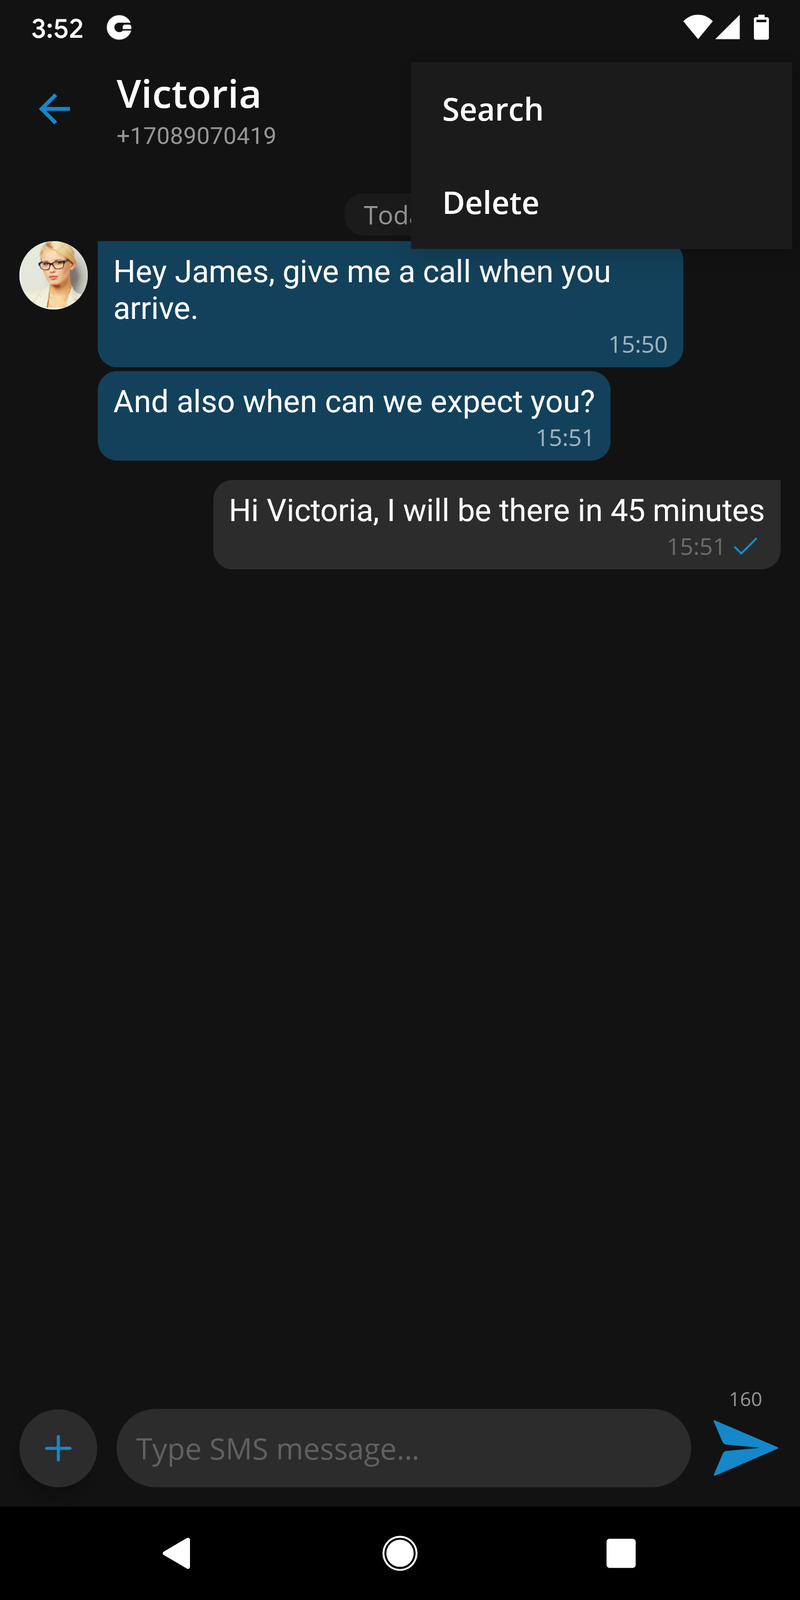
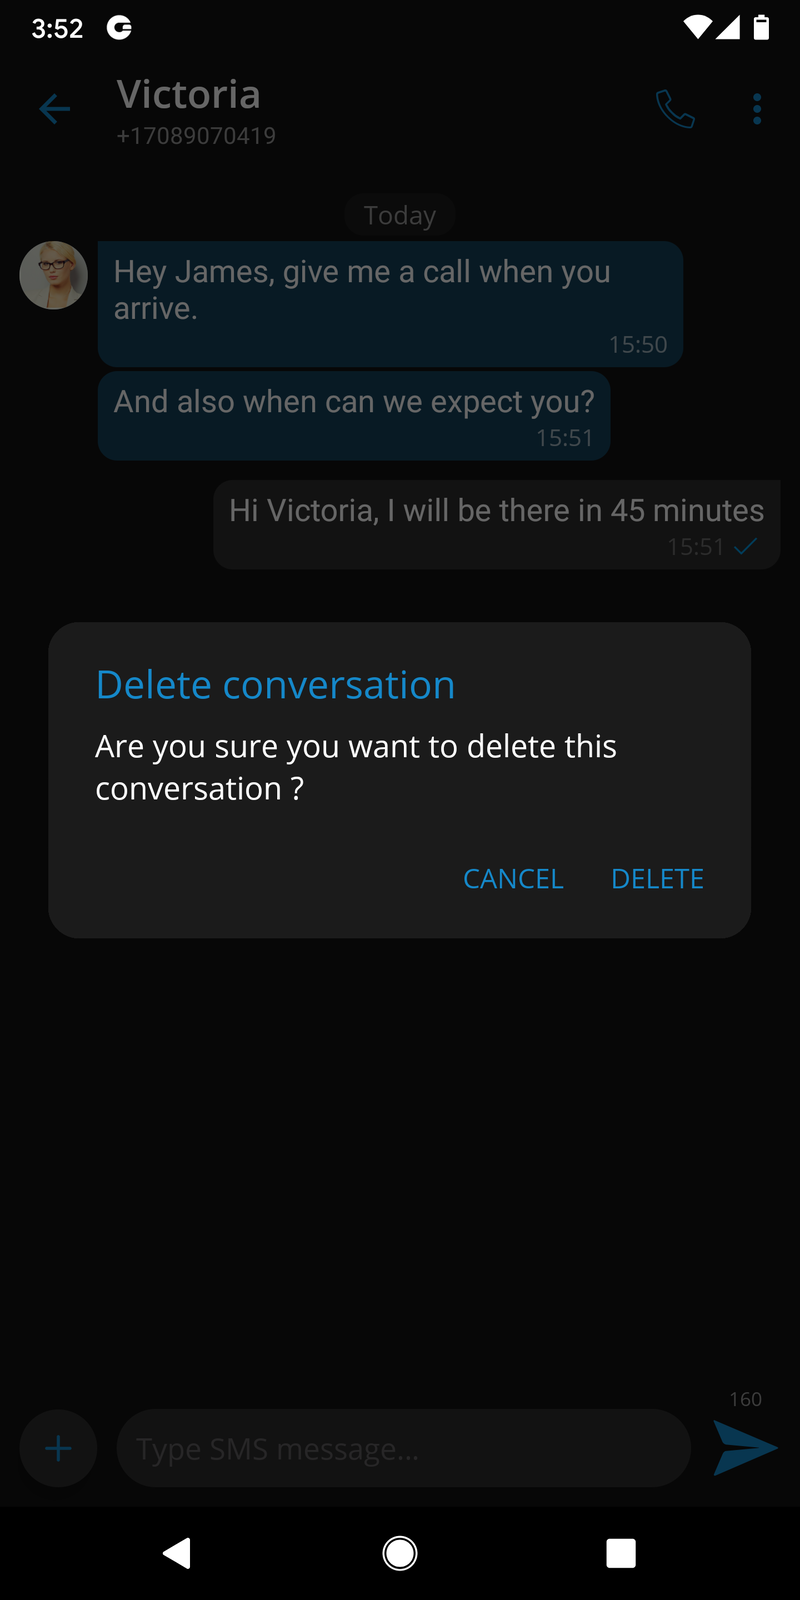
Delete SMS conversations
Users can delete already existing SMS conversations directly by long pressing on a conversation in the SMS conversations list or by selecting the delete option from the upper right corner when they are inside the conversation.
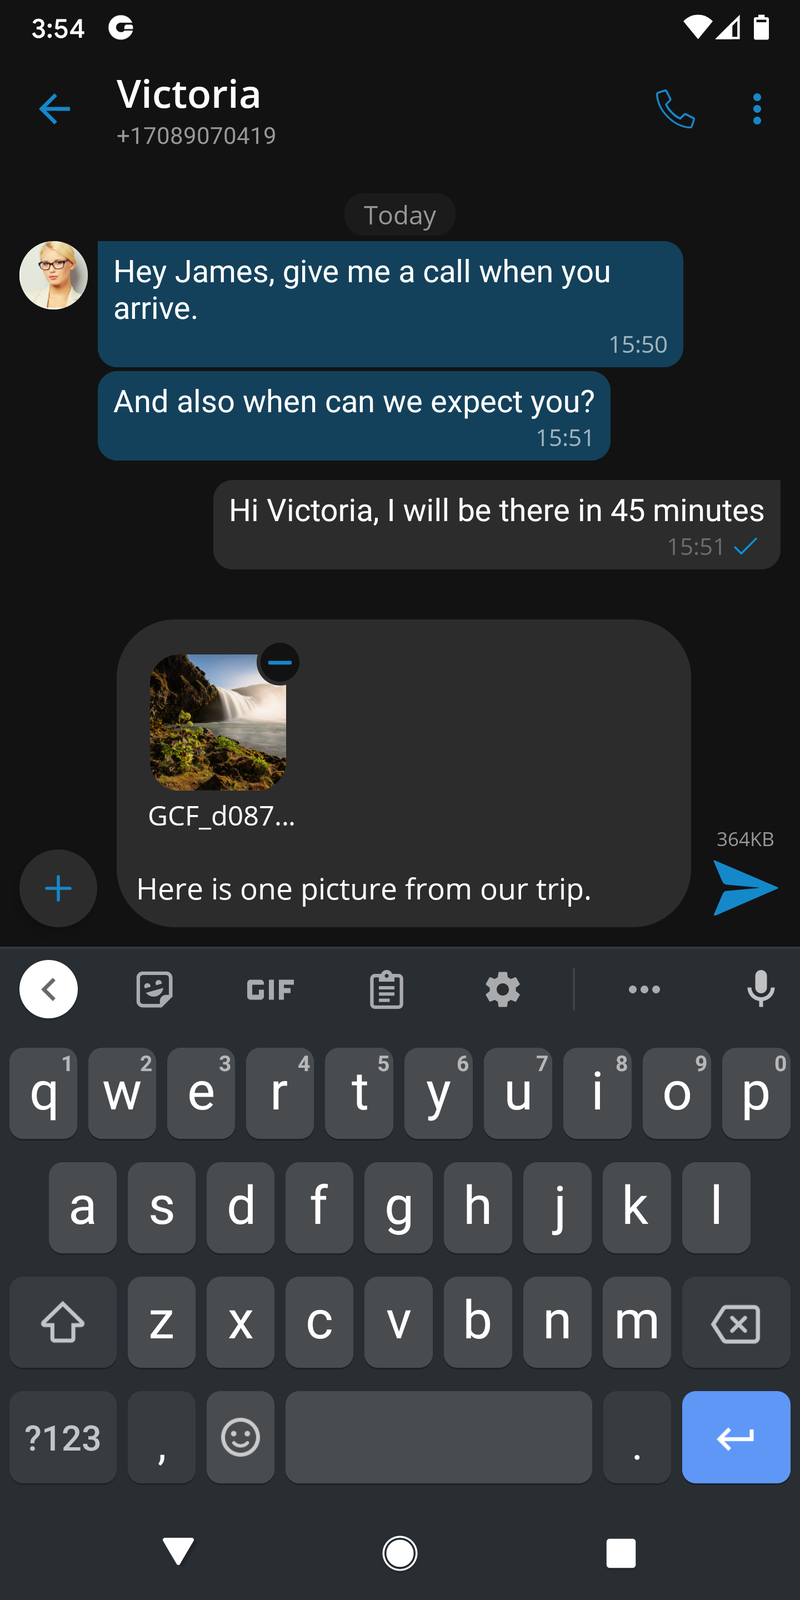
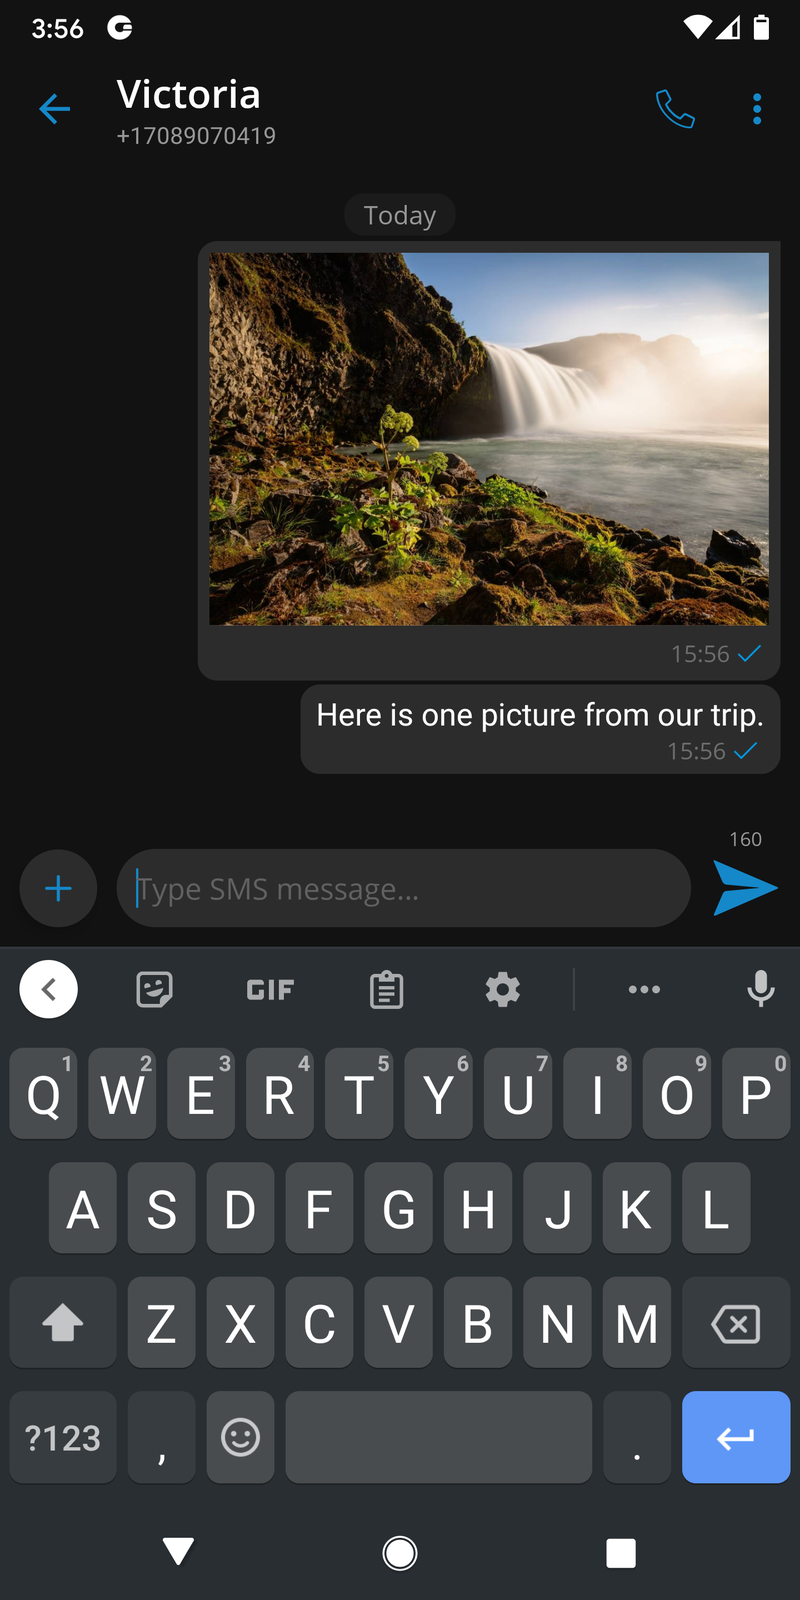
MMS
The MMS message is an enhancement to the standard SMS message. The main difference between SMS and MMS messages is that the users can send multimedia and other files in their messages. It includes media such as videos, pictures, audio clips, GIFs, and much more.
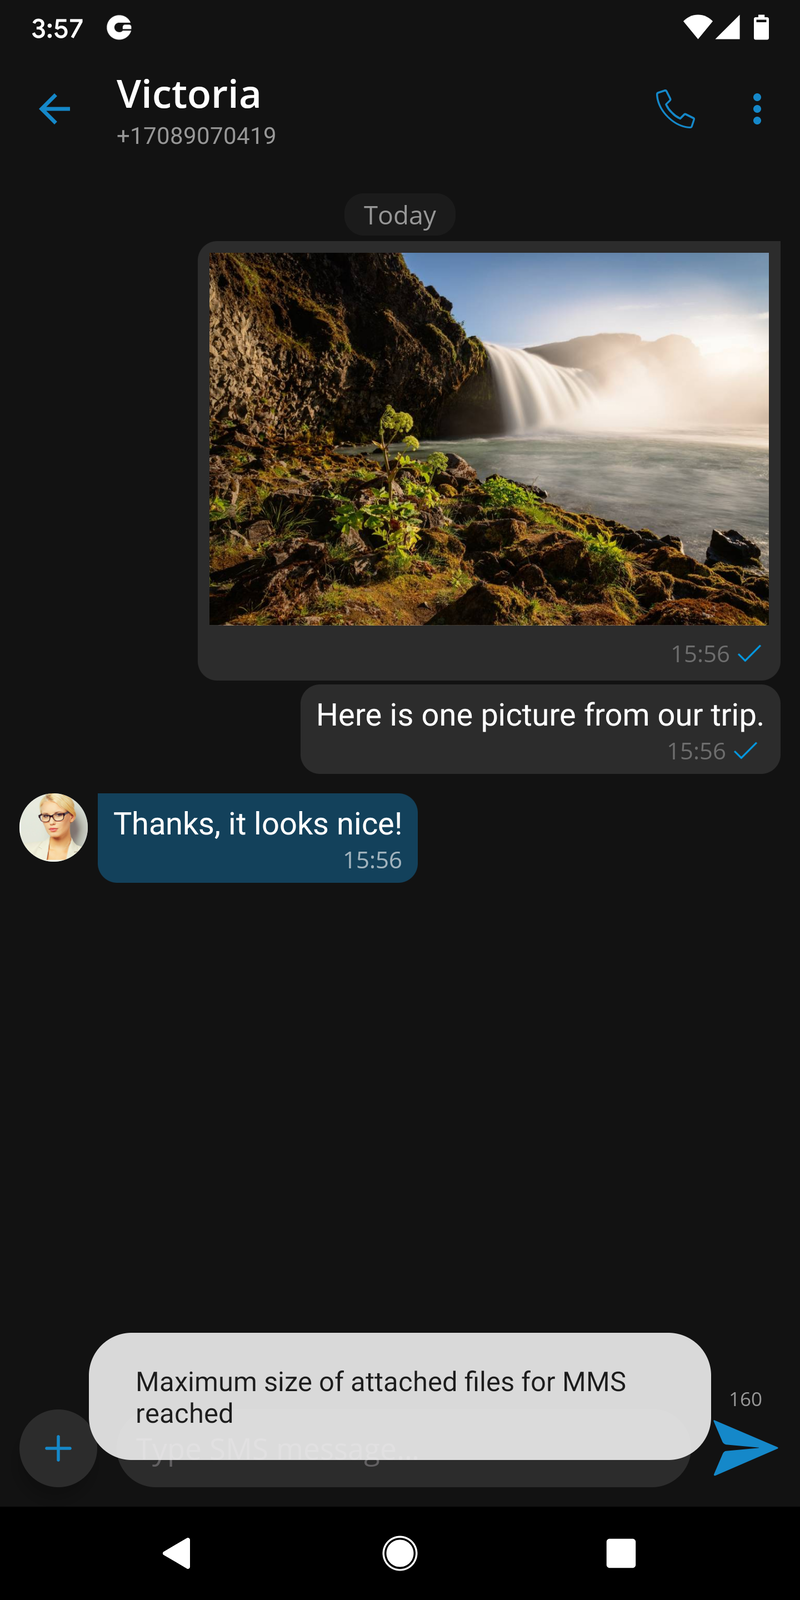
The maximum size of uploaded files is 500 KB or up to ten (10) files per message. Additionally, MMS allows up to 1000 characters of text in the message. MMS notifications have the same behavior as chat notifications - when the MMS message is received, a notification pops up.
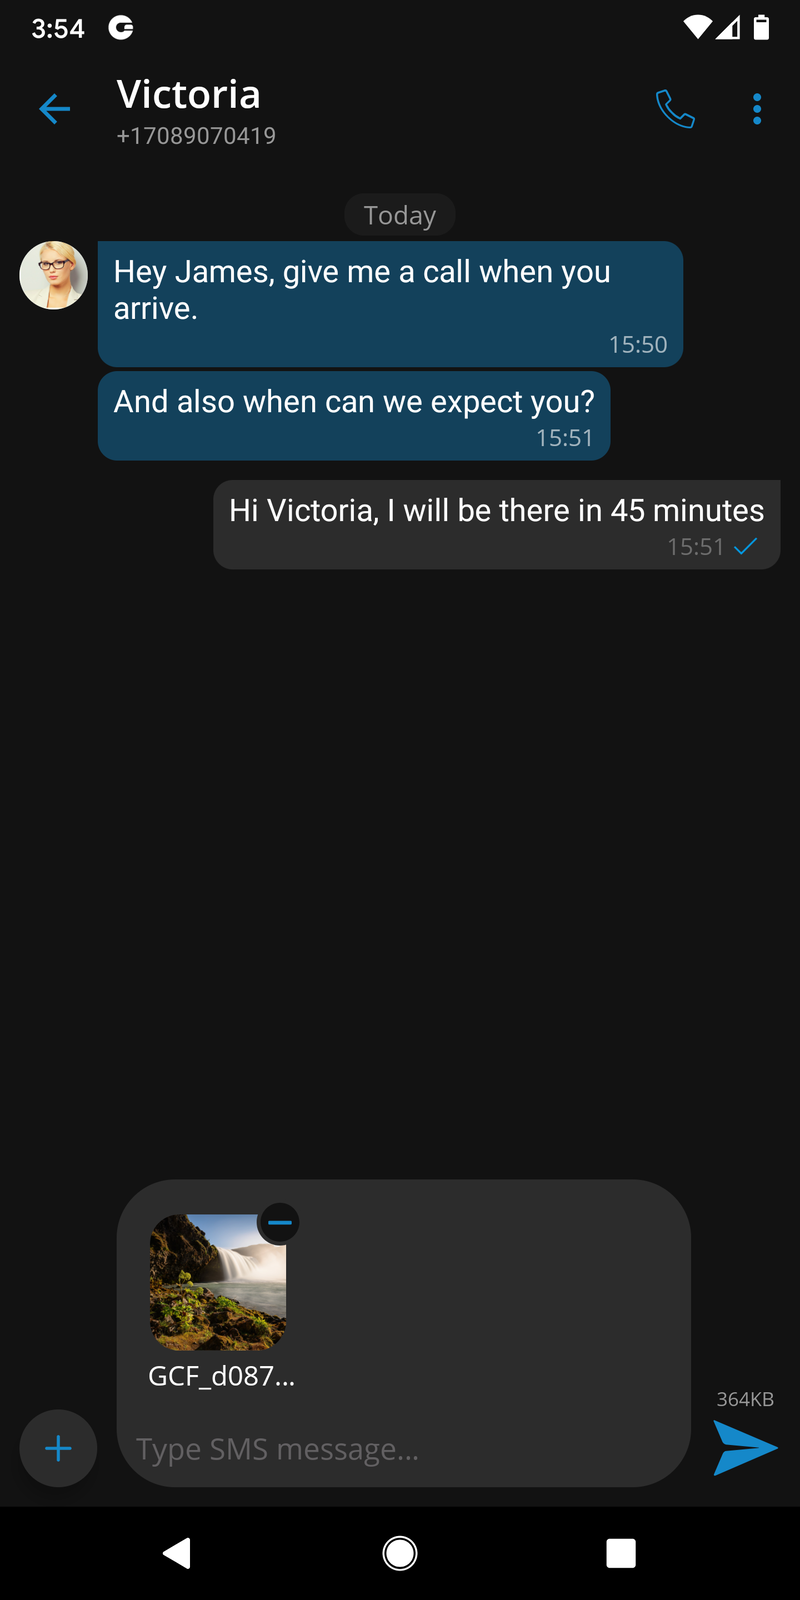
The + button is used to send files, and it can be found on the bottom left side of the SMS screen. Pressing the button opens up a dialog where the users can pick files to be sent to the currently selected conversation.
If users select data exceeding 500kB or if more than ten (10) files are selected, a pop-up message will appear displaying: Maximum size of attached files for MMS reached. All files that exceed the previously mentioned limits will be discarded.
Please note that supported MMS files are as follows:
-
Image Files - jpeg, png, gif
-
Audio Files - MP3, OGG, AMR
-
Text Files - PDF, Vcard, txt
-
Video Files - mp4
If a file is selected, an SMS message becomes an MMS message, which can be seen on the right side of the Send SMS/MMS button as the counter of the remaining kilobytes is displayed instead of the character counter.
After selecting the files, a thumbnail with the file name for each selected file will be displayed above the text area within the input field. Also, it is possible to remove selected files from the MMS message by pressing the - icon in the top right corner of the file.
The gloCOM will automatically download all files smaller than 500kB when connected to WiFi.
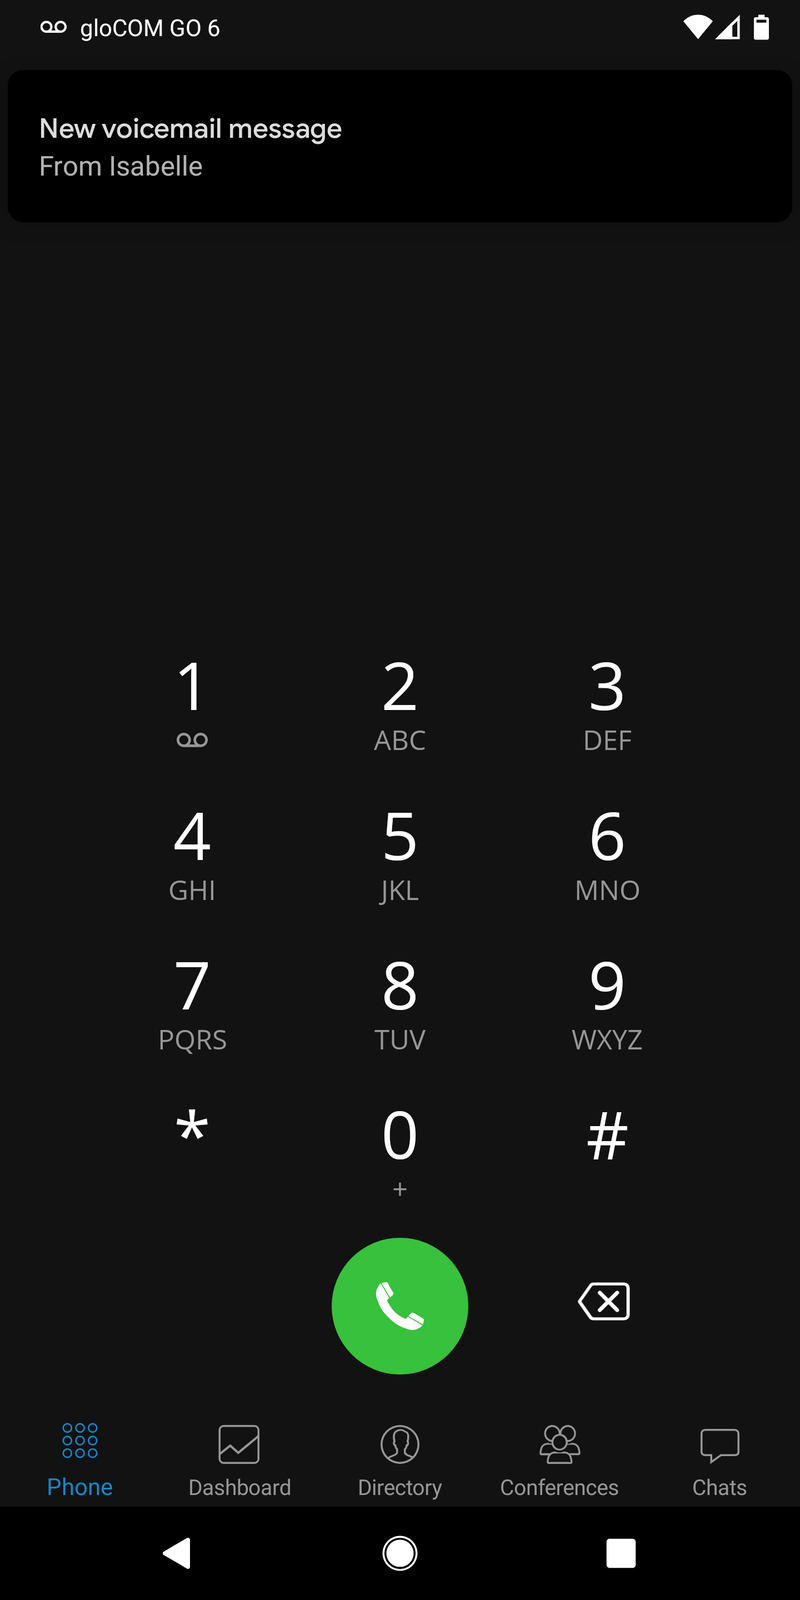
Voicemail management
With gloCOM GO 6 users can listen to new and archived voice messages and archive or delete one or many messages. Users can also call other users' voicemail directly.

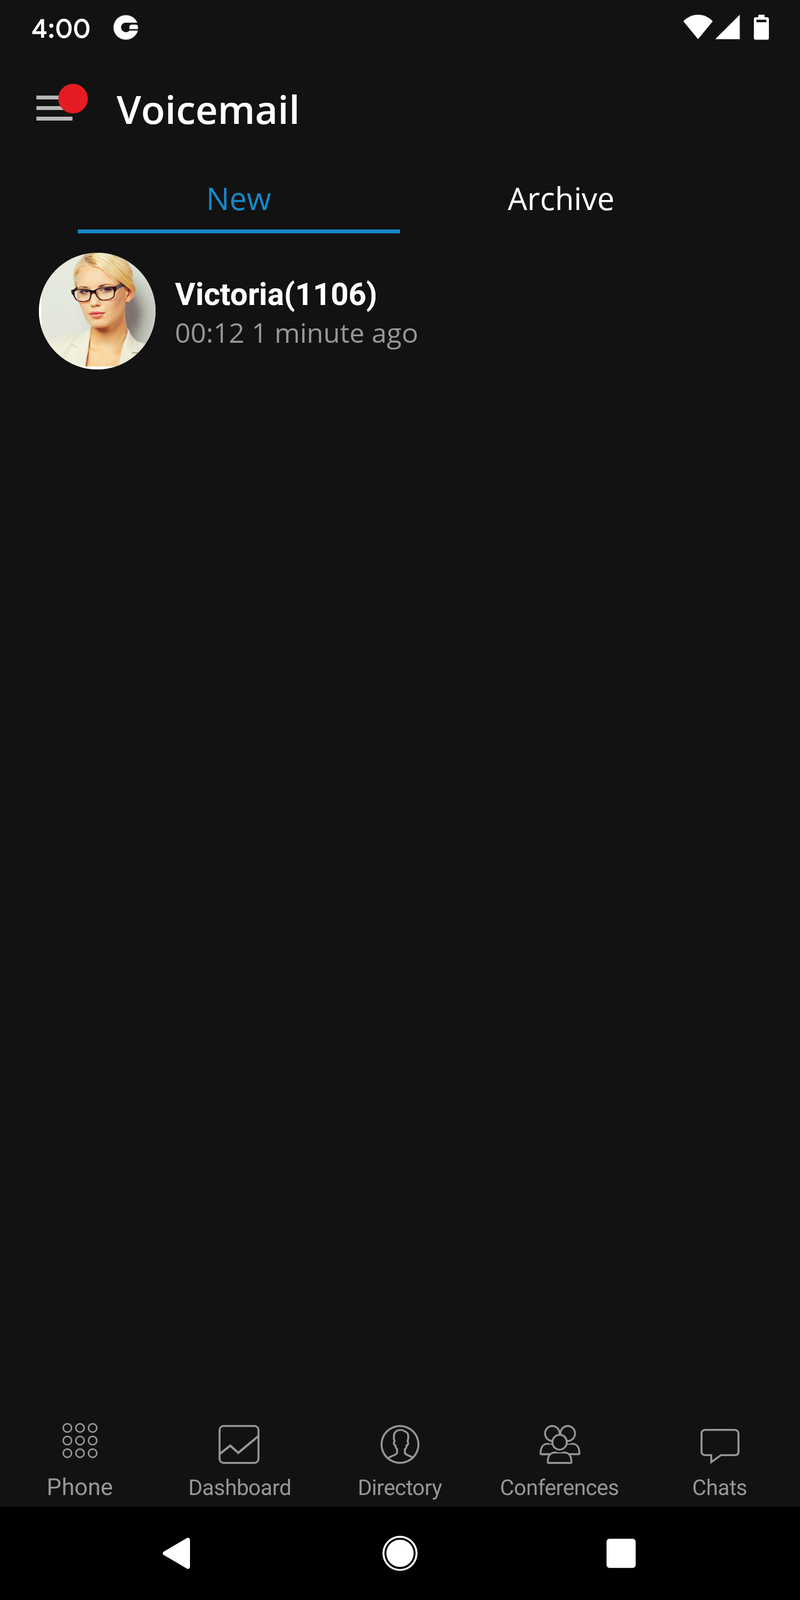
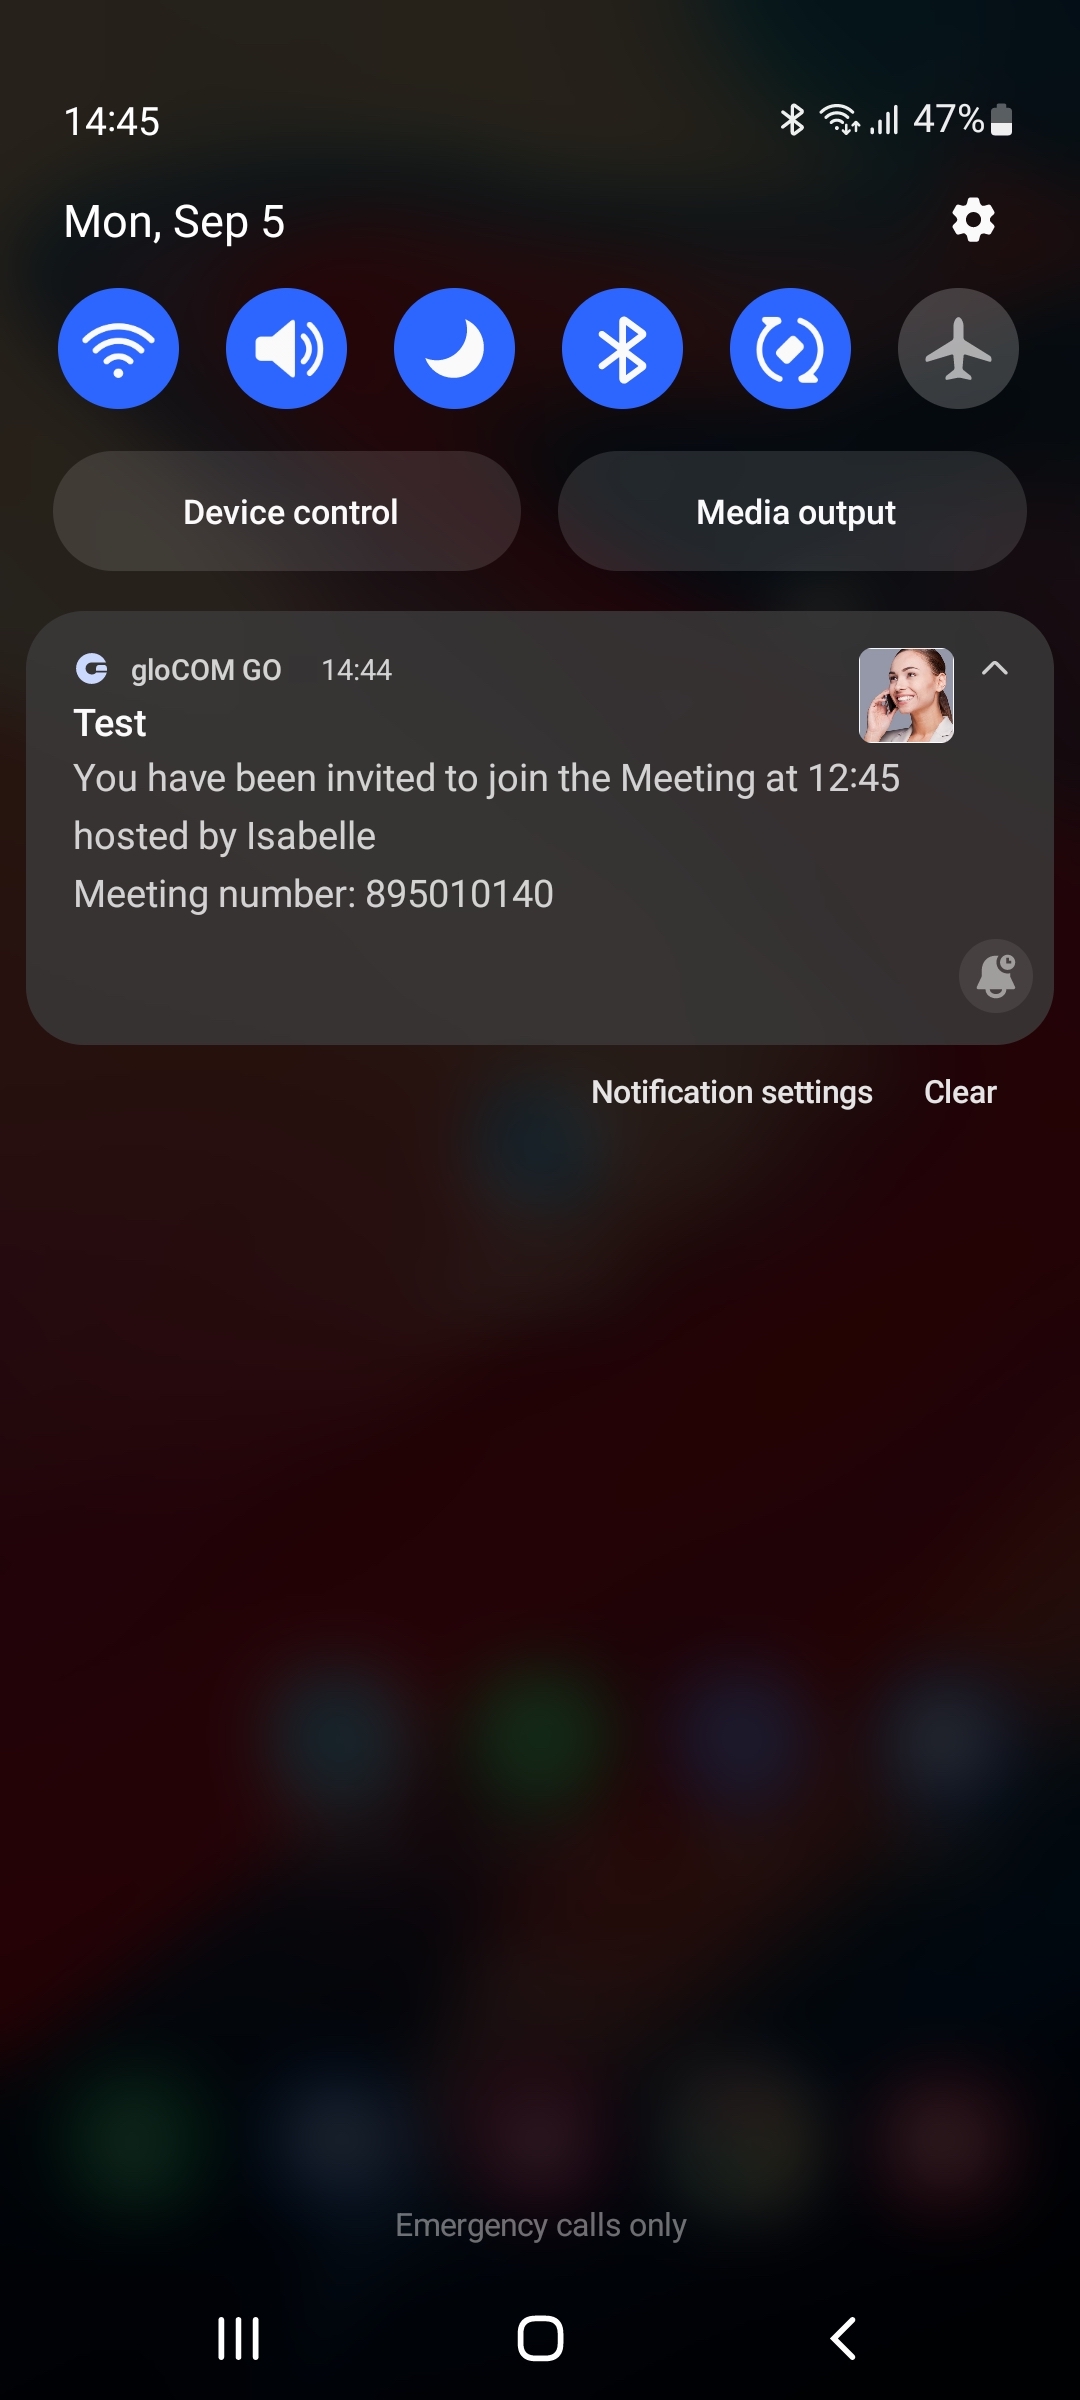
Notifications are shown for new voice messages, as shown below.
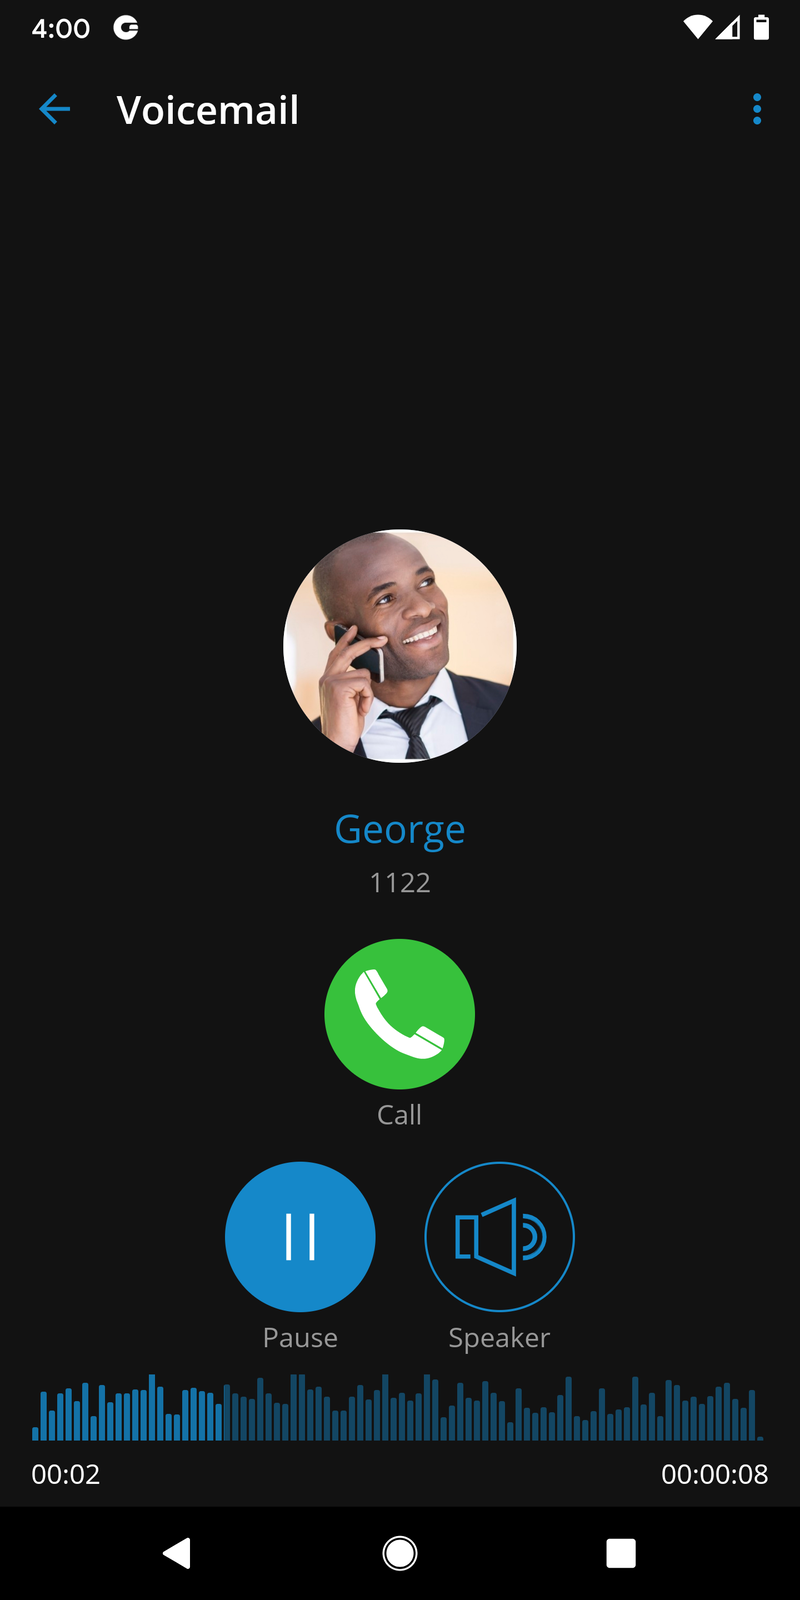
Playing voicemail messages
Messages can be played by selecting them in the list and then playing them.
If the message is not downloaded when play is pressed, a progress dialog will be shown, and once the download is done message should start playing.
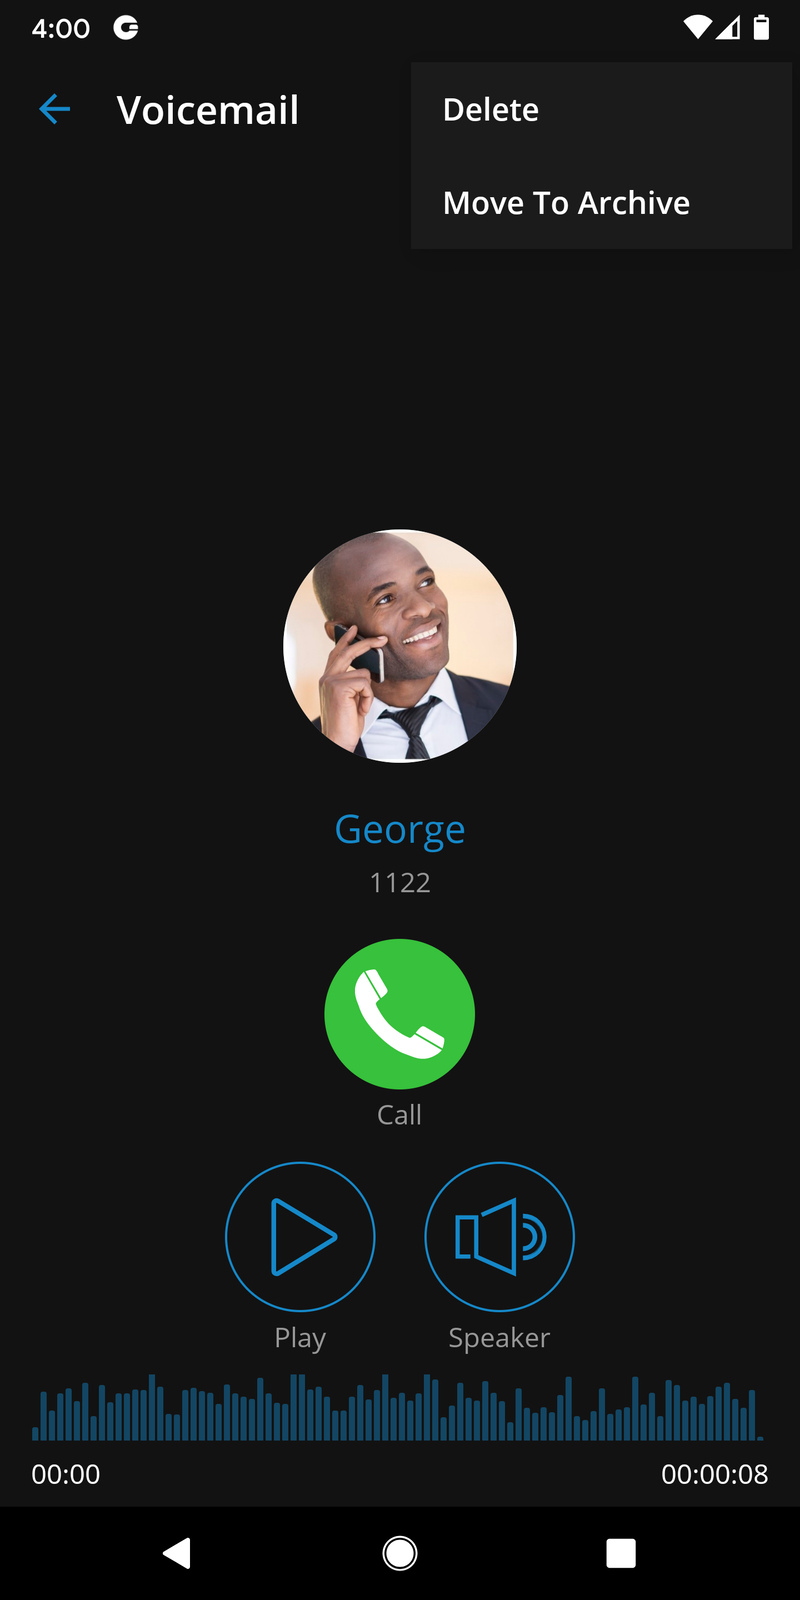
Deleting and archiving voicemails messages
Users can delete or archive individual messages by opening them and then pressing the delete icon or archive icon after opening the menu from the navigation bar.
Users can also select more messages and delete or archive them by long-pressing a message from the list and pressing the delete icon or archive icon in the toolbar.
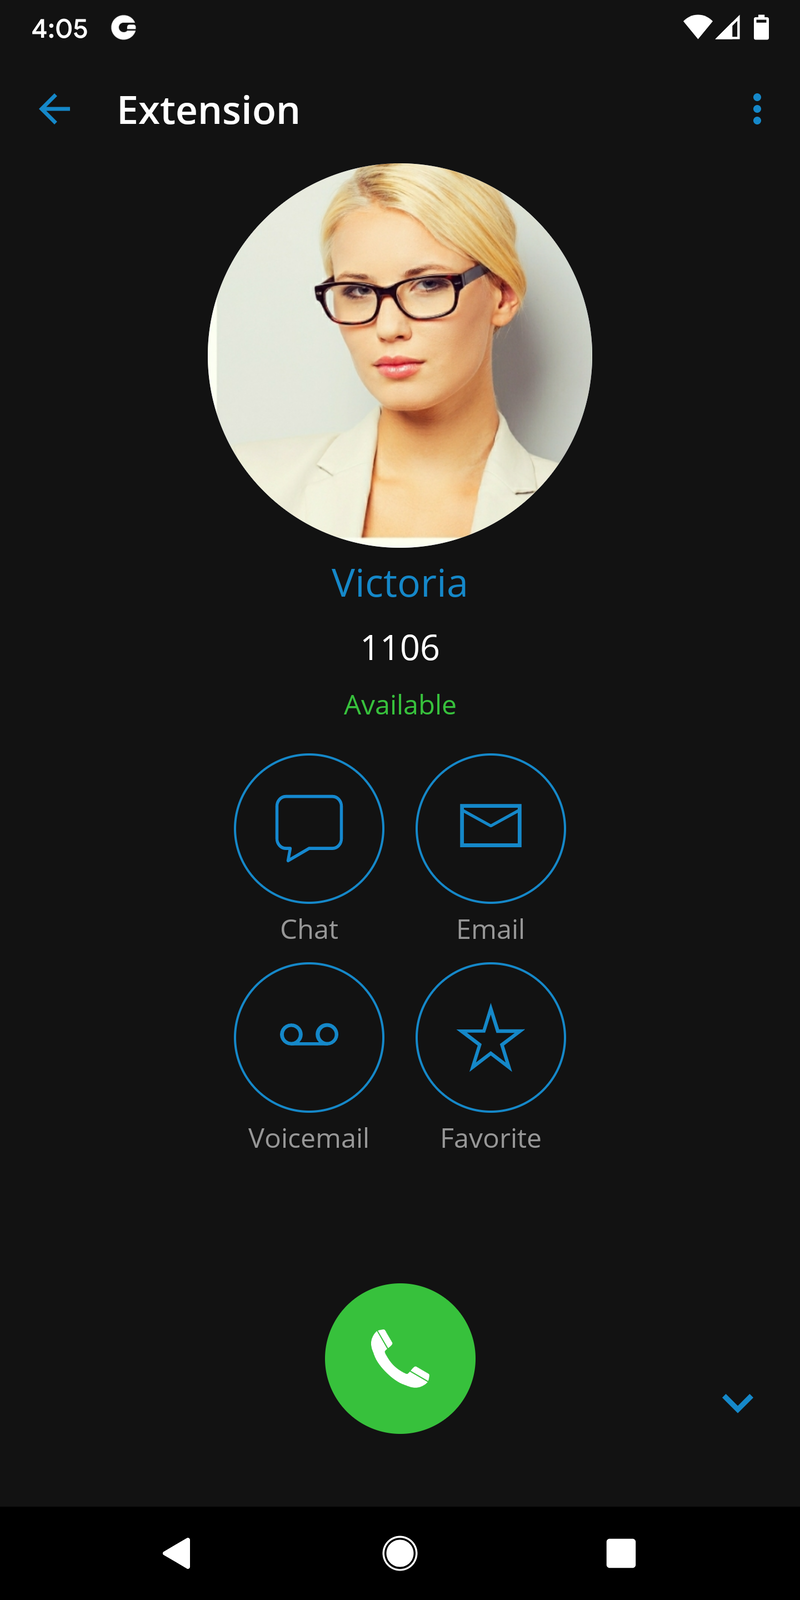
Calling other voicemail boxes directly
Users can open the user’s details screen and press the voicemail button to call the voicemail directly.
Presence
With the Presence feature, users' status is visible. Users can also see which users are online, busy, away, or offline. This feature also provides information when other users were last seen on the system.
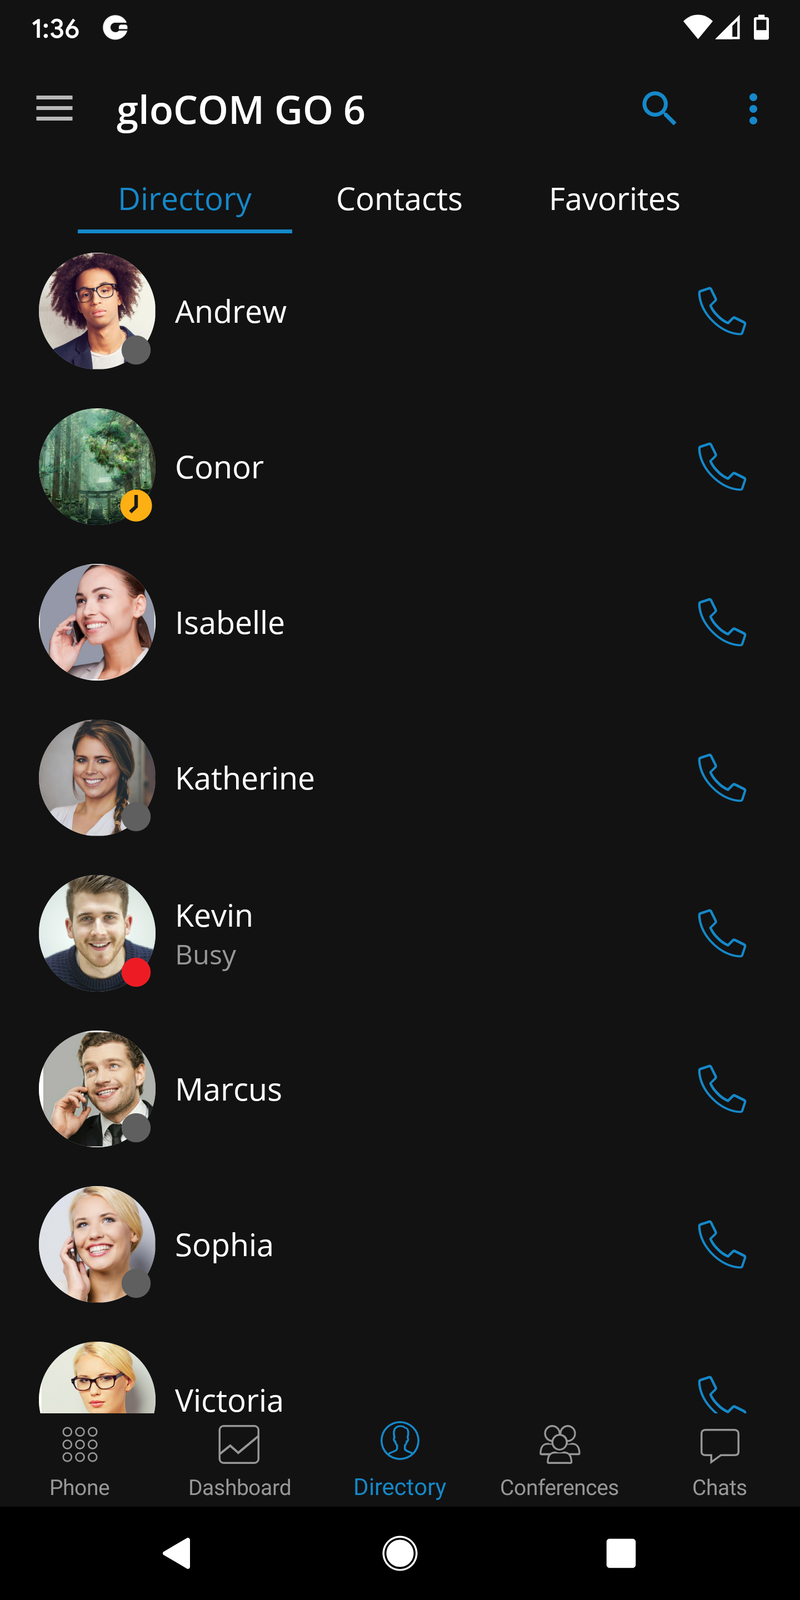
The users' presence can be seen on the system in the Directory tab at the bottom menu. By default, the Directory is sorting online users at the top, alphabetically. Next on the Directory screen are users that recently went away, and then completely offline users.
Presence can be seen in the Grid or List view on Directory.
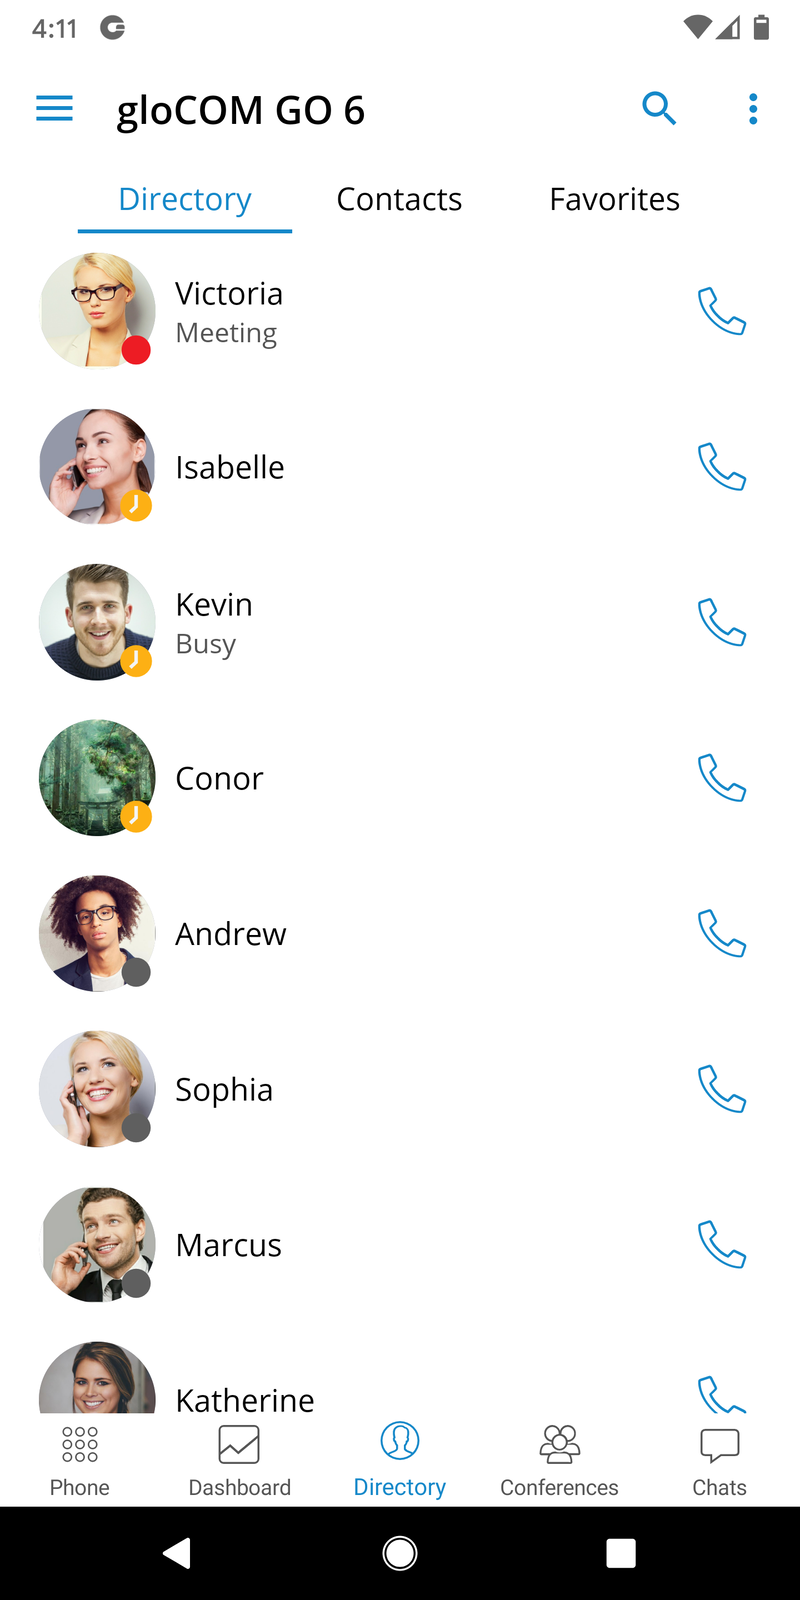
If users prefer alphabetical sorting instead of sorting by Presence, they can change that by pressing the icon with three lines in the top right corner of the screen in Directory.
Pressing the user’s avatar on Directory and opening the user’s info screen, more presence information is available.
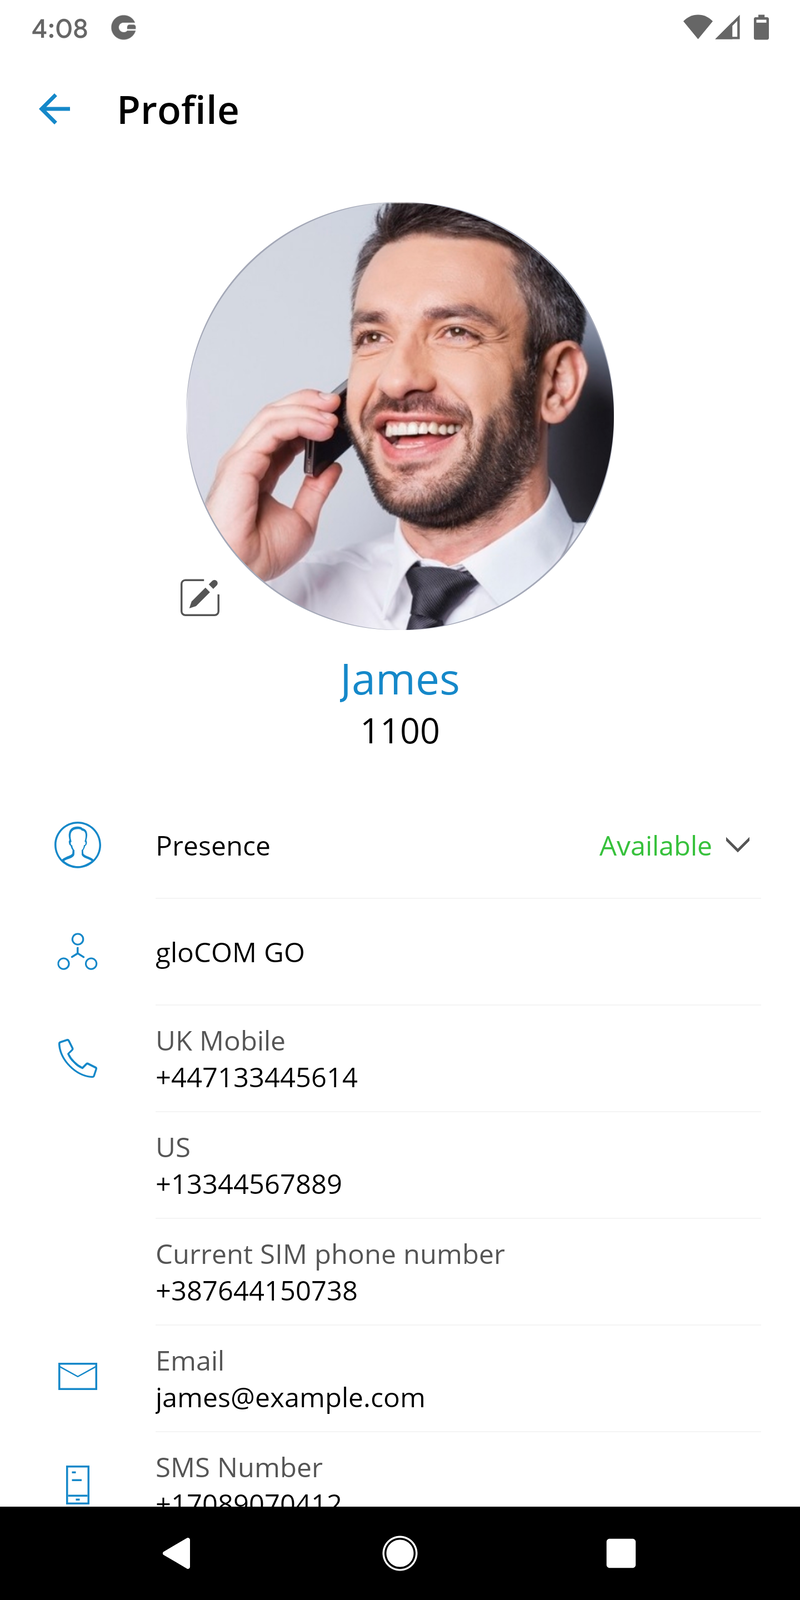
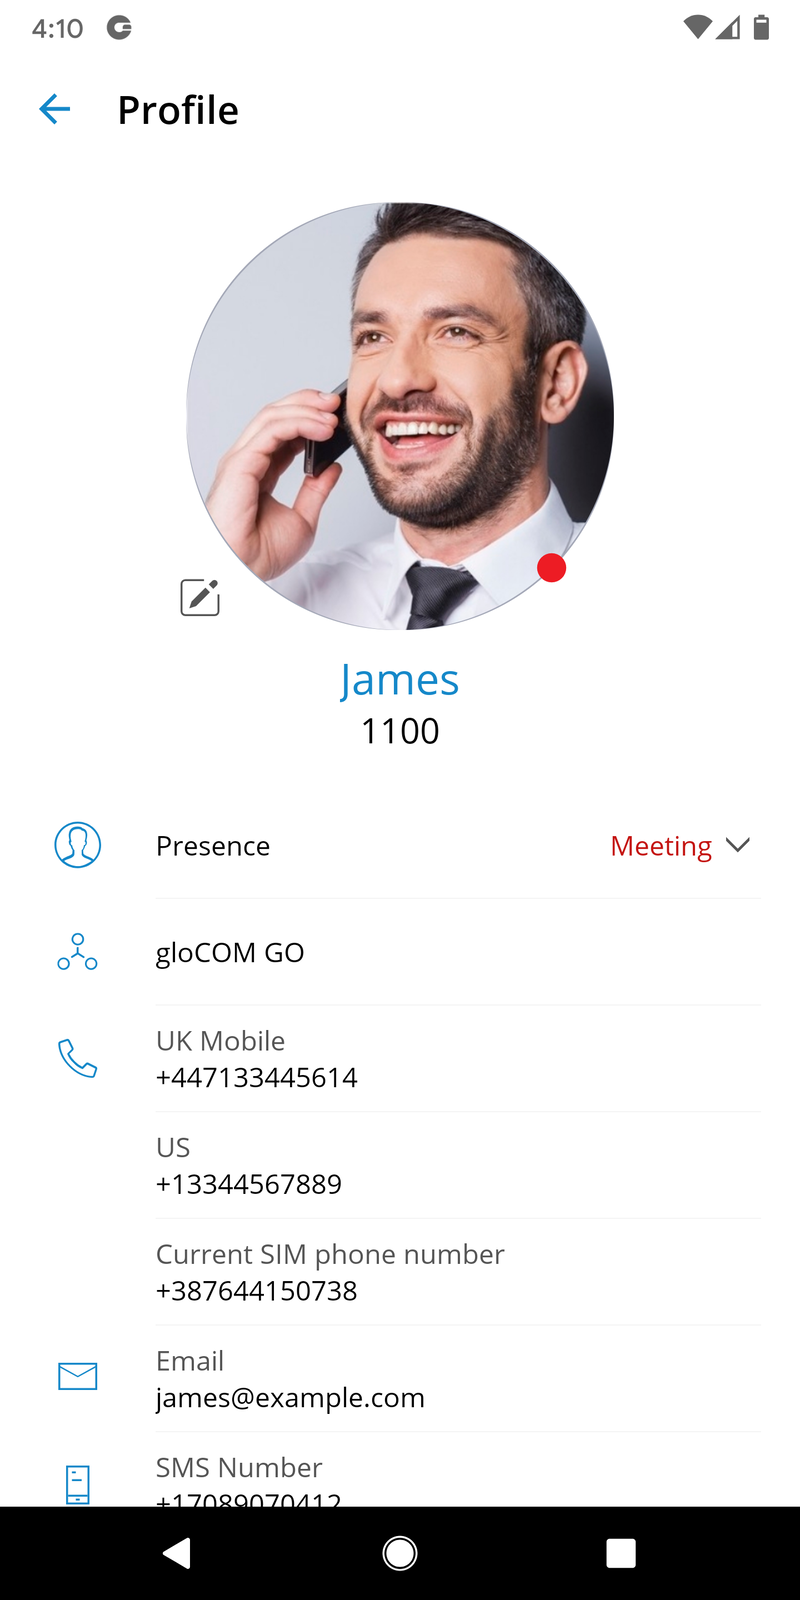
Presence change or update can be done by going to the Profile item on the bottom bar. If users can not see the Profile item, they can click on More and find it there.
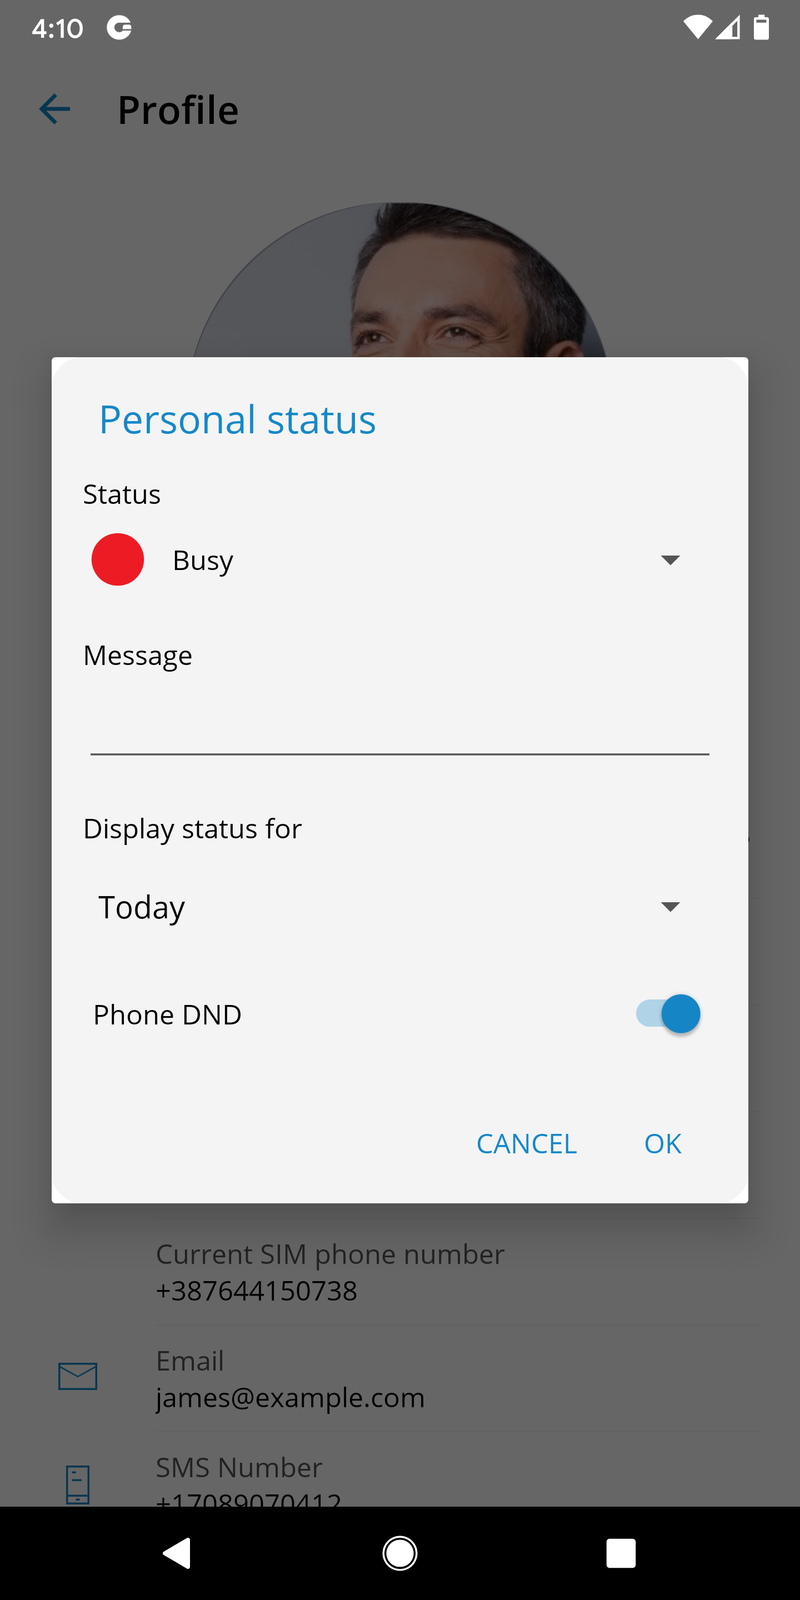
Users can change their personal presence status by pressing on their current status or on the icon of an arrow pointing downwards. A dialog screen will open with three fields: Status, Message, and the display status (for the duration of chosen status).
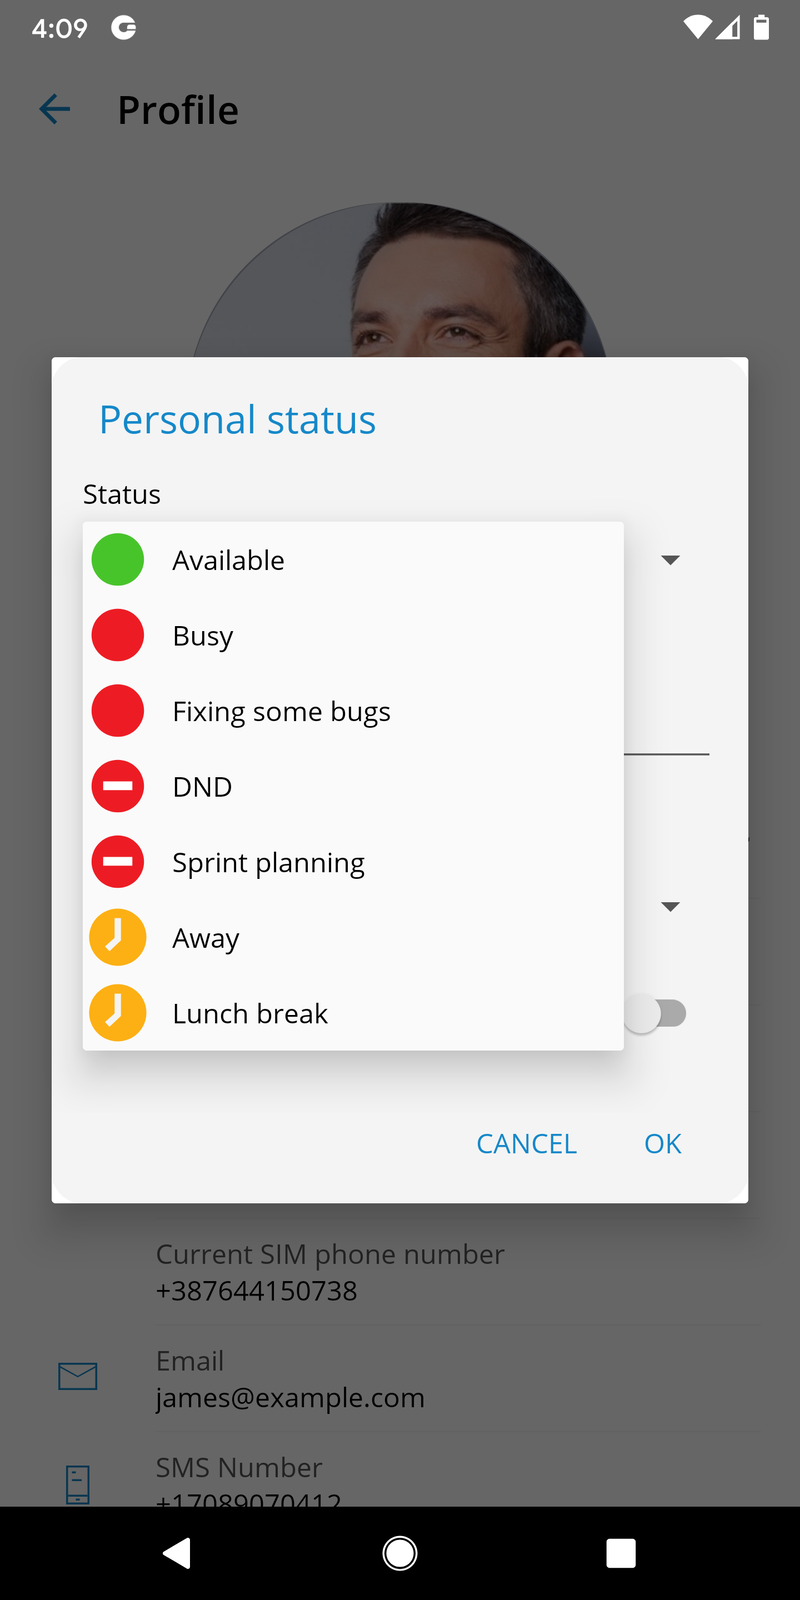
Default statuses are:
-
Available (green icon)
-
Busy (red icon)
-
DND - Do not disturb (red icon with a rectangle)
-
Away (yellow icon with a clock)
Users can create predefined statuses by adding them to PBXware.
For default statuses, users cannot enter a custom message, but for predefined statuses, they can associate a message that will be displayed to other users with the selected status.
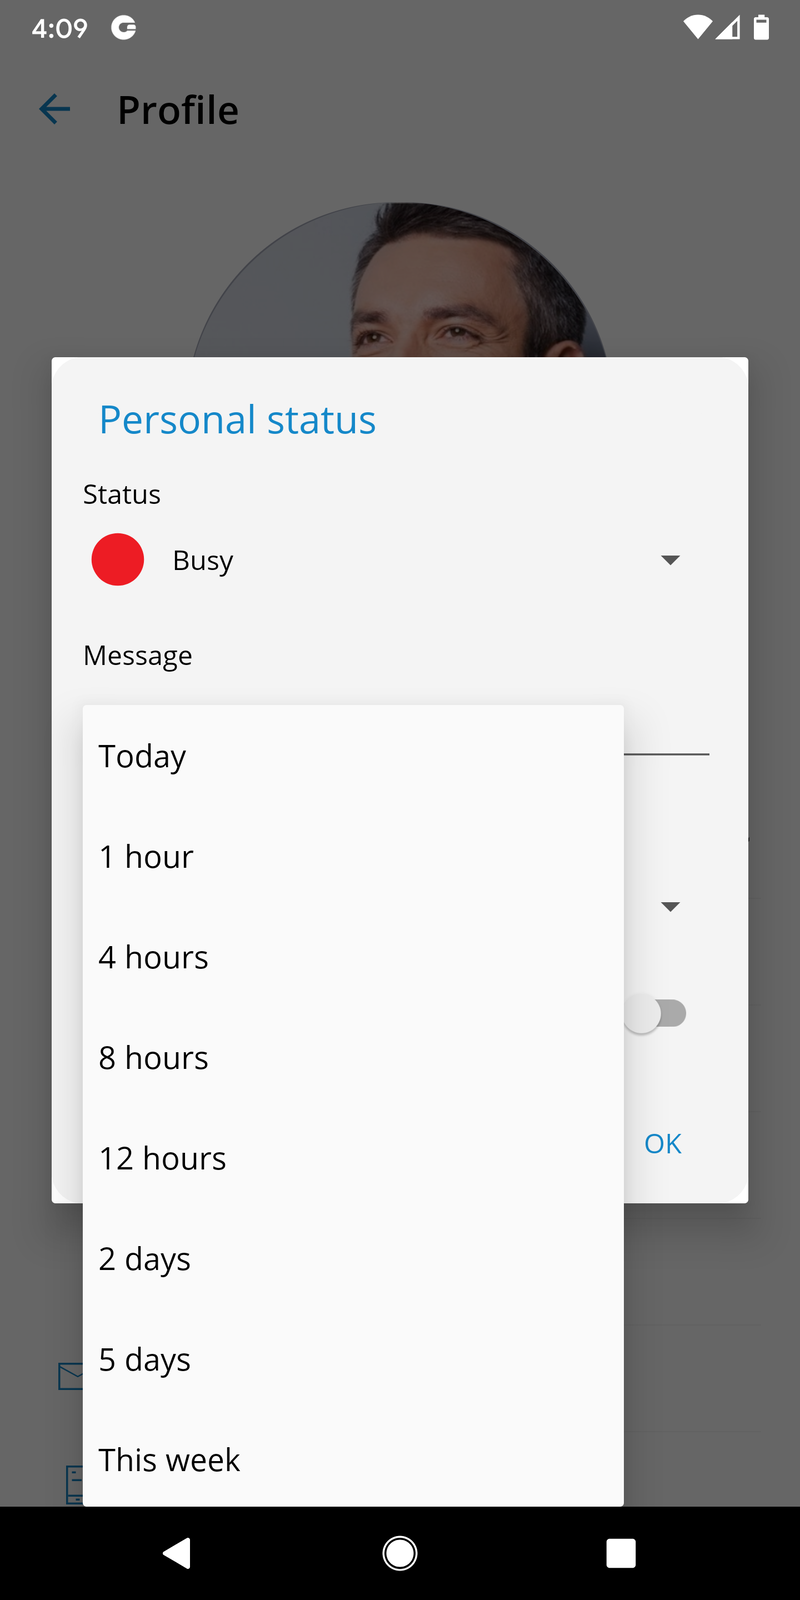
The last option in the Presence dialog is how much time the new Presence status will last.
Available values are:
-
Today
-
1 hour
-
4 hours
-
8 hours
-
12 hours
-
2 days
-
5 days
-
This week
-
Always
Presence status in the chat list
The chat list presence status provides information about the availability of other users. It is displayed with the corresponding icon in the bottom right corner of the user's avatar.
Presence on the chat screen
The information about the availability of the user is also visible in the top left corner of the chat screen.
Dashboard
gloCOM GO 6 dashboard incorporates call information and easy control of Enhanced Services.
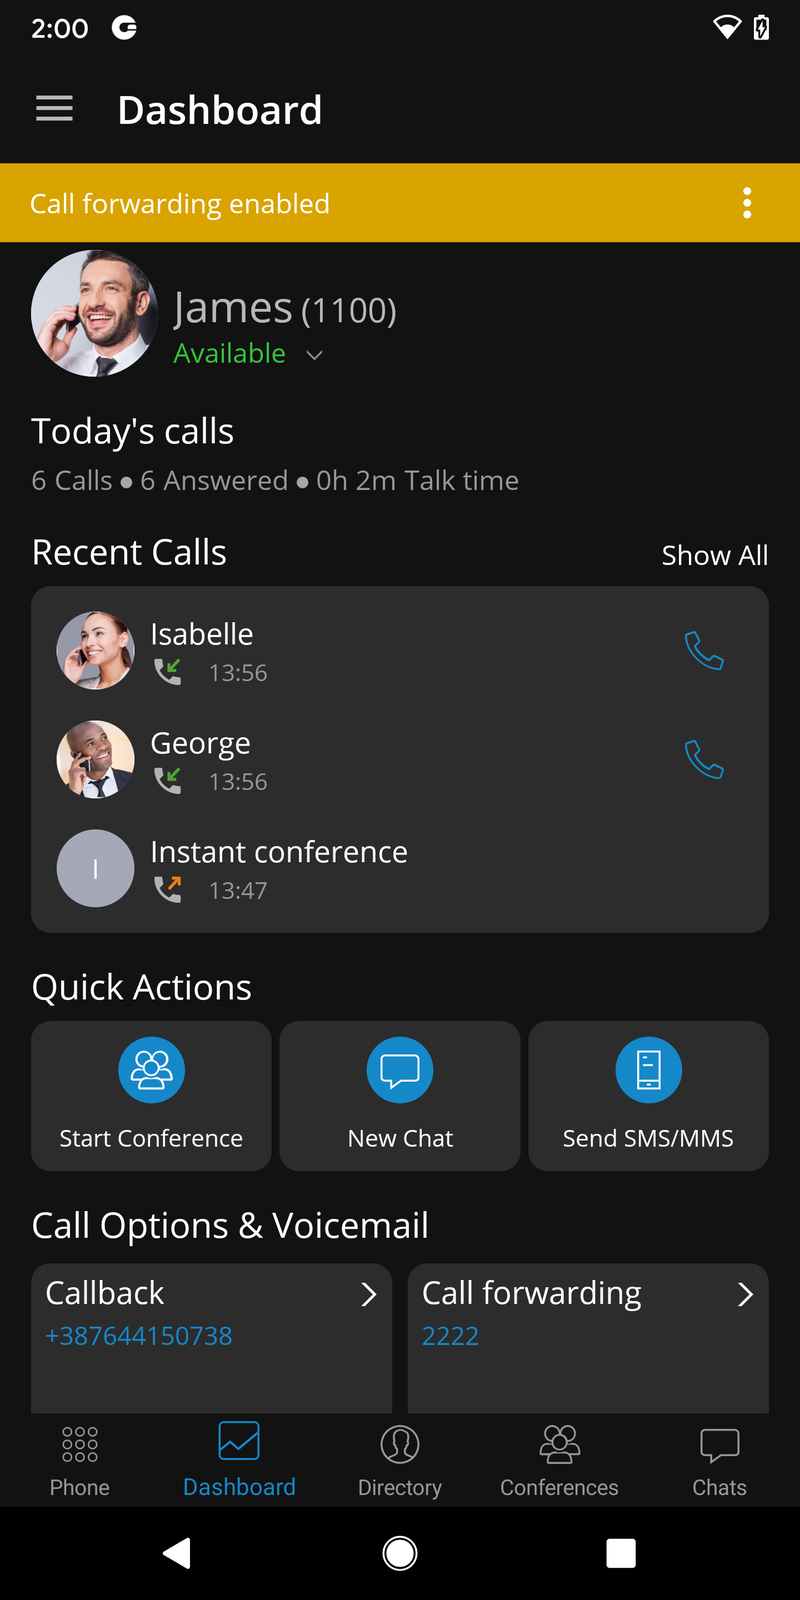
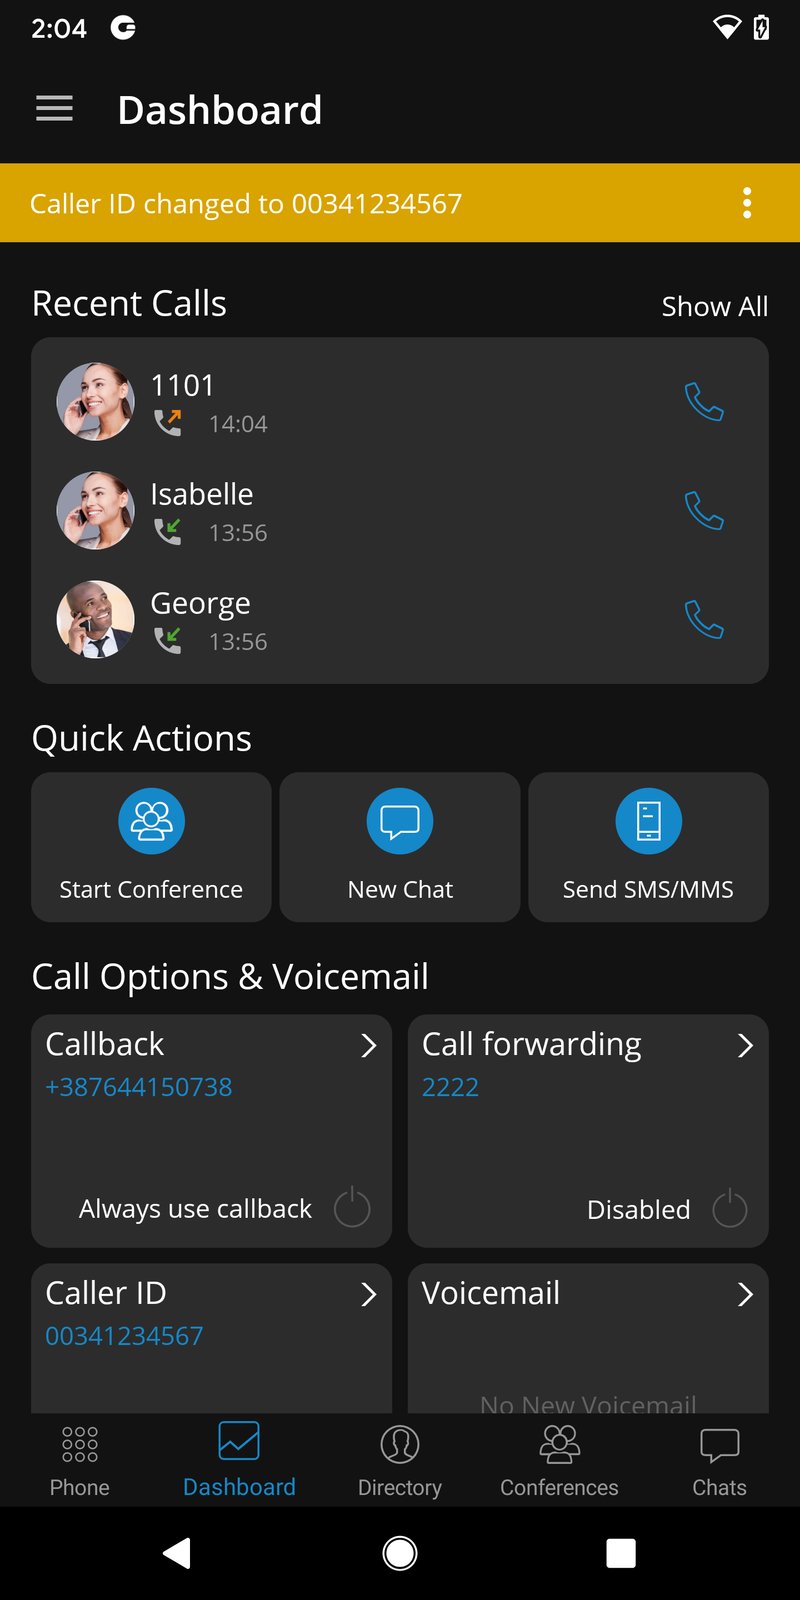
The dashboard contains easy access modules for Profile info, today’s call stats, Recent calls, Call options & Voicemail, Favorites, and Quick actions.
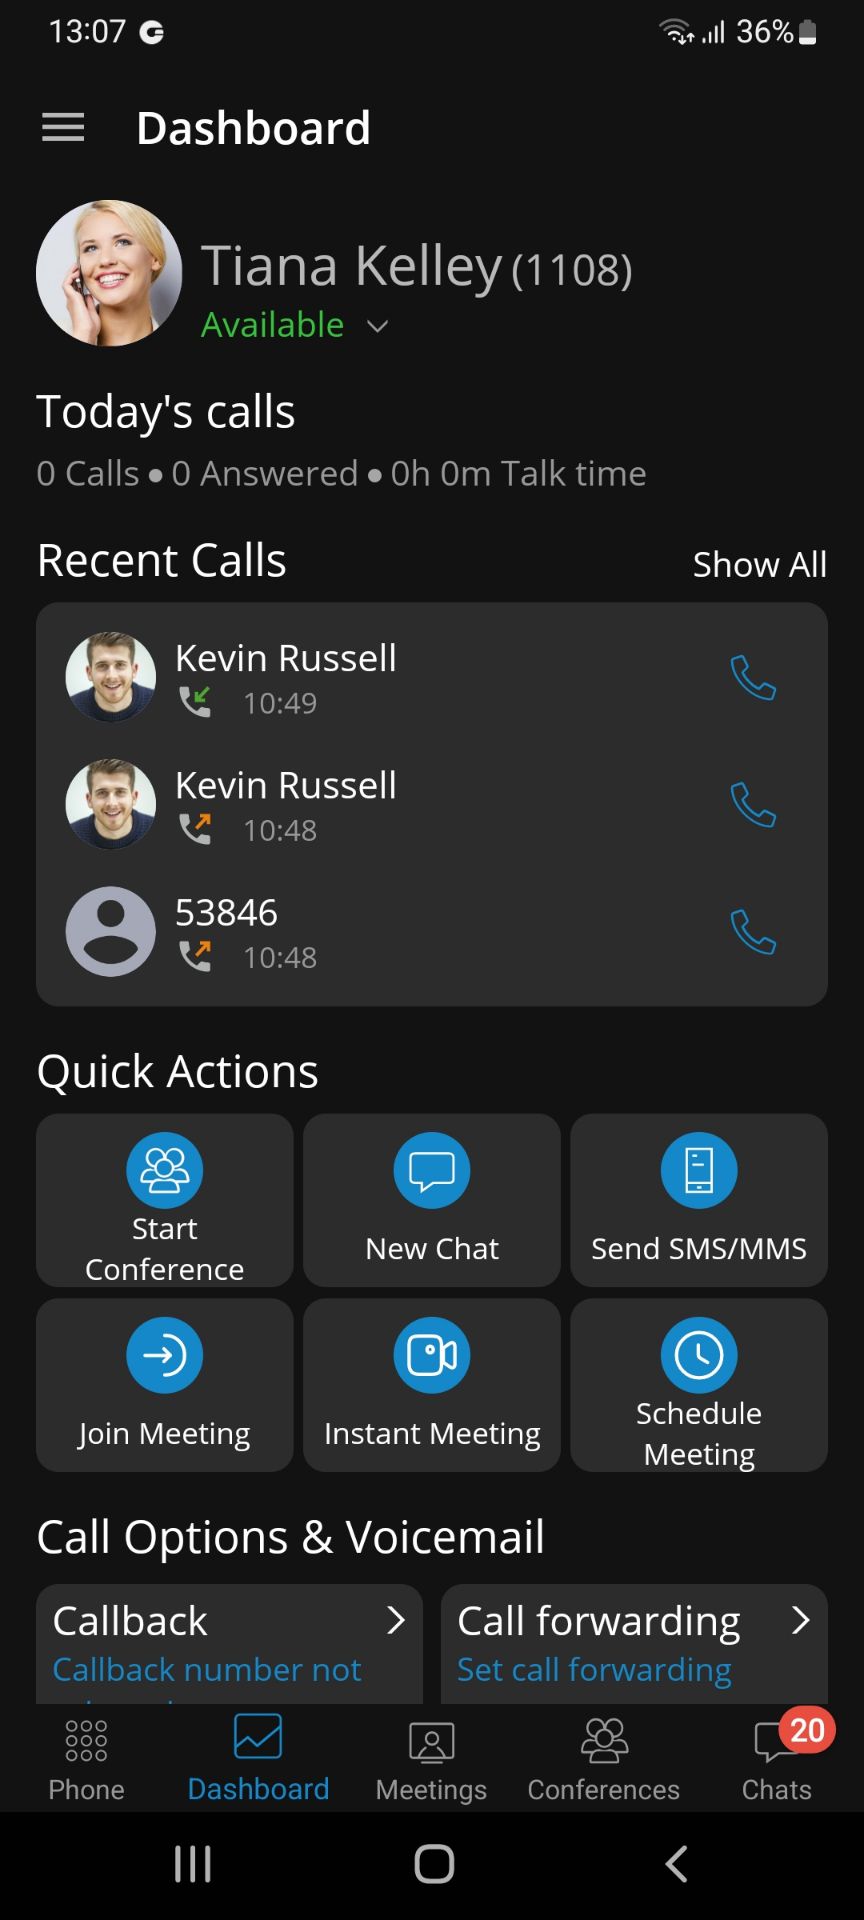
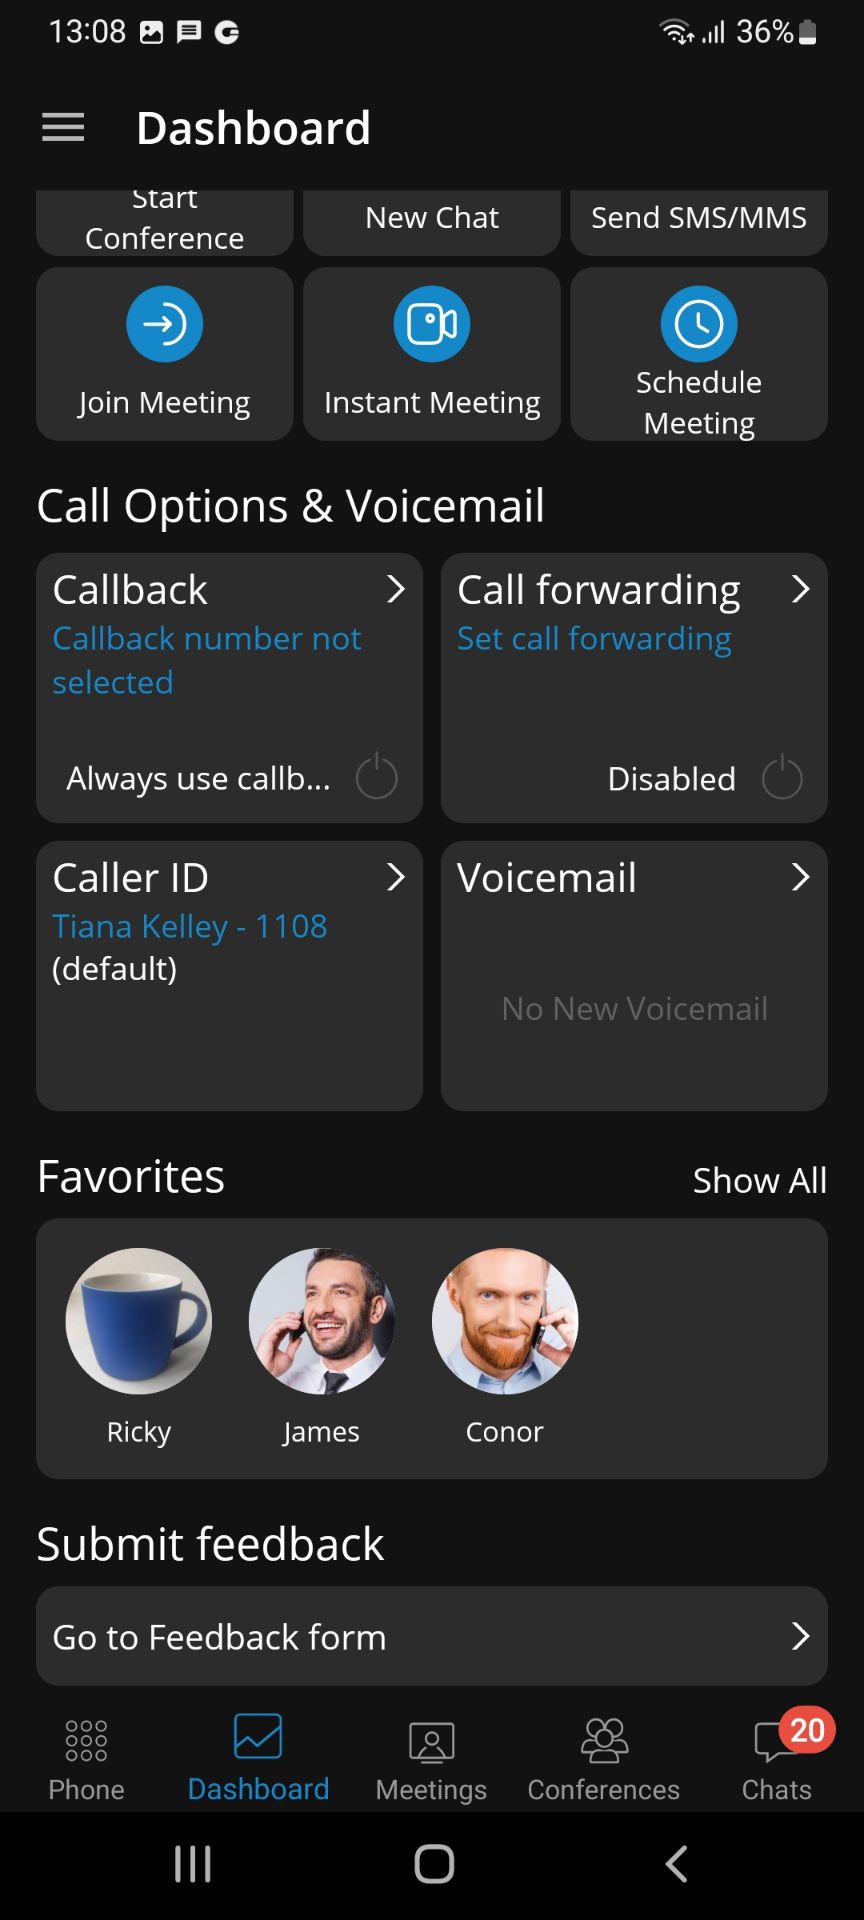
The profile info module displays the username, extension, avatar, and personal status. Today’s calls module displays stats about calls that are made today.
The Recent calls module displays the last three calls and allows interaction with them. The quick actions module will enable users to start a conference quickly, create a new chat, send SMS/MMS and join/schedule/create an instant meeting.
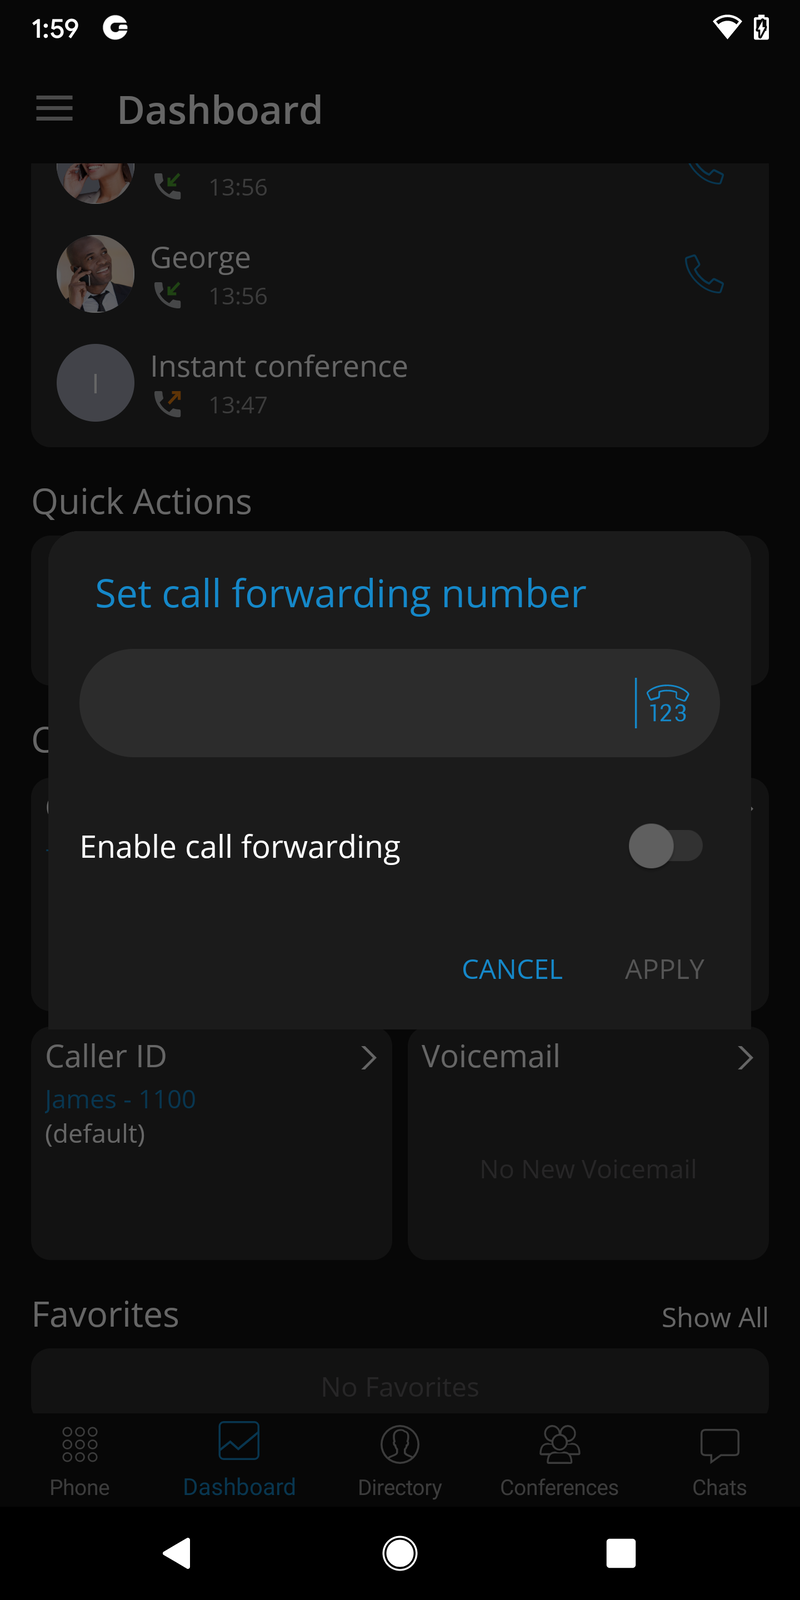
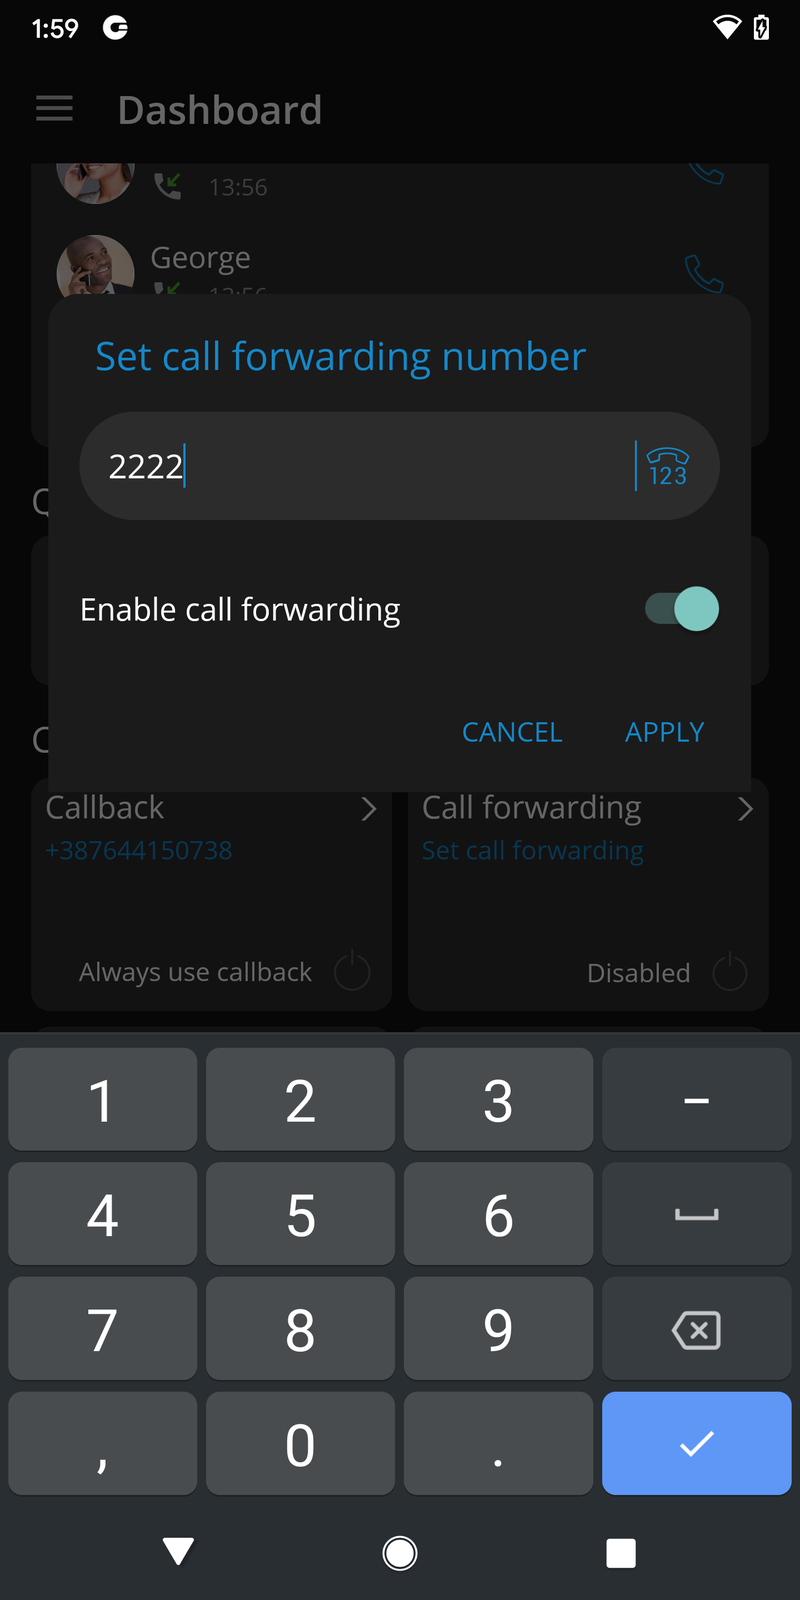
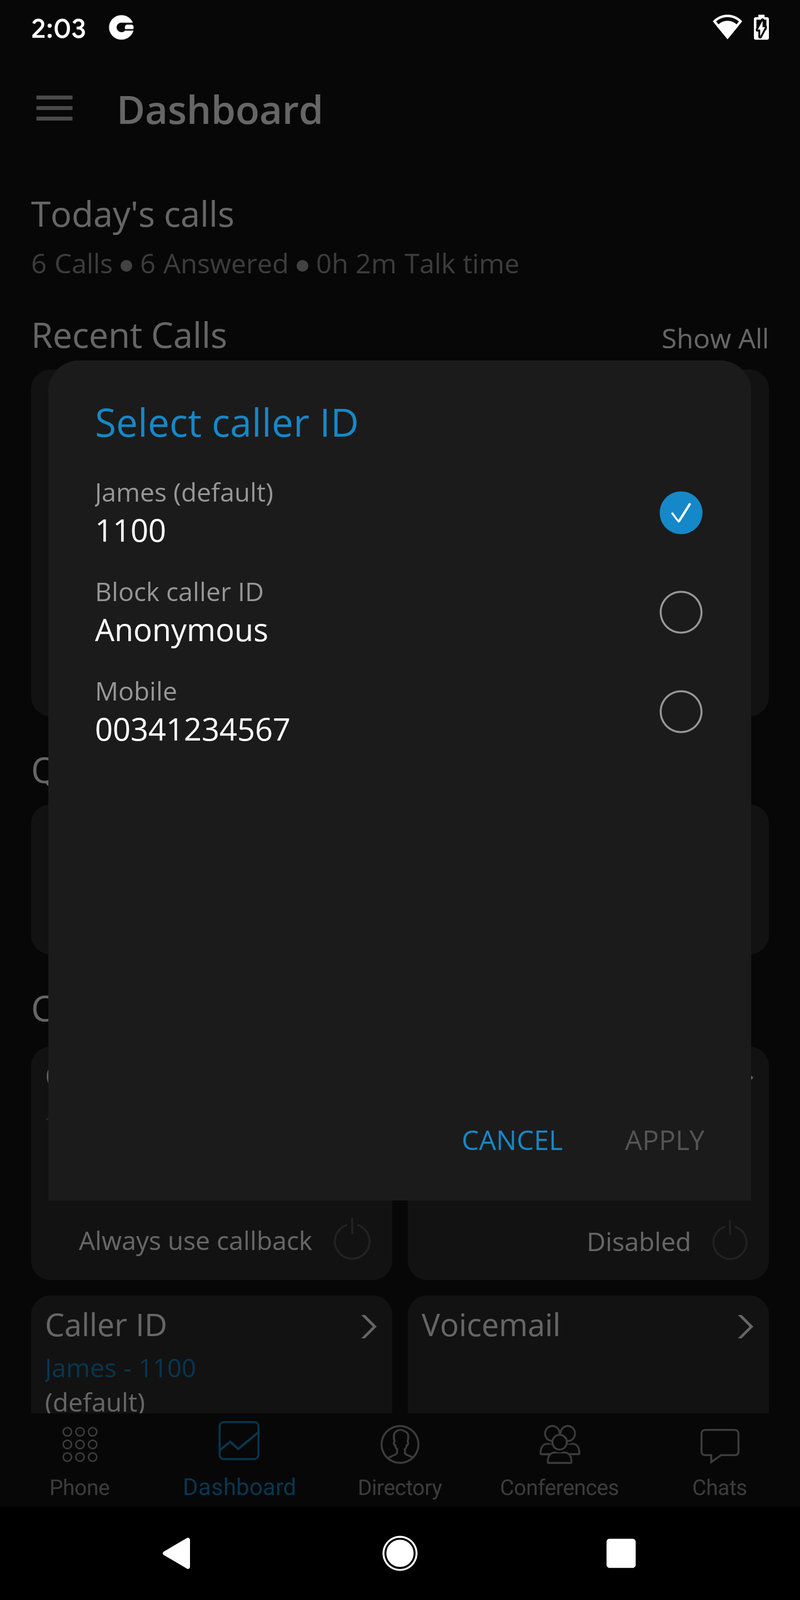
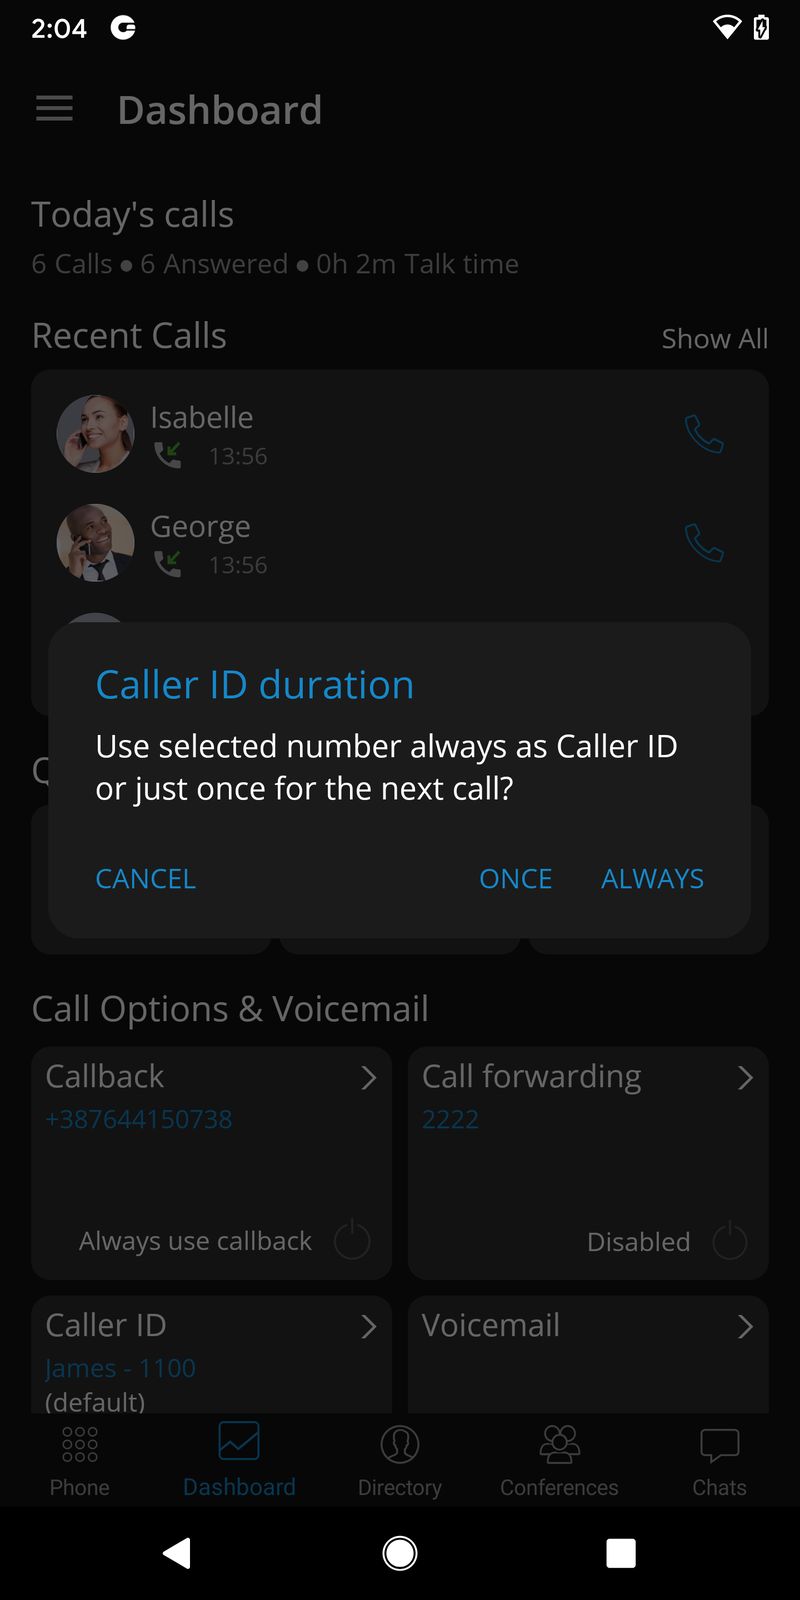
The call options & voicemail module allows users to access settings for call forwarding, callback, caller id, and open voicemail screen.
The Favorites module displays ten favorite contacts and allows interaction with them.
At the bottom of the Dashboard screen, users can express their opinion about gloCOM GO 6 by selecting Feedback.
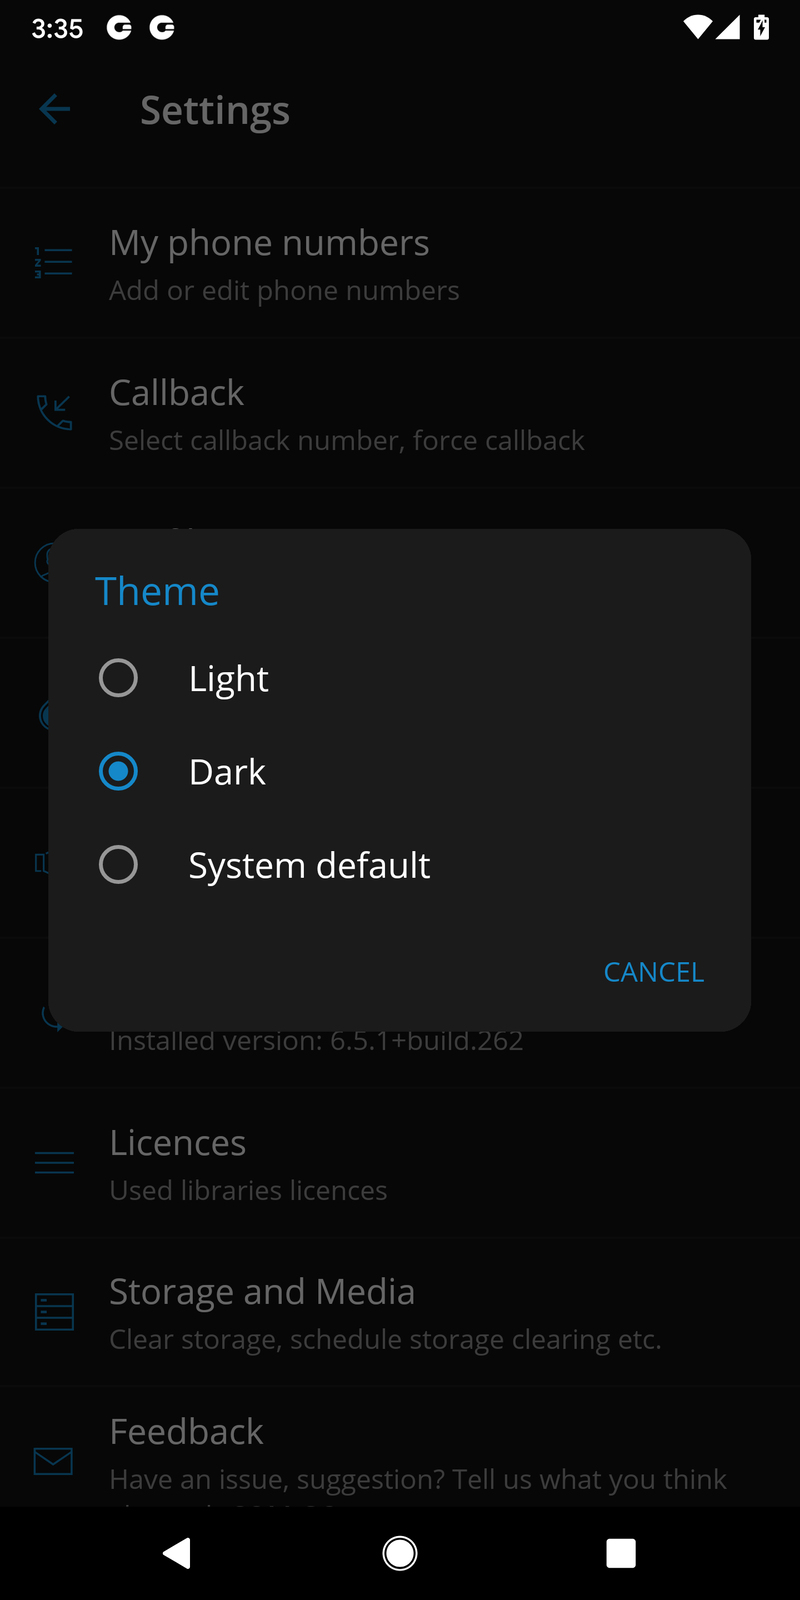
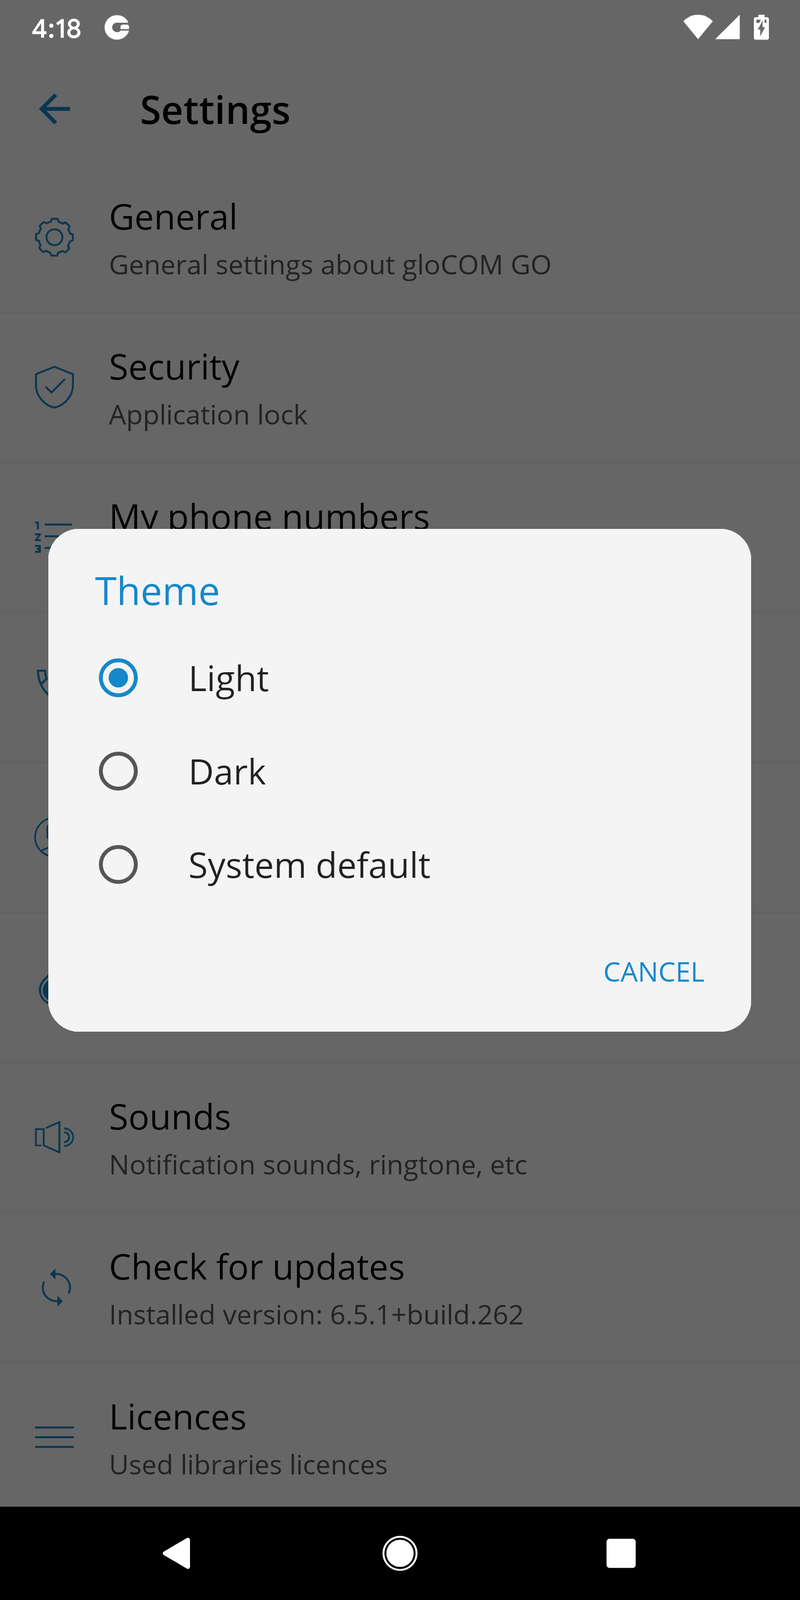
Dark Theme support
gloCOM GO 6 users can select light theme, dark theme or system default.
Dark Mode will follow the system options if Dark Mode is selected in the device system.
In order to select a light, dark, or system default theme, users press on Theme in Settings, and select the preferred theme from the pop-up menu. Once the preferred theme is selected, it will change immediately.
In order to select a light, dark, or system default theme, users press on Theme in Settings, and select the preferred theme from the pop-up menu. Once the preferred theme is selected, it will change immediately.
Localisations (translations)
gloCOM GO 6 is available in different languages. The app detects the system language and applies the translations if that language is supported.
The gloCOM GO 6 has been translated to Italian, Portuguese and German languages, so our international gloCOM GO 6 users can explore the benefits of the gloCOM GO 6 in their native language.
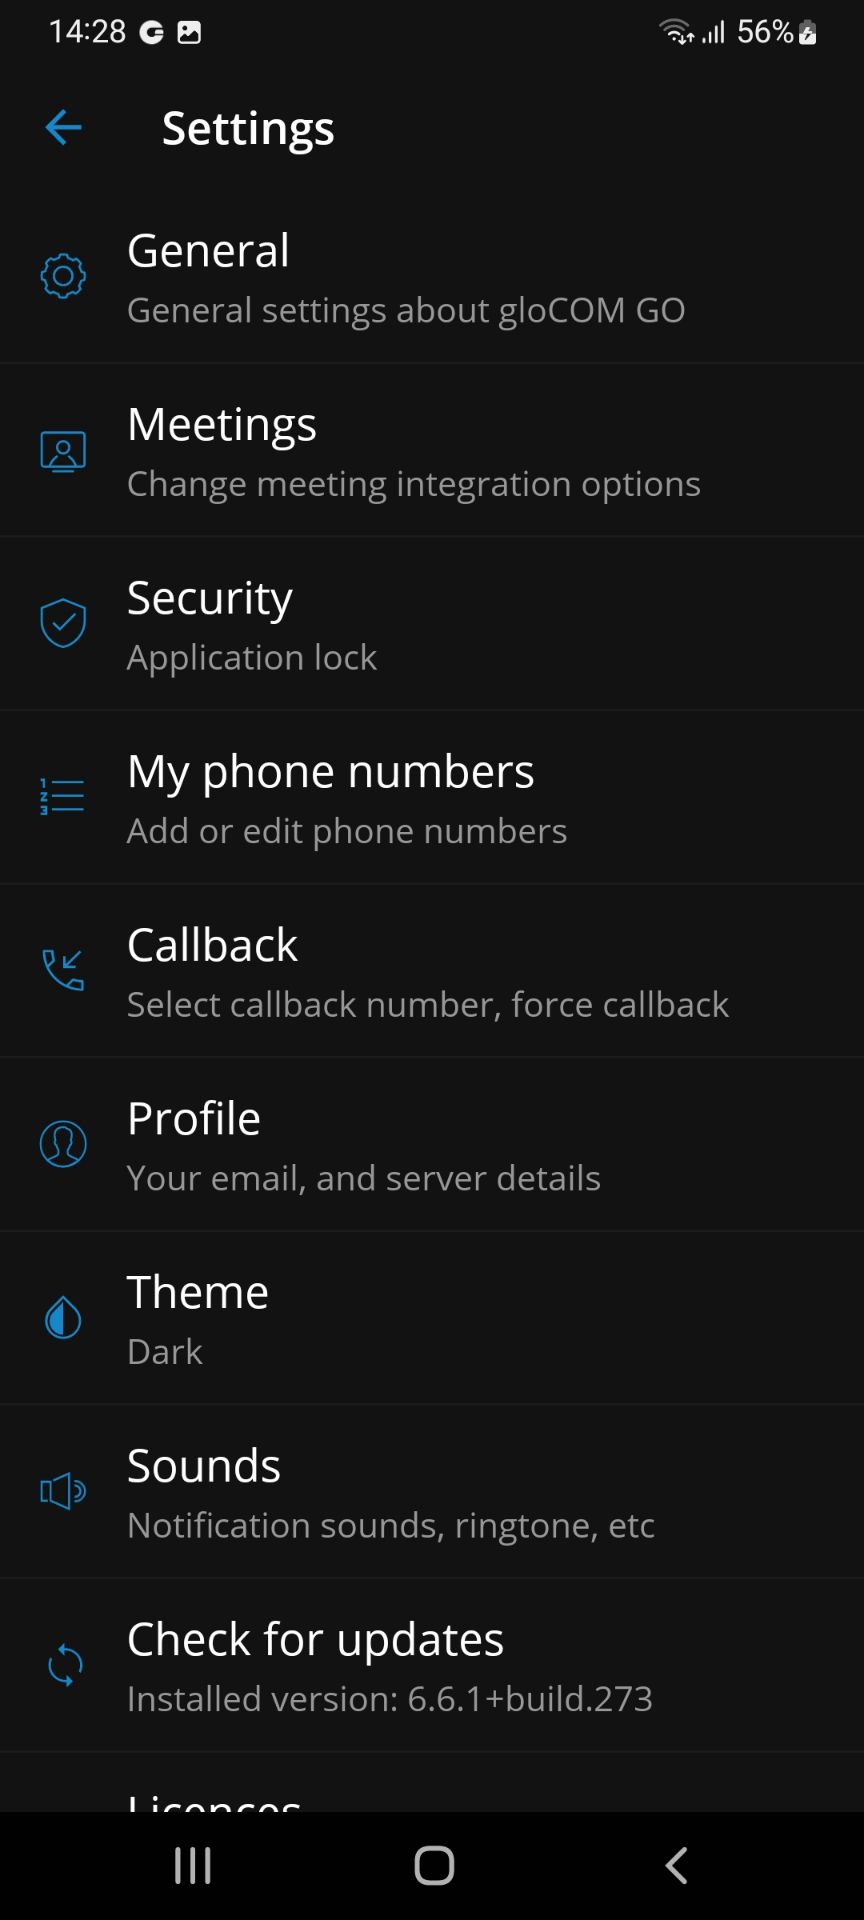
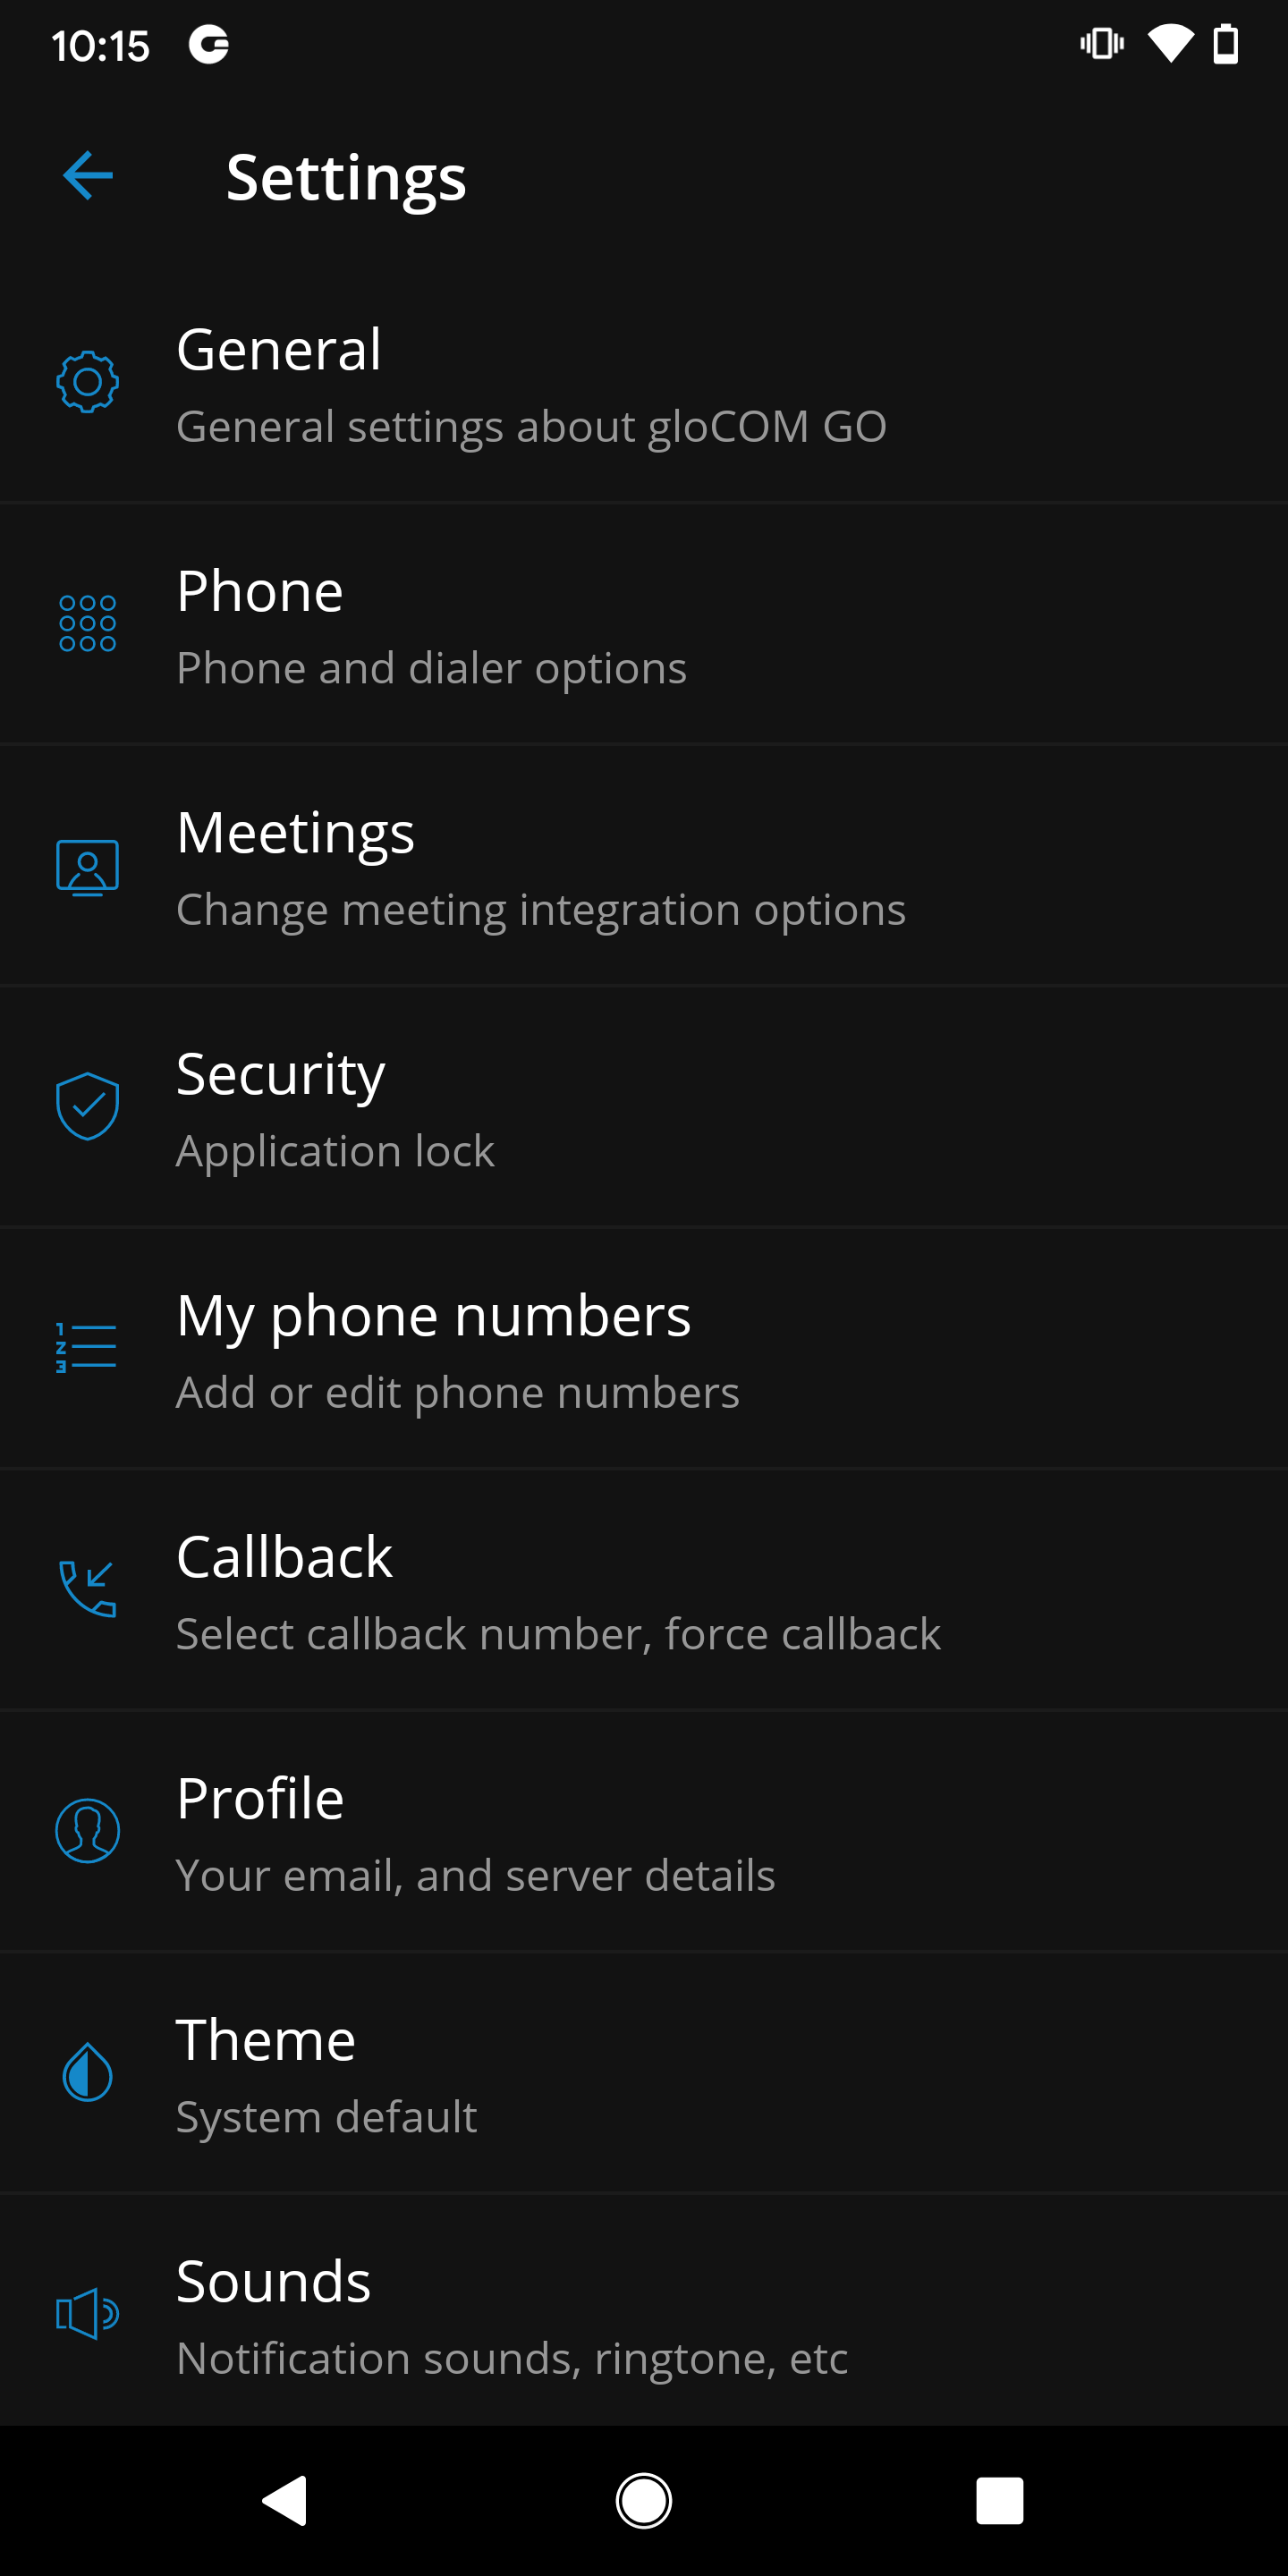
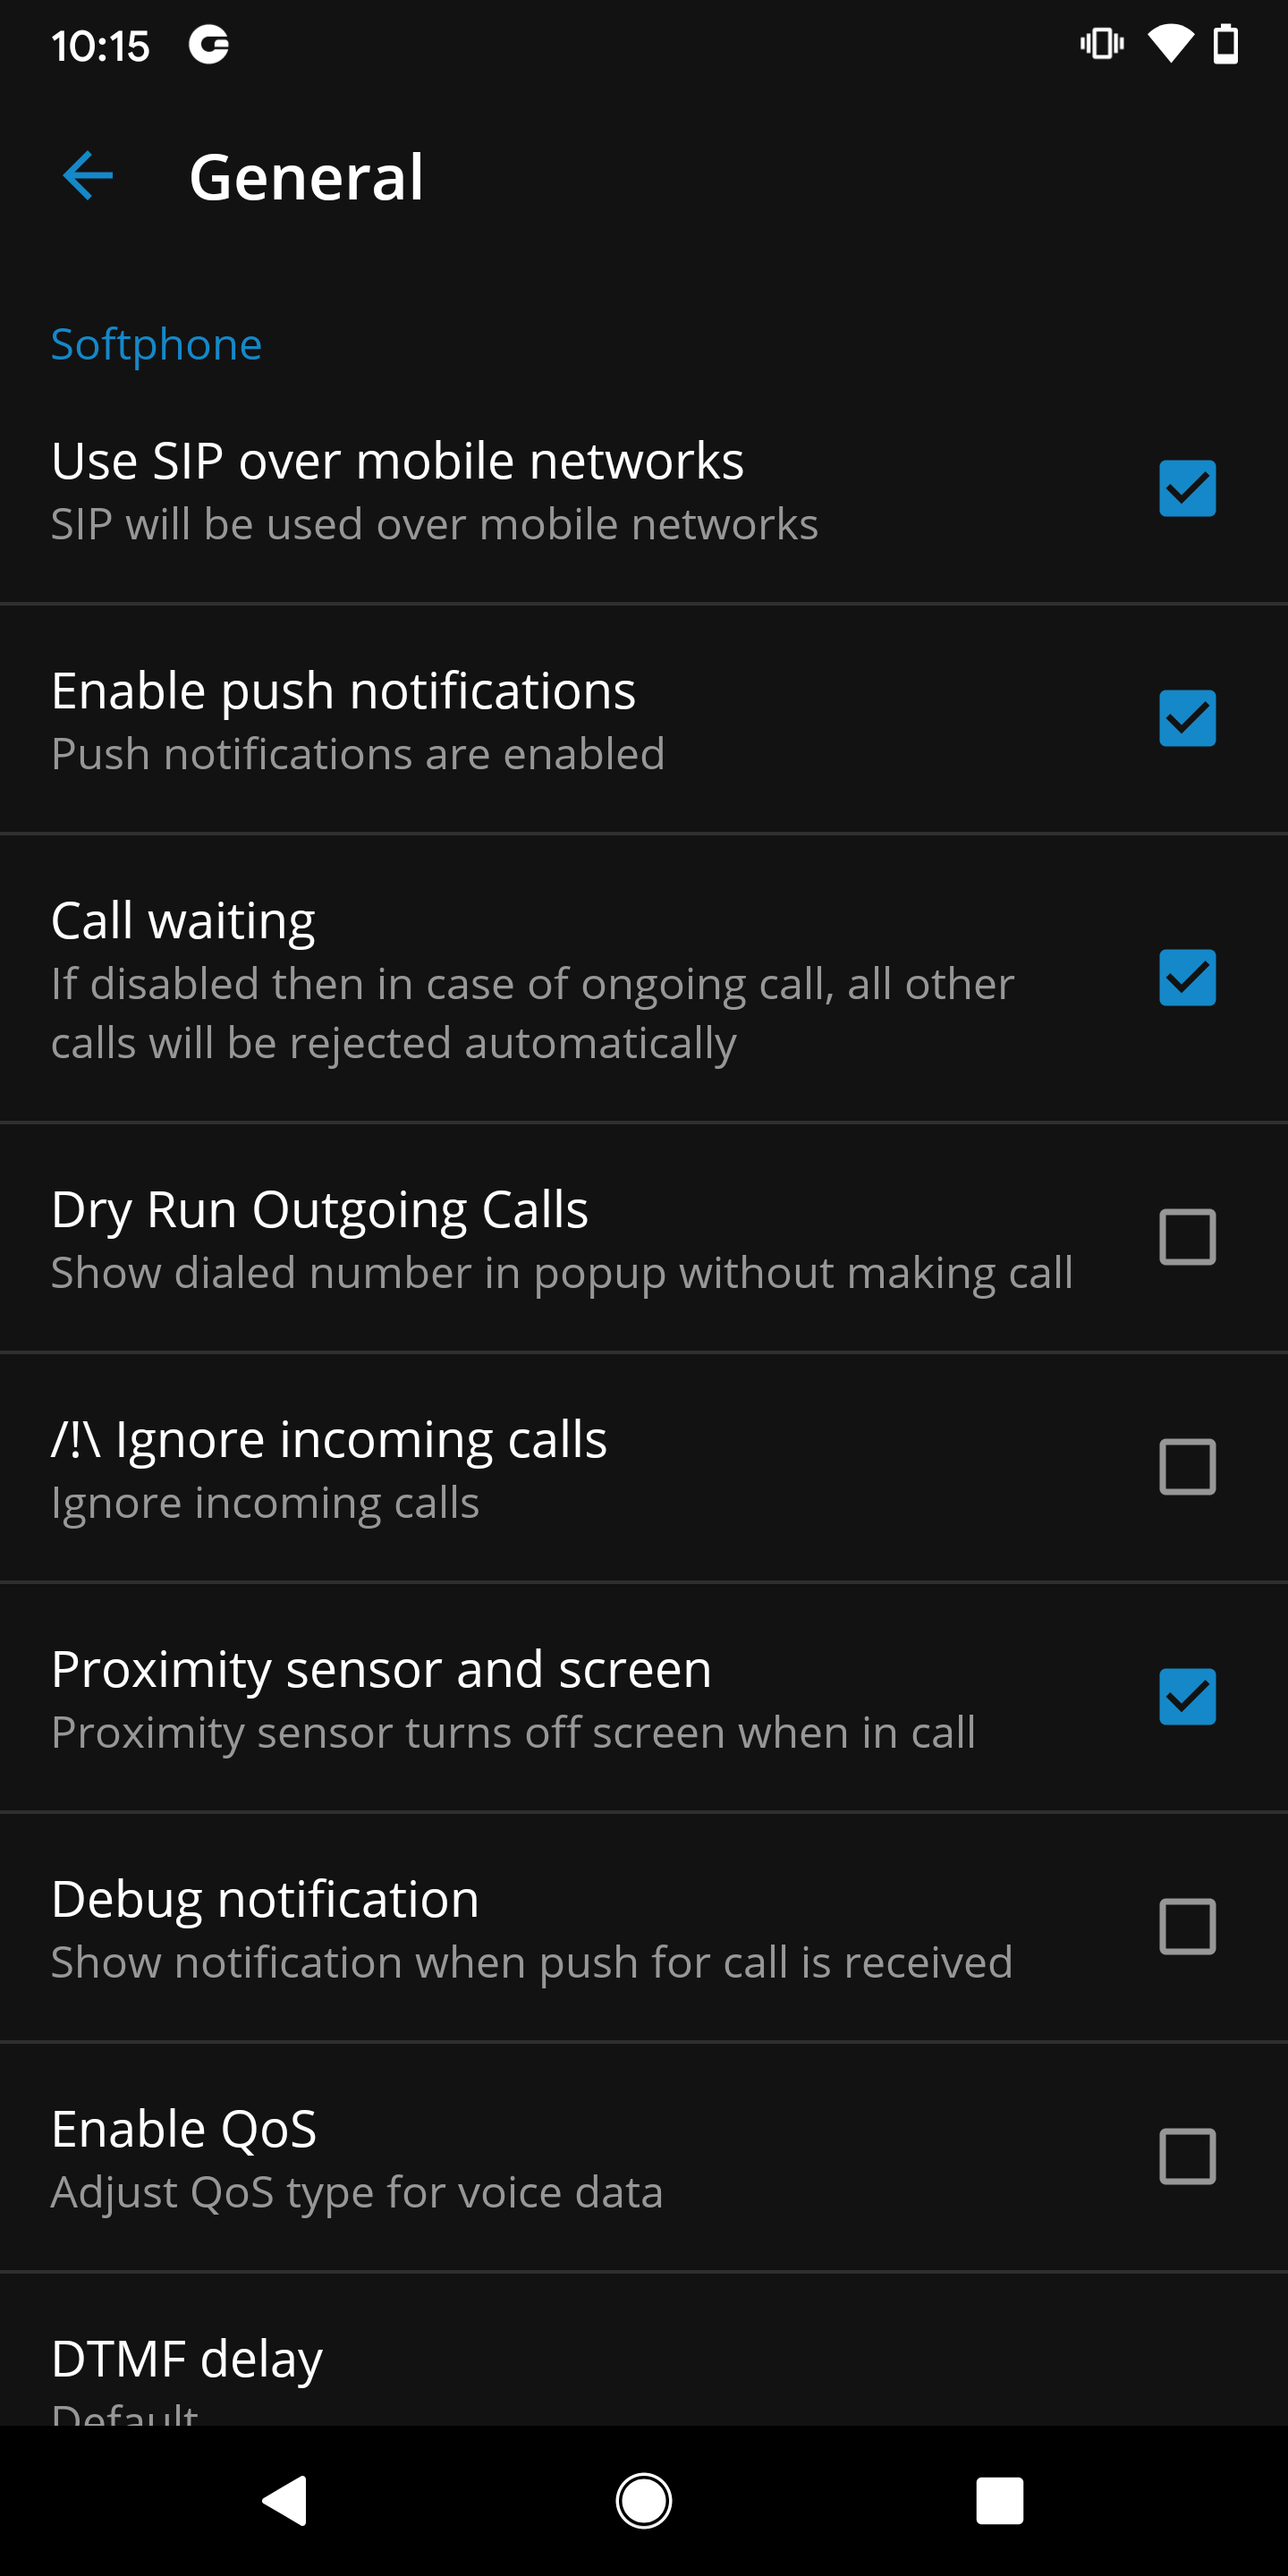
Settings
General - option shows a screen with general settings for gloCOM GO 6.
Phone - shows a screen where it is possible to change phone and dialer options.
Meetings - shows a screen where it is possible to change meeting integration options.
Security - offers users to enable Biometrics security for gloCOM GO 6.
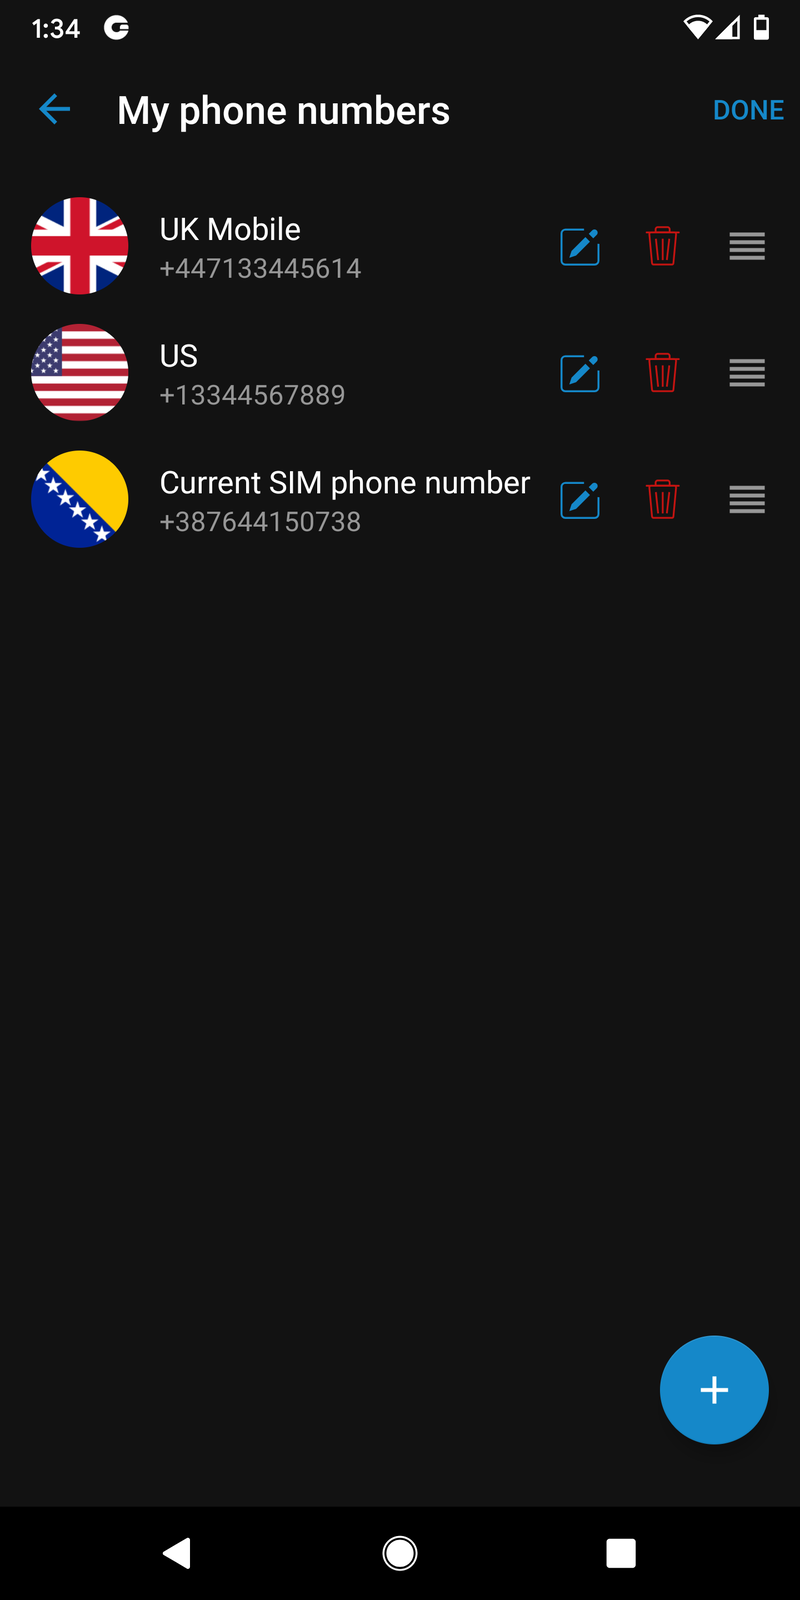
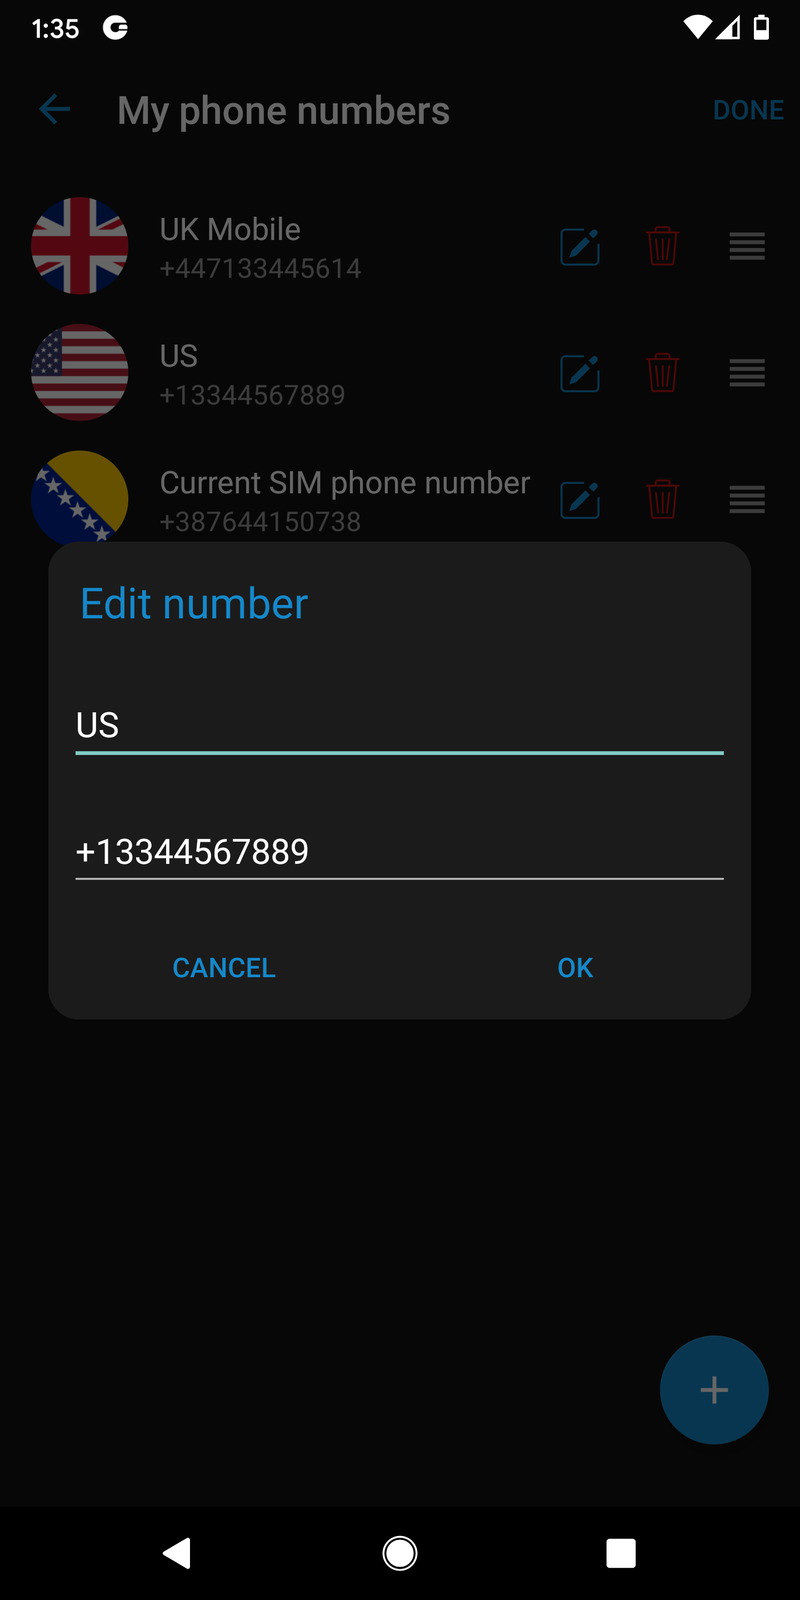
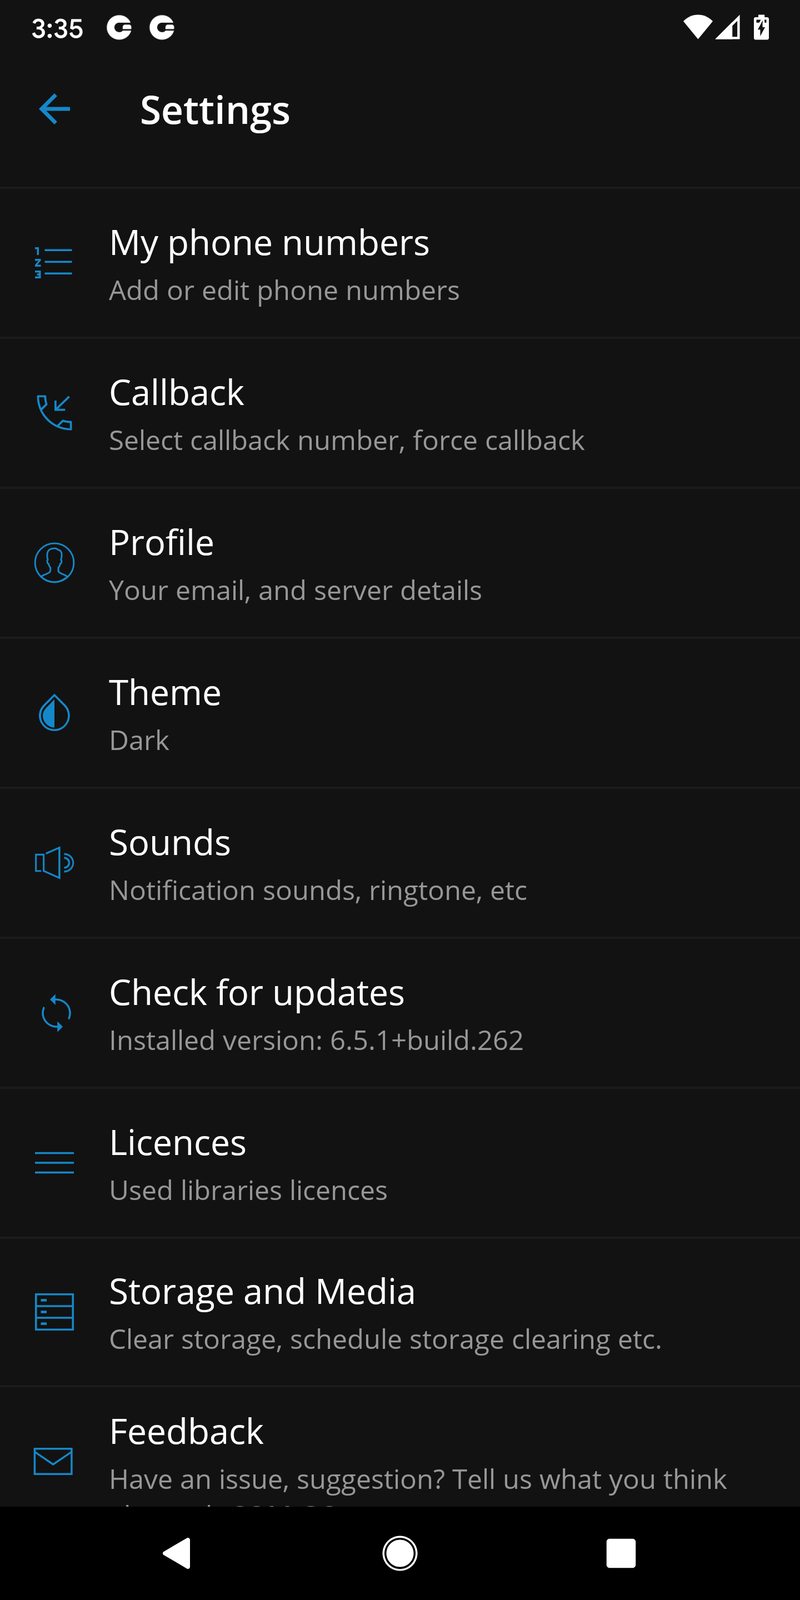
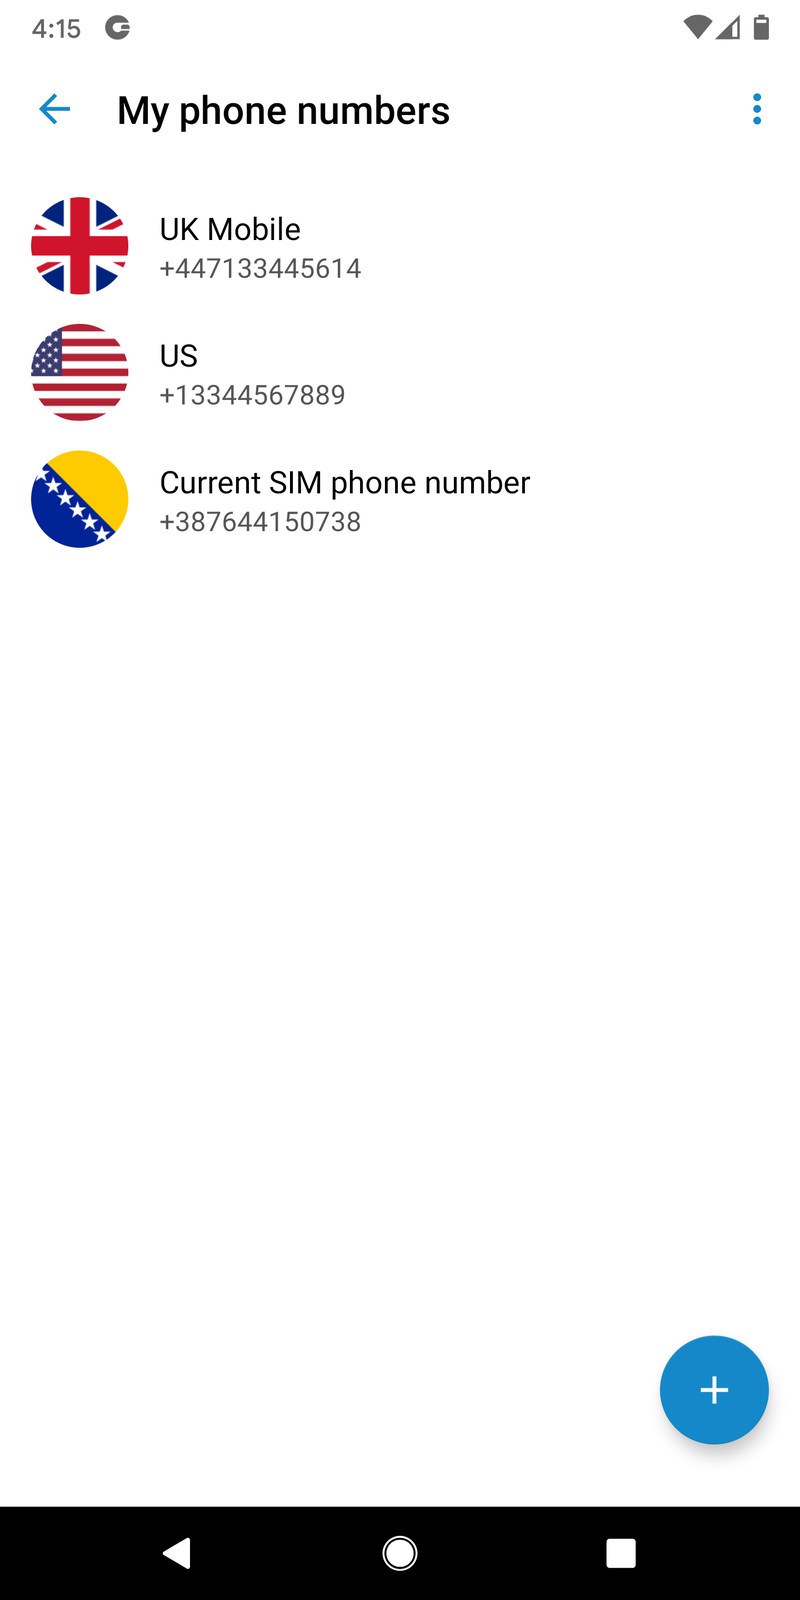
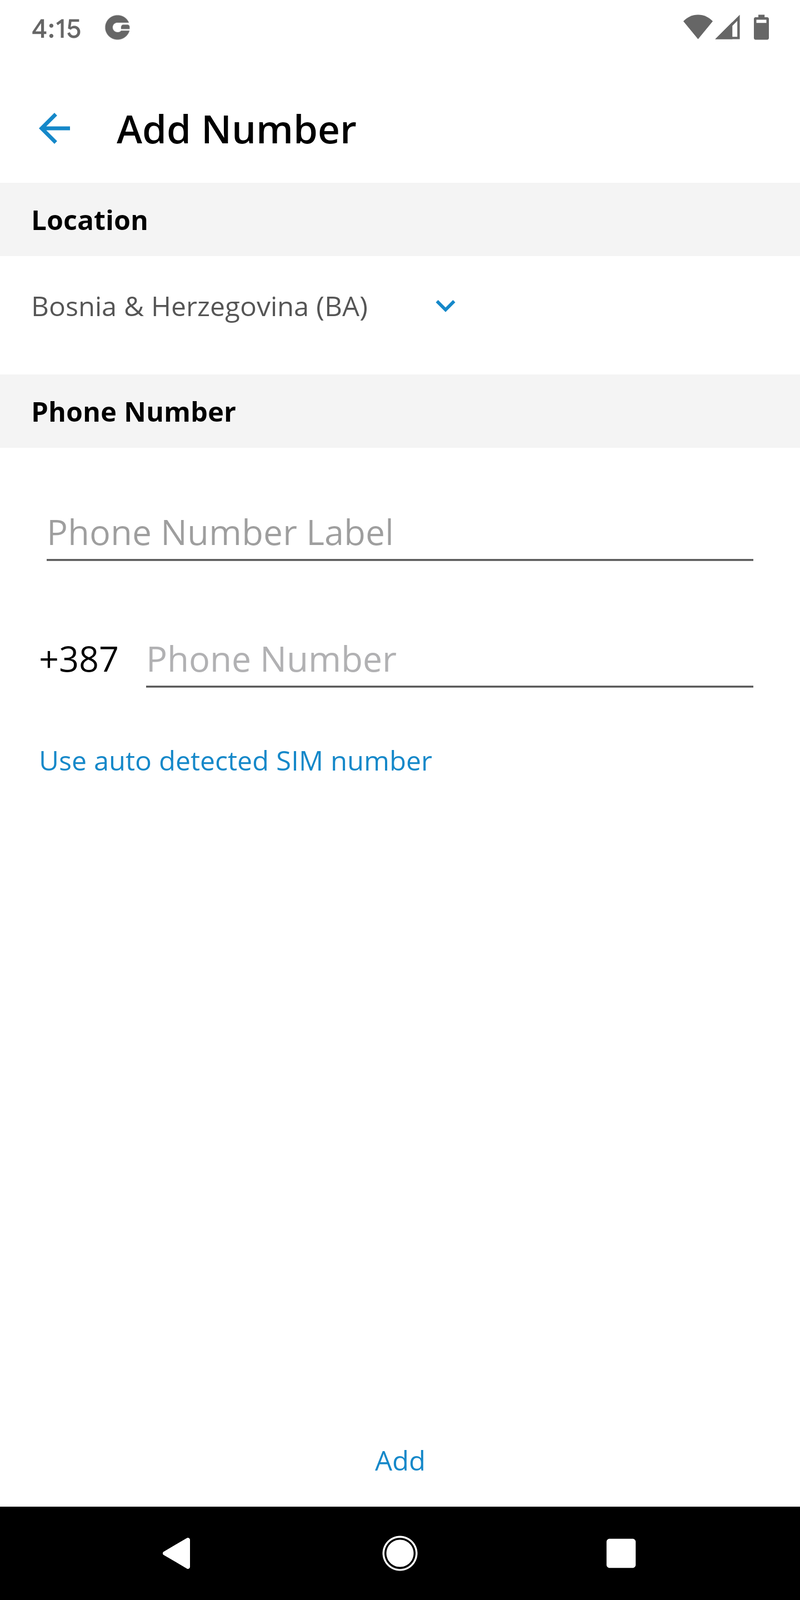
My phone numbers - shows a screen with settings for Country, SIM number, add, edit or delete a phone number, and phone numbers associated with the user’s account.
Callback - screen with settings for a Callback feature.
Profile - shows details about the user’s account (e.g., Department, E-mail, avatar).
Theme - screen with settings for the gloCOM GO 6 theme (dark, light or system default).
Sounds - offers an option to select a ring tone for incoming calls and to Enable/Disable dialpad sounds.
Licenses - shows a screen with a list of the gloCOM GO 6 libraries.
Storage and Media - a storage option in which users can clear all the media files or schedule clearing the media files.
Send Feedback - launches integrated feedback submission form.
About - will display gloCOM GO 6 about page with version number and contact information.
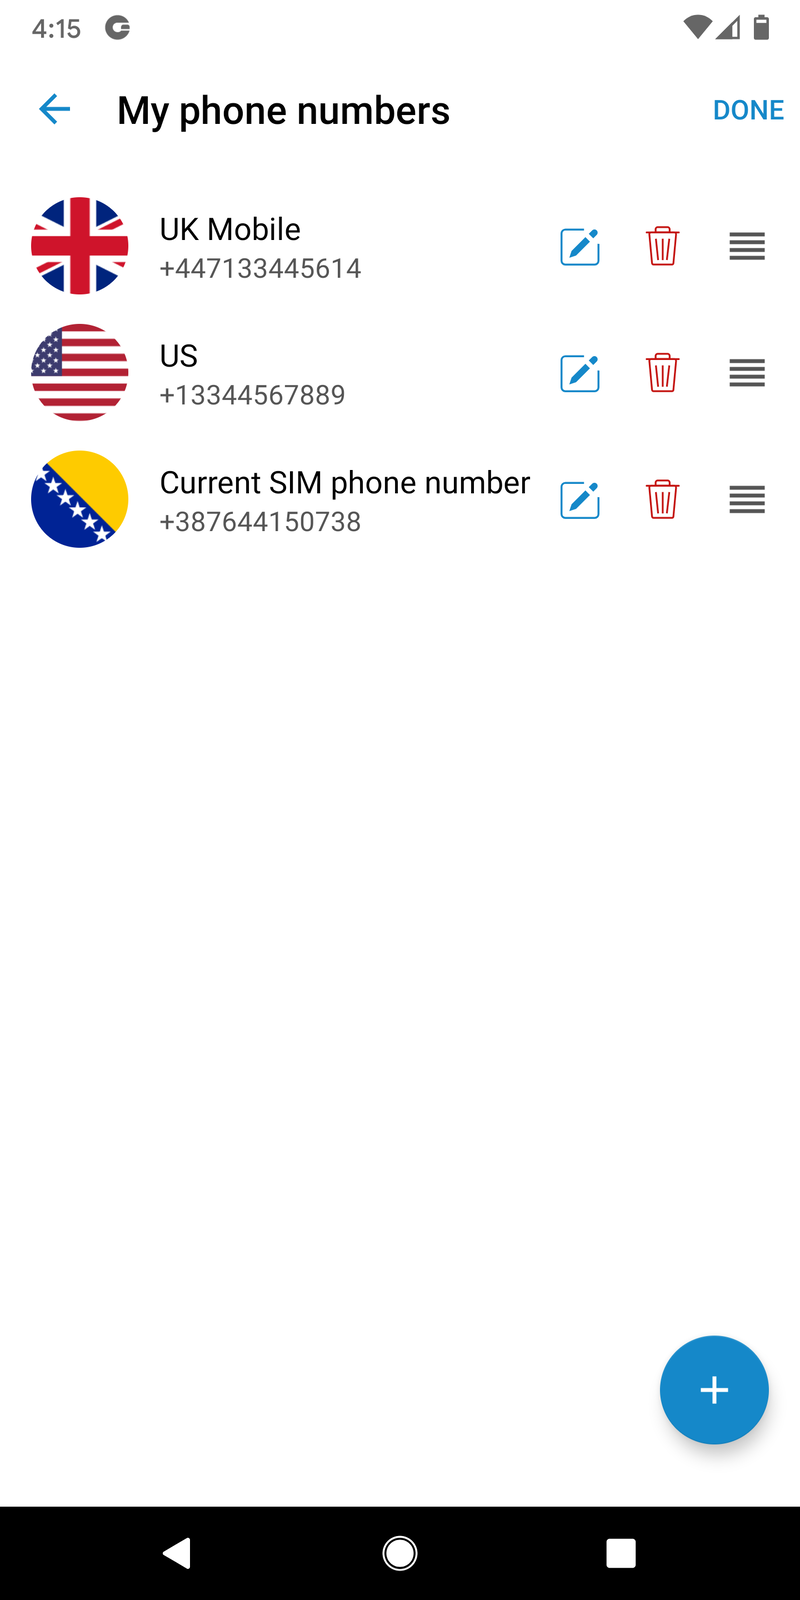
My phone numbers
This section contains numbers defined by the user’s account. Users can add more numbers by using the ADD NEW NUMBER button and sort them by priority using the drag option on the right side of the number and label. These numbers appear in a list of numbers associated with the user’s account when someone tries to call them from gloCOM GO 6 or gloCOM.
Feedback
Feedback can be submitted by pressing '''Settings''' and then '''Feedback''' which will allow users to send feedback from the gloCOM GO 6.
Feedback text needs to be longer than ten characters for the '''Send''' button to be enabled. Users will be notified about successful or failed feedback submissions.
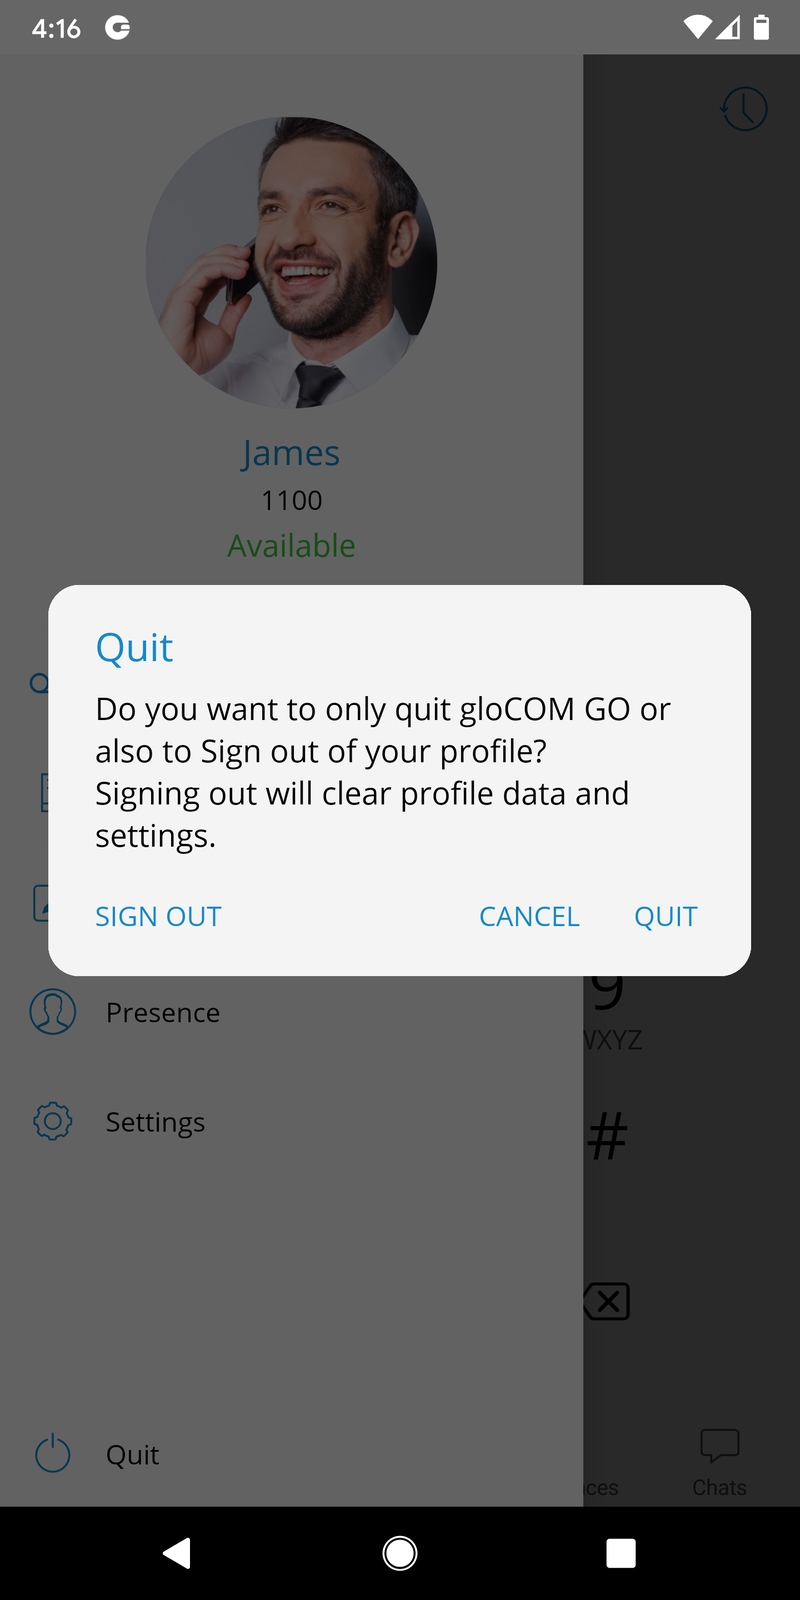
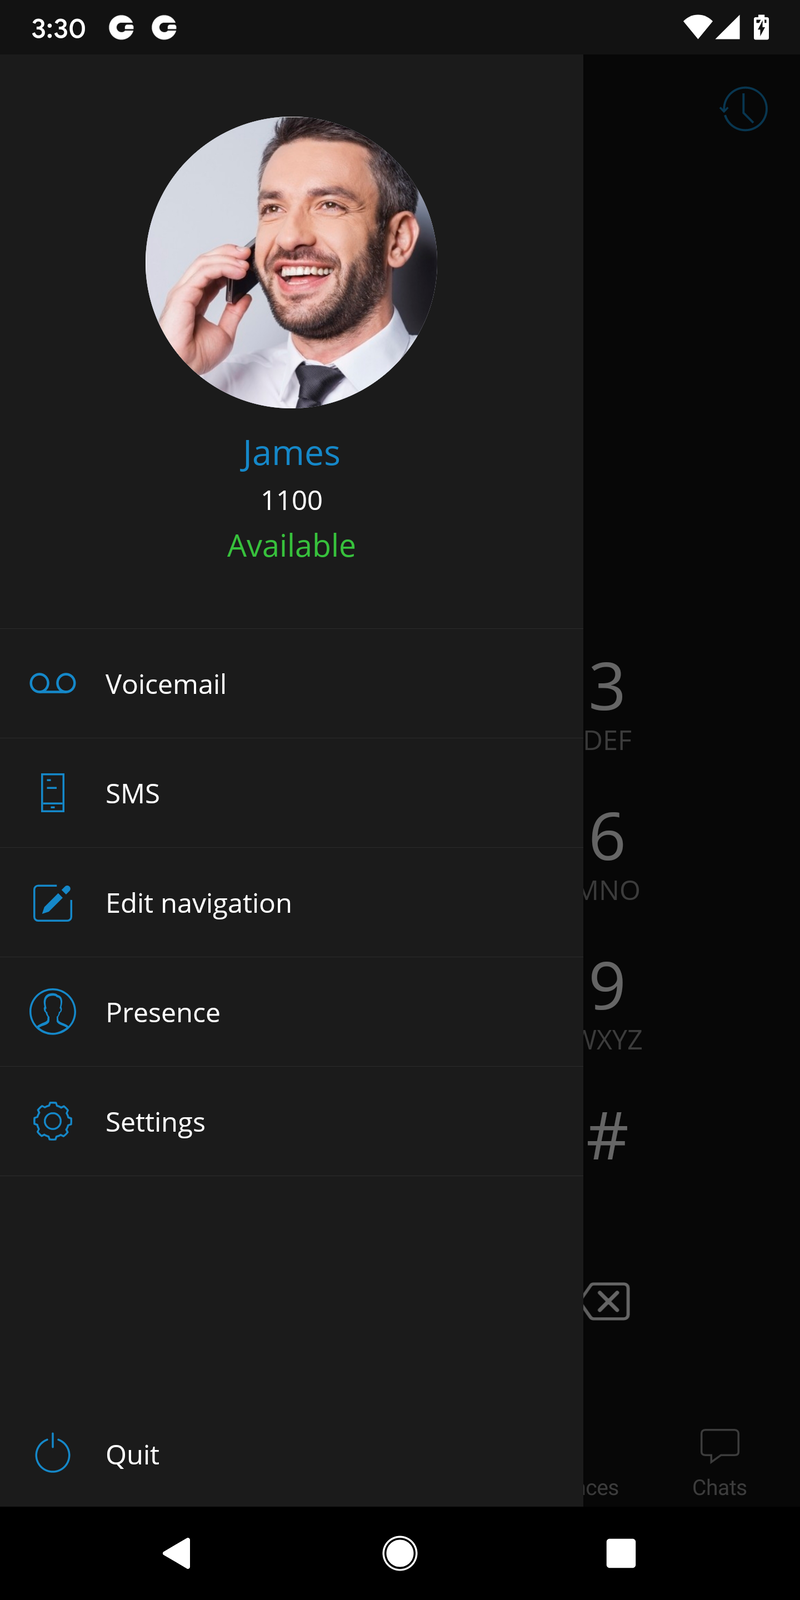
Signing out and Quitting gloCOM GO 6
There are two ways to quit gloCOM GO 6 when users press Quit from the main drawer menu.
Sign Out will clear profile data, and users will be asked to provide a password next time they start gloCOM GO 6.
Users also can use to Quit the application. This exits gloCOM GO 6 leaving all profile data and settings untouched. Next time when users start gloCOM GO 6, they will not be asked for a password. Quit will also disable push notifications, and they will be automatically enabled next time the users enter the gloCOM GO 6.